How to Change Your IP Address: Simple Steps for All Devices

Every device that connects to the internet gets an IP address, a unique set of numbers that acts like an online mailing address. This tiny detail shapes so much of your online experience, from what content you can access to how private your browsing really is.
Sometimes, changing this digital “address” is the quickest way to regain privacy, access restricted websites, or solve persistent network issues.
Methods to Change Your IP Address
Switching your IP address can open doors to better privacy, new content, or a fresh start for your network problems. Several reliable techniques exist, and each has its own strengths and weaknesses.
A basic grasp of how these tools work makes it easier to pick the right approach for your specific goal, whether you’re seeking enhanced security, better access, or simple troubleshooting.
Using a VPN
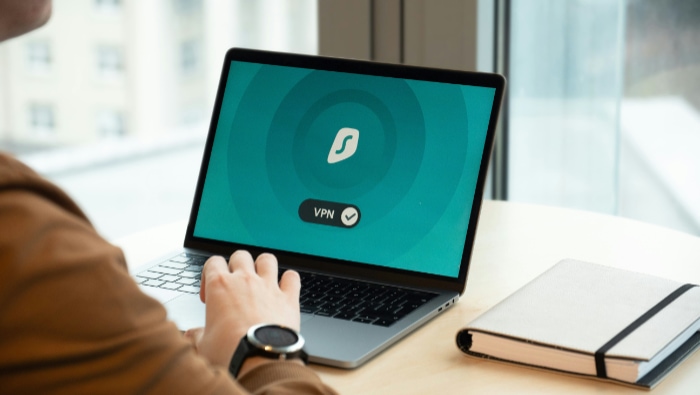
A Virtual Private Network, or VPN, is one of the most popular methods for changing your IP address. VPNs direct your internet traffic through secure remote servers and assign you an IP that matches the VPN server’s location.
As a result, websites and online services see the VPN’s address instead of your real one. This provides a layer of privacy and helps bypass regional restrictions.
Choosing a trustworthy VPN matters. Look for services that offer strong encryption, a clear privacy policy, and a reputation for not logging user activity.
Paid VPNs generally offer better security and faster speeds than free options.
Employing Proxy Servers
Proxy servers serve as intermediaries between your device and the rest of the internet. When you connect through a proxy, your outward-facing IP address matches the proxy server rather than your device.
Proxies can be a quick option for changing your IP address, especially if you only need to mask it for certain websites or activities.
While proxies can change your visible IP, they rarely offer the same level of privacy or encryption as VPNs. Some proxies are configured within your browser, making them useful for web browsing but less comprehensive for all internet activity on your device.
The main difference lies in security: VPNs encrypt all network traffic, while most proxies do not. Proxies work best for lightweight tasks that don’t involve sensitive information.
Router Restart and Device Settings
Home routers generally assign dynamic public IP addresses provided by your internet service provider. Restarting or unplugging your router can sometimes result in a new public IP address, depending on your ISP’s system.
If your need is simply to refresh your address or resolve connectivity issues, this straightforward technique can be surprisingly effective.
For deeper control, you can adjust your device’s network settings. Assigning a static local IP on your computer or smartphone lets you manage how your device interacts with your home network but doesn’t affect your public address.
Changing the router’s external IP usually requires either a restart at the right time or contacting your service provider for assistance. Each of these adjustments comes with its own limitations, so it’s important to know what your situation calls for.
Changing Networks
Switching from one internet network to another causes your public IP address to change automatically. Moving between different Wi-Fi networks, connecting to mobile data, or visiting a public hotspot all assign a new IP.
This method is simple and requires no extra tools or settings.
Changing networks suits those who want an immediate change for privacy, troubleshooting, or testing. The process is as easy as disconnecting from one network and picking another, making it accessible for nearly everyone, regardless of technical background.
Keep in mind that each network gives out its own range of IPs, so the scope of change depends on your available connections.
Step-by-Step Guides for Various Devices

Changing an IP address often depends on the device being used. Each system provides unique settings and permissions, making the process slightly different for Windows computers, MacOS devices, smartphones, tablets, and home routers.
With clear steps tailored to each platform, you can update your IP easily and efficiently, whether you aim to use a VPN, adjust manual settings, or switch networks.
Windows Computers
Changing your IP address on Windows computers can be done in a few straightforward ways. Here are the main approaches:
To change your local IP manually:
- Open the Network and Sharing Center from the Control Panel.
- Select your current network connection and click on Properties.
- Double-click on Internet Protocol Version 4 (TCP/IPv4).
- Choose Use the following IP address and enter your desired local IP address.
- Click OK to save your changes.
Note: Changing the local IP in this manner only affects your device’s address within your local network, not your public (internet-facing) IP.
To change your public IP using a VPN:
- Download and install software from a reputable VPN provider.
- Open the VPN application and sign in.
- Select a server location from the VPN’s list.
- Click Connect. Your internet traffic will now be routed through the VPN, which updates your public IP across online services and websites.
To set up a Proxy in Windows:
- Go to Settings and select Network & Internet.
- Choose Proxy from the sidebar.
- Enter the details provided by your proxy service (address and port).
- Save the settings and start browsing through the proxy for supported applications and browsers.
Each method provides different levels of privacy and control, so choose the one that best fits your needs.
MacOS Devices
Managing IP addresses and configuring privacy tools on a Mac is straightforward. Here are step-by-step instructions for the most common methods:
To manually assign a local IP address:
- Open System Settings and select Network.
- Choose your current network connection (for example, Wi-Fi or Ethernet).
- Click Details beside your active connection.
- Select the option to manually configure IP settings.
- Enter your new local IP address, then save the changes.
Tip: You can also choose to obtain an IP address automatically in the same menu if you want the system to handle it.
To set up a proxy server:
- In System Settings, go to Network and select your connection.
- Click Details and navigate to the Proxies tab.
- Check the proxy protocol you wish to use (such as HTTP or SOCKS).
- Enter the proxy server information as provided by your service.
- Click OK and then Apply to save your proxy settings.
To use a VPN on macOS:
- Download and install the VPN app of your choice from a reputable provider.
- Open the VPN app, sign in, and select a server location.
- Click Connect. Your public IP will be replaced by the VPN server’s IP, helping you maintain privacy and access region-restricted content.
Advanced users can manually add VPN settings in System Settings under Network by clicking the plus (+) icon to create a new VPN connection and entering configuration details from the VPN provider.
Each of these options offers control over your Mac’s network identity, so you can tailor your settings to fit your privacy and connectivity needs.
Smartphones & Tablets (Android/iOS)
Mobile devices make it easy to change your IP address using a variety of methods. Follow these steps based on your preferred approach:
To change your public IP by switching networks:
- Disconnect from your current Wi-Fi or mobile data network.
- Connect to a different Wi-Fi network or switch between mobile data and Wi-Fi.
- Your device will automatically receive a new public IP address assigned by the new network.
To manually configure a local IP address:
- Open your device’s Wi-Fi settings and select the network you are connected to.
- Tap on the network’s details or “Advanced” options.
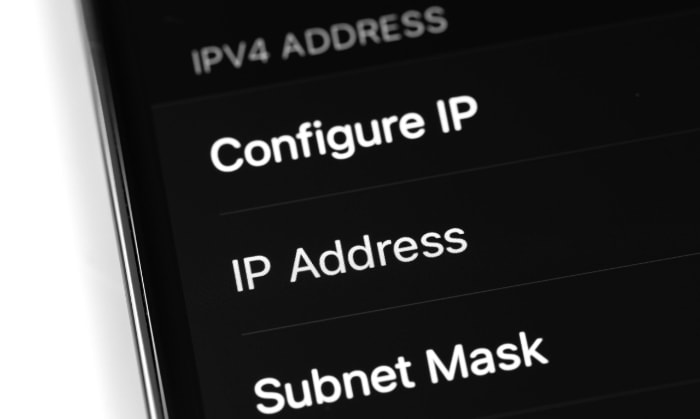
- Look for the “IP settings” or “Configure IP” section.
- Select Manual and enter your preferred local IP address.
- Save your changes.
Note: Manually changing the IP here only affects your local network address, not your public internet IP.
To use a VPN app for a new public IP:
- Go to the Google Play Store (Android) or App Store (iOS).
- Download a trusted VPN application.
- Open the app, sign in, and select a server location.
- Tap Connect. Your internet traffic will now be routed through the VPN server, giving you a new public IP address and enhanced privacy.
To set up a proxy (optional and app-dependent):
- In Wi-Fi settings, select your connected network.
- Tap on “Proxy” or “Advanced” settings.
- Enter the proxy server details supplied by your proxy provider.
- Save your settings. Now, web traffic from supported apps will be routed through the proxy.
Home Routers
Many home routers assign public IP addresses dynamically, and changing your router’s public IP is often surprisingly simple. Here are several methods you can use, depending on your needs and your familiarity with routers:
To refresh your public IP using a router restart:
- Power off your router by unplugging it from the outlet.
- Wait several minutes (five to ten is usually enough) to allow any assigned IP leases to expire.
- Plug your router back in and wait for it to fully restart.
- Your internet service provider may assign a new public IP address when the router reconnects.
Tip: This works best for ISPs that use dynamic IPs. Not all providers issue a new IP every time, but leaving the router unplugged longer increases your chances.
To access advanced router settings through the admin panel:
- Open a web browser on a device connected to your home network.
- Enter your router’s default gateway address in the address bar. Common defaults are 192.168.1.1 or 192.168.0.1.
- Log in using your router’s admin credentials. If you haven’t changed them, check the label on your router or documentation.
- Navigate to the section for “LAN” or “DHCP” settings.
To renew the IP lease or adjust DHCP settings:
- Find the option labeled “DHCP Lease” or “Renew WAN Lease” (the name may vary).
- Click to release and then renew the lease. This action prompts your router to request a new IP from your ISP.
- You can also change how local IPs are assigned to devices by editing the DHCP range, which helps avoid device conflicts on your network.
For advanced configuration (if supported by your router):
- Some routers include options to manually configure the connection type under the “Internet” or “WAN” settings.
- You may be able to request a new IP directly, switch between DHCP and static modes, or input custom DNS servers for more control.
Potential Challenges and Troubleshooting

Changing your IP address can feel straightforward at first, but several stumbling blocks sometimes disrupt the process. Without some preparation and basic troubleshooting tactics, it’s easy to run into obstacles related to the limits of your chosen method, device settings, unexpected connection issues, or security risks.
Navigating these challenges with patience can save time and frustration.
Temporary vs Permanent IP Changes
Most easy methods offer only temporary IP changes. Restarting your router, toggling your device’s Wi-Fi, or switching to a VPN or proxy typically results in a new IP for just a single session or period of time.
As soon as you disconnect, restart, or your internet provider resets your connection, your IP may revert or be reassigned. Permanent changes, such as requesting a static IP from your provider or configuring long-term VPN settings, usually require more technical steps, higher costs, or special permission.
Users should be prepared for their new IP to revert unless they use solutions specifically designed for lasting change.
Common Issues and Solutions
Changing your IP isn’t always seamless. Connection dropouts, loss of internet access, or conflicting network settings between devices can occur.
Sometimes, manually set IPs clash with others on the same network, resulting in errors or unstable connections. Double-checking that each device receives a unique local IP and ensuring VPN or proxy apps are properly configured helps solve most basic problems.
If issues persist, restarting both the device and router often forces a clean connection and refreshes network assignments, resolving most short-term hiccups.
Risks with Third-Party Services
Using an unreliable VPN or proxy can create more problems than it solves. Some services risk exposing your real IP through leaks, weak encryption, or logging practices that compromise privacy.
Free providers could inject ads, throttle speeds, or even distribute malware. Before trusting a third-party app or service, research their reputation, privacy policy, and technical protections.
Paid, well-reviewed options tend to offer stronger safeguards and fewer unpleasant surprises.
Dealing with Detection and Blocking
Many websites, streaming platforms, and online services actively detect and block known VPN and proxy IP addresses. If you find yourself unable to access certain sites or face regular CAPTCHA challenges, your IP may have landed on a blocklist.
Rotating to a new server location within your VPN, clearing cookies, or switching providers can sometimes restore access. However, some sites maintain aggressive defenses, so occasional blocks are hard to avoid entirely.
Remaining flexible and open to alternative solutions helps maintain uninterrupted access while using IP-changing tools.
Conclusion
Deciding to change your IP address is more than a technical exercise; it involves weighing your goals, the methods available, and the potential risks involved. Privacy, access, and network troubleshooting all offer valid reasons for making a switch, but each approach comes with its own set of benefits and limitations.
Picking the right technique depends on your specific needs, your comfort with different tools, and any legal boundaries in your area.
Prioritizing reputable services and following device-specific best practices help maintain your privacy and security while minimizing frustration. Always keep safety, ethical use, and local laws in mind when selecting a method for IP change.
Should you run into obstacles, a patient approach to troubleshooting will usually resolve most issues without putting your connection or personal information at risk. Staying informed, flexible, and responsible ensures that the process both protects your interests and respects the rules that govern internet use.


