How To Clean Printheads: Maximize Printer Life

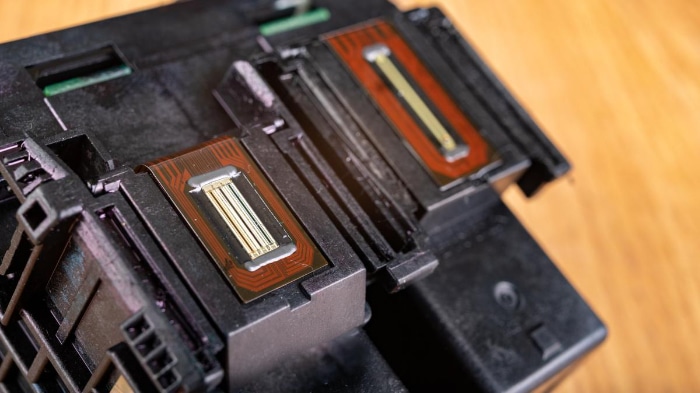
Maintaining the quality of your printer involves more than just keeping it free from dust and changing the ink cartridges. At the heart of your printer, especially inkjet models, is an essential component known as the print head.
This crucial part oversees the transfer of ink onto the paper, determining the clarity and precision of your prints. Over time, ink residues can build up, leading to streaks, faded outputs, and other print imperfections.
Therefore, periodic cleaning of the print head becomes paramount.
Recognizing Print Head Issues
Understanding the signs of print head issues can save you from frustrating print outputs and potential damage to your printer. The print head, responsible for transferring ink onto paper, can encounter various problems if not maintained.
Let's explore the key indicators of a troubled print head to ensure timely intervention.
Faded Prints
When the print quality starts to deteriorate, resulting in light or incomplete images, it might be an early sign that the print head nozzles are clogged. Ink, especially if left unused for long periods, can dry out and obstruct the free flow, causing the faded appearance.
Streaks or Lines on the Paper
Whether horizontal or vertical, streaks can be a glaring indicator of a dirty print head. Dust, debris, or accumulated ink can interfere with the proper function of the nozzles, leading to these unsightly imperfections on your document or image.
Incorrect Color Outputs
If your prints are not matching the expected color outcomes, the print head might be mixing colors inappropriately. Sometimes, cross-contamination of colors can happen, especially if the ink cartridges are leaking or the print head has been contaminated.
Missing Prints in Certain Areas
Blank spots or areas where the printer seems to have missed printing entirely can be particularly concerning. This suggests that some parts of the print head may be entirely clogged, preventing ink from reaching the paper in those sections.
Frequent Paper Jams
Though not directly a print quality issue, consistent paper jams can sometimes be attributed to problems with the print head. When it's not functioning properly, it can cause paper to feed unevenly or get stuck during the printing process.
By becoming familiar with these signs, you can ensure that your printer remains in optimal working condition. Addressing print head issues promptly can extend the life of your printer and guarantee consistently high-quality outputs.
Preliminary Steps Before Cleaning
Before diving into the cleaning process for your print head, it's crucial to prepare properly. These preliminary steps ensure both your safety and your printer's safety, ensuring the cleaning process goes smoothly and effectively.
Turn Off the Printer and Unplug It
Safety first. Before attempting any maintenance on your printer, always switch it off and disconnect it from the power source.
This protects you from any electrical mishaps and prevents any unexpected printer movements.
Gather Necessary Cleaning Supplies
Having the right tools on hand streamlines the cleaning process. Here's what you'll need:
- Soft cloth or lint-free wipes
- Distilled water or isopropyl alcohol (based on printer type and manufacturer's recommendations)
- Cotton swabs or soft brush
Protective Measures
It's always wise to protect yourself from ink stains or any other unexpected messes. Wearing gloves can help keep your hands clean and free from ink splatters.
Familiarize Yourself with the Printer Manual
While many printers share common features, each model can have its unique quirks. Before you begin the cleaning process, glance through your printer's manual to understand any specific instructions or warnings.
If you've misplaced the manual, most manufacturers offer digital versions online.
Preparation sets the foundation for a successful cleaning session. By following these preliminary steps, you can tackle print head cleaning confidently and ensure a prolonged life for your printer.
Automated Cleaning (If Available)
Modern printers, especially inkjet varieties, often come equipped with a built-in cleaning cycle. This convenient feature allows users to address minor clogs or print imperfections without resorting to manual cleaning methods.
Here's how to harness this feature for optimal results.
Understanding the Built-in Cleaning Cycle
The automated cleaning function uses the printer's own ink to flush out any blockages in the print head. While this method is effective for minor clogs, it's worth noting that it can consume a noticeable amount of ink. Therefore, it's best used judiciously.
Initiating the Cleaning Cycle
- Access the Printer Settings: Most printers will have a settings or maintenance option on their display panel. Navigate to this section to find the cleaning option.
- Select the Cleaning Option: Once inside the maintenance or settings menu, look for an option labeled ‘cleaning', ‘print head cleaning', or something similar. Select this option to begin the process.
- Choose the Intensity (If Applicable): Some printers offer different levels of cleaning, ranging from light to deep cleaning. If you've never run a cleaning cycle or if the clogs are severe, you might want to opt for a deeper clean. However, remember that more intensive cleaning might use more ink.
Monitor the Process
While the cleaning cycle is relatively hands-off, it's essential to remain nearby. Listen for any unusual sounds, and check the printer display for any alerts or messages.
If the printer prompts any further actions, follow the on-screen instructions.
Run a Test Print
After the cleaning cycle has finished, it's a good practice to run a test print. This will help you gauge the effectiveness of the cleaning and determine if further action is needed.
If imperfections persist, consider running another cycle or moving on to manual cleaning methods.
By making the most of the automated cleaning function, users can ensure their printers continue to produce high-quality prints while minimizing hands-on maintenance time.
Manual Cleaning Process

While automated cleaning cycles offer convenience, sometimes the situation calls for a hands-on approach. Manual cleaning gives you direct control, ensuring you address every nook and cranny of the print head.
Let's walk through the manual cleaning process to restore your printer to its former glory.
Preparing the Work Area
Before you start, set up a clean, well-lit workspace. This helps in easily identifying any clogs or dirt and ensures you have all the tools within arm's reach.
Lay down newspapers or disposable sheets to catch any drips and protect your surface.
External Cleaning
- Wipe Down the Outer Parts: Using a soft cloth lightly dampened with distilled water or isopropyl alcohol, gently clean the exterior of the print head and its surrounding areas. This removes any dust or loose ink particles.
- No Forceful Rubbing: Ensure you are gentle during this process. Aggressive cleaning can damage the print head or push contaminants further into the nozzles.
Internal Cleaning
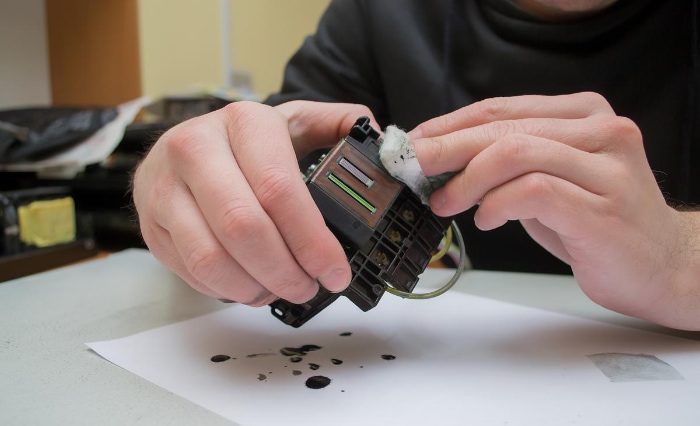
- Removal of the Print Head: Begin by carefully taking out the print head, keeping in mind that not all printers have removable heads. If you're unsure, consult your printer's manual or look online for model-specific guidance.
- Nozzle Cleaning: Dampen a cotton swab with distilled water or isopropyl alcohol. Gently clean the nozzle area, where the ink exits the print head. Use a light touch to avoid causing any damage.
- Drying Time: Once cleaned, let the print head dry completely. This can be naturally air-dried or sped up by using a soft, lint-free cloth.
Reassembly
After ensuring the print head is dry, carefully reinstall it into the printer. Ensure it's securely in place to avoid any misalignments or print errors.
Final Check
Once reassembled, it's wise to run a few test prints. This helps in confirming the print head is clean and the printer is functioning correctly.
You might need to repeat the manual cleaning or consult a professional if there are still issues.
Manual cleaning may seem intimidating, but with careful steps and patience, it can be a highly effective way to maintain your printer's performance.
Re-testing and Verification
After dedicating time and effort to clean the print head, the next logical step is to ensure that the cleaning was effective. Re-testing and verification serve as a quality check, confirming that the printer is back to its optimal performance and that any previously observed issues are resolved.
The Importance of Re-testing
Ensuring that the cleaning process has indeed rectified the problem is paramount. This not only provides peace of mind but can also prevent further issues or damages from being overlooked.
It's a way to confirm that your efforts have borne fruit.
Running a Test Print
- Choose a Test Page: Opt for a colorful, detailed print that will challenge all aspects of your printer's capabilities. This could be a previously problematic page or a designated printer test page available in the printer settings.
- Look for Improvements: Compare this test print with previous problematic prints. The difference should be evident, showcasing clearer, streak-free images and accurate colors.
Printer Diagnostics
Most modern printers come with a diagnostic tool. This tool checks the internal health of the printer and can give insights into any persistent problems.
- Access the Diagnostic Tool: Often found within the printer settings or utilities, this tool can run a comprehensive check on your printer's health.
- Review the Results: After the diagnostic test, you'll receive a report or feedback on the printer's condition. This will highlight if any issues remain or if all systems are functioning well.
Addressing Persisting Issues
If, after re-testing, there are still observable issues, it might be an indication of a more significant problem.
- Consult the Manual: Revisit your printer's manual. Sometimes, manufacturers provide troubleshooting guides for common problems.
- Seek Professional Help: If issues persist, it might be time to consult a technician or reach out to the manufacturer's customer support. They can offer expert advice or repair services.
Re-testing and verification are essential steps in the maintenance process. They ensure that your printer delivers the best possible results, and you get the most out of your device.
Conclusion
Maintaining a printer's performance requires periodic attention, especially to its print head. Through both automated and manual cleaning methods, users can ensure optimal print quality and prolong the lifespan of their device.
Furthermore, by recognizing signs of print head issues early on and acting promptly, one can avoid more significant complications down the line. Every step, from preliminary preparations to re-testing and verification, plays a vital role in achieving the best out of your printer.
So, always prioritize your printer's health, and it will consistently reward you with high-quality outputs.


