How to Connect Antenna to Your Samsung TV: DIY Tips

Diving into the process of connecting an antenna to your Samsung TV is a smart move towards diversifying your entertainment options. This guide is your roadmap to accessing a wide range of free-to-air channels, enhancing your viewing experience without the need for expensive subscriptions.
With straightforward, step-by-step instructions, you’ll discover how simple it is to set up your antenna, configure your TV settings, and enjoy a plethora of new channels.
Exploring Your Samsung TV Model
Before diving into the process of connecting an antenna to your Samsung TV, it’s crucial to have a clear understanding of your specific TV model. Samsung TVs come in a variety of models, each with its unique features and specifications.
Recognizing your TV model will ensure you follow the correct steps and use the appropriate accessories for a successful antenna connection.
Identifying Your Samsung TV Model
To correctly identify your Samsung TV model, start by locating the model number. This can typically be found on the back of your TV or in the TV’s menu system.
Once you have the model number, you can easily look up the specific details and capabilities of your TV. Knowing your model is particularly important as it determines the type of antenna input your TV supports and whether any additional equipment is needed.
Understanding the Specifications Relevant to Antenna Connections
Different Samsung TV models have varying specifications that influence how they connect to an antenna. Key specifications to consider include:
- Antenna Input Type: Most modern Samsung TVs have a coaxial RF input for antenna connections, but the type and location can vary.
- Built-in Tuner Type: Verify if your TV has a built-in digital tuner, which is necessary for decoding digital signals received from the antenna.
- Supported Broadcast Standards: Ensure your TV supports the broadcast standards used in your region, such as ATSC in North America or DVB in Europe.
- Software Features: Some Samsung TVs offer advanced software features that can enhance the antenna viewing experience, such as automatic channel scanning and signal strength indicators.
Choosing the Right Antenna
Selecting the appropriate antenna is a critical step in enhancing your TV viewing experience. The choice of antenna can significantly affect the number and quality of channels you receive.
Factors such as your geographical location, the distance from broadcast towers, and the presence of obstructions like tall buildings or trees play a vital role in this decision.
Different Types of Antennas
There are primarily two types of antennas used for home television setups: indoor and outdoor antennas. Each type has its own advantages and is suitable for different situations.
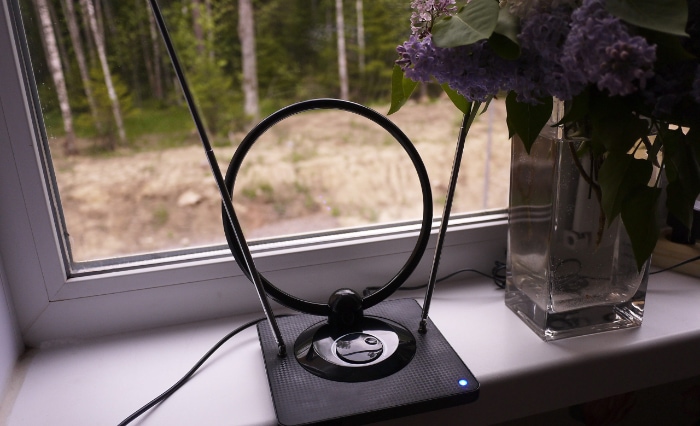
- Indoor Antennas: These are compact, easy to install, and ideal for urban areas where broadcast towers are relatively close. They are less expensive and can be placed near the TV. However, their range and signal quality can be limited compared to outdoor antennas.
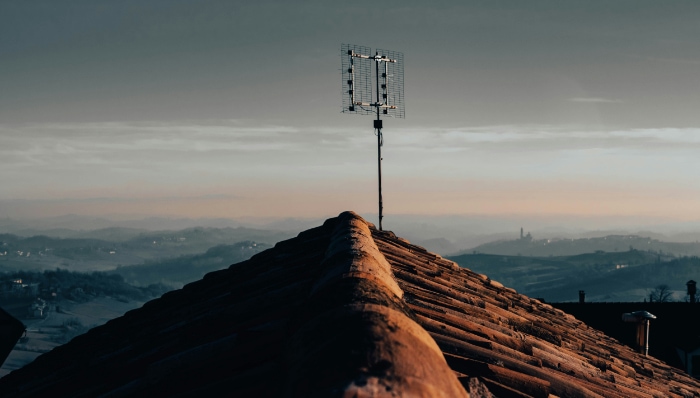
- Outdoor Antennas: These are installed on the roof or high outside the house and are known for providing better reception and a wider range of channels. They are more suitable for rural areas or locations far from broadcast towers. Although they require a more complex installation, their performance in receiving signals is generally superior.
Factors to Consider When Choosing an Antenna
When selecting an antenna, consider the following key factors:
- Location: Assess your proximity to the nearest broadcast towers. Websites like the FCC’s DTV Reception Maps can provide this information based on your address.
- Signal Strength: The strength of the broadcast signal in your area will dictate the range and type of antenna you need.
- Directional vs. Omnidirectional Antennas: Directional antennas are designed to receive signals from a specific direction and are ideal if broadcast towers are generally in one direction from your location. Omnidirectional antennas can receive signals from all directions, making them suitable for areas with multiple broadcast towers in different locations.
- Physical Barriers: Consider the physical barriers around your home, such as tall buildings, hills, or trees, that could obstruct the signal.
Step-by-Step Guide to Connecting an Antenna to Your Samsung TV

Connecting an antenna to your Samsung TV is a practical and straightforward process. This section will guide you through the essential steps, ensuring a hassle-free setup.
From locating the antenna input to properly securing your antenna, these steps are pivotal for achieving the best possible signal reception.
Locating the Antenna Input on Your Samsung TV
The first step in connecting your antenna is to locate the antenna input on your Samsung TV. This input is typically found on the back of the TV and is marked as ‘ANT IN’, ‘RF IN’, or similar.
It’s designed to accommodate the coaxial cable from your antenna. If you’re uncertain about the location, the user manual for your specific Samsung TV model will provide detailed guidance.
Connecting the Antenna Cable to the TV
After locating the antenna input, follow these steps to connect the antenna cable:
- Take the coaxial cable that comes from your antenna.
- Align the cable’s pin with the center of the antenna input on your TV.
- Gently insert the cable into the input and screw it on to secure the connection. This ensures a stable and consistent signal.
Securing the Antenna for Optimal Signal Reception
The final step involves positioning and securing the antenna to maximize signal reception:
- For Indoor Antennas: Place the antenna near a window or high on a wall. Experiment with different placements to see where you get the best reception.
- For Outdoor Antennas: Mount the antenna as high as possible, typically on the roof, and direct it towards the nearest broadcast tower. You might need to adjust the direction for optimal reception. Ensure it’s securely fastened to withstand weather conditions.
Configuring Your Samsung TV Settings
After successfully connecting your antenna to the Samsung TV, the next crucial step is configuring the TV settings. This process involves accessing the TV menu, navigating to the appropriate settings, and conducting a channel scan.
Proper configuration is essential to ensure your TV recognizes the antenna and scans for all available channels.
Accessing the Menu on Your Samsung TV
To begin configuring your Samsung TV, you need to access the main menu. This is done using your Samsung remote control.
Depending on your TV model, this may be achieved by pressing the ‘Menu’, ‘Home’, or ‘Settings’ button. Once you have accessed the menu, you will find various options to manage your TV’s settings, including those for channel setup and broadcasting.
Navigating to the Channel Setup Options
Within the menu, navigate to the channel setup options. This is typically found under the ‘Broadcasting’ or ‘Channel’ section of the menu.
Here, you will find all the settings related to TV broadcasting and channel configurations. It’s in this section where you can specify the source of the broadcast (in this case, the antenna) and adjust other relevant settings.
Scanning for Channels and Saving Them
The final step in the configuration process is scanning for channels. Look for an option labeled ‘Auto Program’, ‘Channel Scan’, ‘Auto Tuning’, or something similar.
Selecting this option will prompt your TV to scan for all channels that can be received by the connected antenna. This process may take a few minutes. Once the scan is complete, your TV will automatically save the available channels, making them easily accessible for viewing.
Troubleshooting Common Antenna Connection Issues
Even with a proper setup, you may occasionally encounter issues with your antenna connection on your Samsung TV. Common problems range from poor signal quality to no signal at all.
Tips for Resolving Poor Signal Quality
Poor signal quality often manifests as a pixelated picture or intermittent sound. Here are some steps to improve your signal quality:
- Check the Antenna Connection: Ensure the coaxial cable is firmly connected to both the antenna and the TV. Loose connections can significantly degrade the signal.
- Reposition the Antenna: If you are using an indoor antenna, try moving it to a different location, preferably near a window or higher up. For outdoor antennas, slight adjustments in direction can make a big difference.
- Avoid Physical Obstructions: Keep the area around the antenna clear of physical obstructions, such as furniture, walls, or large electronic devices, which can block or interfere with the signal.
- Inspect the Antenna and Cable: Look for any damage to the antenna or the cable, as wear and tear can impact the signal quality.
Adjusting Antenna Placement and Direction
The placement and direction of your antenna are crucial for optimal reception. Follow these guidelines:
- Directional Alignment: Use a compass or an online tool to determine the direction of the nearest broadcast tower and align your antenna accordingly.
- Elevation Matters: Higher placement of the antenna usually results in better signal reception. If possible, mount the antenna on a higher point of your home.
- Trial and Error: Sometimes, finding the best spot for your antenna requires a bit of experimentation. Try different placements and orientations to see what works best.
When to Consider an Amplifier or Signal Booster
In some cases, especially in areas with weak signal strength, you might need an amplifier or a signal booster. Here’s when to consider one:
- Long Distance from Broadcast Towers: If you live far from the nearest broadcast tower, an amplifier can help boost the signal strength.
- Multiple TVs Connected to One Antenna: Using an amplifier can compensate for the signal loss due to splitting the signal across multiple TVs.
- High Obstruction Areas: If there are significant obstructions such as hills or tall buildings between your antenna and the broadcast tower, an amplifier might help.
Conclusion
With these guidelines, you are now equipped to seamlessly connect an antenna to your Samsung TV, configure the necessary settings, and troubleshoot common issues. From understanding your TV model to choosing the right antenna, each step is designed to enhance your viewing experience.
The process of setting up and optimizing your antenna connection might require some patience and experimentation, especially in finding the ideal antenna placement. However, the reward of accessing a wide range of channels without the need for a subscription makes it a worthwhile endeavor.
Remember, the quality of your reception largely depends on your specific circumstances, such as location and environment. Therefore, personalizing these steps to suit your unique situation is key.
Enjoy the expanded world of entertainment and information that free-to-air channels offer, all through the simple addition of an antenna to your Samsung TV.


