How to Fix “Ethernet Doesn't Have a Valid IP Configuration” on Windows

Sudden loss of a wired internet connection can disrupt both productivity and peace of mind. Spotting the “Ethernet Doesn't Have a Valid IP Configuration” message on your Windows computer signals a disconnect between your device and reliable network access.
This issue often appears out of the blue and can be linked to anything from a simple network misconfiguration to deeper software or hardware problems. Thankfully, with a few targeted steps, it’s possible not only to fix the immediate problem but also to strengthen your setup against similar interruptions in the future.
Understanding the Error
Seeing the “Ethernet Doesn't Have a Valid IP Configuration” message can be frustrating, especially when internet access grinds to a halt without warning. This error signals that your Windows computer cannot obtain a proper IP address from the network, disrupting communication with your router and blocking online access.
Multiple technical quirks or glitches can contribute to the problem. Gaining clarity about the most common causes can help you resolve the issue quickly and effectively, whether it appears occasionally or persists over time.
Core Causes
DHCP failures often sit at the top of the list when tracing this error. The DHCP (Dynamic Host Configuration Protocol) assigns IP addresses automatically to devices on your network.
If the router encounters lease conflicts or stops responding to requests, your computer might be left without a valid IP address, breaking the connection.
Driver issues are another frequent culprit. Network adapter drivers function as the bridge between Windows and your hardware.
Outdated or corrupted drivers can interfere with how the Ethernet adapter communicates, leading to failed attempts at establishing a reliable connection.
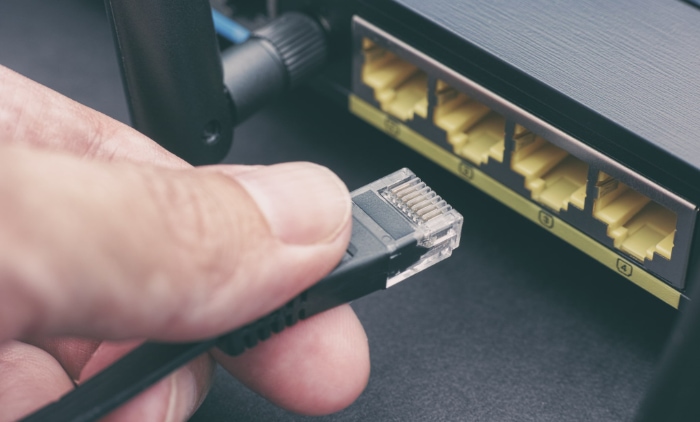
Problems can also stem from hardware faults. Physical components such as damaged Ethernet cables, malfunctioning network interface cards (NICs), or misconfigured routers can break the link between your device and the internet.
Something as simple as a loose cable or as complex as a failing adapter may be responsible for the disruption.
IP configuration errors sometimes arise when addresses are entered manually or when network settings are changed. Manual assignments that conflict with other devices, incorrect subnet masks, or mismatched gateways can prevent smooth communication with the rest of the network.
Such inconsistencies may stall or block internet access entirely.
TCP/IP stack corruption rounds out the most common sources of trouble. Windows depends on a collection of network protocols to handle data exchange over the web.
If system files related to the TCP/IP stack become corrupted, your computer may struggle to maintain or initiate a valid network connection. Addressing these technical hiccups usually involves resetting the affected protocols or reconfiguring network settings to restore access.
Immediate Troubleshooting Steps

A sudden drop in your Ethernet connection can be jarring, especially if you rely on a stable wired network for work or personal tasks. Fortunately, most connectivity issues spring from problems that can be fixed quickly with a few simple steps.
By working through these troubleshooting actions one by one, you can often restore your internet access without technical support.
Quick Fixes
1. Reboot Your Devices
- Unplug your router and modem from the power source.
- Wait 30 seconds, then plug them back in.
- Restart your Windows PC as well.
Rebooting clears minor glitches from network equipment and your computer, forcing a fresh connection attempt.
2. Reset the Ethernet Adapter
- Press Windows + R, type ncpa.cpl, then press Enter.
- In the Network Connections window, right-click your Ethernet adapter.
- Select Disable, wait a few seconds, then right-click and select Enable.
Resetting the Ethernet adapter can solve temporary hardware or driver hiccups.
3. Flush the DNS Cache
- Open Command Prompt as an administrator.
(Right-click Start > Windows Terminal (Admin) or Command Prompt (Admin)) - Type: ipconfig /flushdns
- Press Enter and wait for confirmation.
Flushing DNS clears out old or corrupted records that might interfere with your network connection.
Advanced Initial Checks
4. Release and Renew Your IP Address
- Open Command Prompt as an administrator.
- Type the following commands, pressing Enter after each:
ipconfig /release
ipconfig /renew - Releasing and renewing your IP address forces your PC to request a fresh address from the router, often resolving DHCP assignment problems.
5. Verify DHCP Status and Network Settings
- In Command Prompt, type: ipconfig /all
- Look for your Ethernet adapter details:
- Confirm DHCP Enabled says Yes.
- Check for a valid IPv4 Address (should not start with 169.254).
- Review the listed Default Gateway and DNS Servers.
If your PC has no IPv4 address or gets one starting with 169.254, it is not receiving information from the router. Double-check physical connections, and confirm that the router’s DHCP service is enabled through its administration page.
Step-by-step troubleshooting like this quickly pinpoints where the issue lies, making it easier to decide what to try next or provide clear details if you need to seek further assistance.
Advanced Solutions for Persistent Issues

If the standard troubleshooting steps haven’t restored your Ethernet connection, tackling a few advanced fixes can make a significant difference. Persistent “Ethernet Doesn't Have a Valid IP Configuration” errors often need deeper adjustments at the system or network configuration level.
The steps below outline practical, hands-on solutions. Follow them carefully and test your connection after each change.
System-Level Fixes
Reset the TCP/IP Stack and Winsock
- Open Command Prompt as an administrator.
(Right-click the Start button and select “Windows Terminal (Admin)” or “Command Prompt (Admin)”) - Enter this command and press Enter:
netsh int ip reset - Then, enter this command and press Enter:
netsh winsock reset - Restart your computer.
Resetting the TCP/IP stack and Winsock can clear out corruption and misconfigurations in Windows’ networking protocols.
Reinstall Network Drivers
- Press Windows + X and select Device Manager.
- Expand the Network adapters section.
- Right-click your Ethernet adapter and select Uninstall device.
- Confirm and restart your PC.
Windows will automatically reinstall the driver after reboot. If it doesn’t, you can select “Scan for hardware changes” at the top of Device Manager or manually install the latest driver from your hardware manufacturer’s website.
Network Configuration Adjustments
Assign a Static IP Address
- Press Windows + R, type ncpa.cpl, and press Enter.
- Right-click your Ethernet adapter and select Properties.
- Double-click Internet Protocol Version 4 (TCP/IPv4).
- Select “Use the following IP address,” then fill in:
- IP address: Choose an unused address in your local network’s range.
- Subnet mask: Usually 255.255.255.0.
- Default gateway: Enter your router’s IP address.
- Preferred DNS server: Try Google DNS (8.8.8.8) or your router’s address.
- Click OK and close all dialogs.
A static IP can help if DHCP isn’t properly assigning addresses.
Adjust Power Management Settings
- Go to Device Manager (Windows + X, then select Device Manager).
- Expand Network adapters and right-click your Ethernet adapter.
- Select Properties.
- Under the Power Management tab, uncheck “Allow the computer to turn off this device to save power.”
- Click OK.
This prevents Windows from disabling your network adapter during sleep or to save energy.
Temporarily Disable IPv6
- Open Network Connections (Windows + R, type ncpa.cpl, press Enter).
- Right-click your Ethernet adapter and select Properties.
- Uncheck “Internet Protocol Version 6 (TCP/IPv6).”
- Click OK.
Disabling IPv6 lets you focus troubleshooting on IPv4, often resolving certain compatibility issues with older networks or devices.
Each of these steps addresses deeper or often-overlooked causes of persistent IP configuration problems. Apply changes one at a time and check for restored connectivity before moving to the next solution.
Preventive Measures and Maintenance

Consistent network performance depends on a few simple habits and settings checks. Taking time for preventive maintenance can minimize surprises and keep your Ethernet connection running smoothly.
The steps below make it easy to improve reliability and reduce the chances of future network disruptions.
Driver Management
Enable Automatic Network Driver Updates
- Press Windows + I to open Settings.
- Click Update & Security, then select Windows Update.
- Click Advanced options.
- Turn on Receive updates for other Microsoft products and ensure automatic updates are enabled.
Automatic updates help your network adapter stay current with the latest improvements and bug fixes.
Check for MAC Address Conflicts
- Log in to your router’s admin panel. Usually, enter your router’s IP address into a web browser (commonly 192.168.1.1 or 192.168.0.1).
- Look for a section named Device List, Attached Devices, or LAN Status.
- Check all listed devices’ MAC addresses to ensure there are no duplicates.
If duplicate MAC addresses appear, resolve them by ensuring each device’s address is unique or reset the router if you are unsure which device is causing conflict.
System Optimization
Disable Fast Startup
- Open Control Panel.
- Select Power Options.
- Click Choose what the power buttons do from the sidebar.
- Click Change settings that are currently unavailable.
- In the Shutdown settings section, uncheck Turn on fast startup.
- Click Save changes.
Turning off Fast Startup prevents the network adapter from entering a hibernated state that can cause connection issues after a reboot or shutdown.
Update Router Firmware and Check DHCP Settings
- Access your router’s admin panel in a web browser.
- Find Firmware Update or Upgrade Router in the menu (may be under Administration or System Tools).
- Click Check for Updates and follow prompts to install if available.
- Next, locate the DHCP Settings section.
- Ensure DHCP Server is enabled and the address range is suitable for your devices (e.g., 192.168.1.2 to 192.168.1.100).
Up-to-date firmware and correct DHCP settings help your network run efficiently and avoid common IP assignment errors.
Adopting these preventive steps will significantly reduce the risk of future Ethernet connectivity issues and help maintain a smooth and stable network environment for all your devices.
Hardware and Network Diagnostics

A thorough diagnostics process covers both the physical hardware and the software configuration of your network connection. When basic fixes do not solve your Ethernet problem, performing structured checks makes it possible to find and correct deeper issues.
Follow these steps to methodically rule out hardware failures and catch hidden problems affecting your network adapter.
Physical Checks
Test and Replace Ethernet Cables
- Unplug your current Ethernet cable from both your PC and router or switch.
- Inspect the cable for any visible damage, kinks, or bent connectors.
- Substitute with a different, working Ethernet cable.
- Reconnect and check if your connection returns.
Test Network Ports and Network Interface Card (NIC)
- Plug the Ethernet cable into a different port on your router or switch.
- If possible, connect your PC to another known-good router or network.
- If your PC is a desktop, try a different NIC if available (use a USB-to-Ethernet adapter or another PCIe card).
Run Adapter Diagnostics in Device Manager
- Press Windows + X and choose Device Manager.
- Expand Network adapters.
- Right-click the Ethernet adapter and select Scan for hardware changes.
- Look for any warning icons (!) or error messages.
- If you see a warning, right-click the adapter and select Properties to review error codes or troubleshooting info.
Advanced Diagnostic Tools
Check Event Viewer Logs for Network Errors
- Press Windows + S, type Event Viewer, and open it.
- In the left pane, expand Windows Logs and select System.
- Scroll through the log list and look for error or warning entries related to Dhcp-Client, Tcpip, or similar services.
- Double-click any relevant entry for details.
Audit Network Adapter Settings
- Open Device Manager (Windows + X, then choose Device Manager).
- Expand Network adapters, right-click your Ethernet adapter, and select Properties.
- Under the Power Management tab, uncheck Allow the computer to turn off this device to save power.
- Switch to the Advanced tab.
- Review important settings:
- Quality of Service (QoS): Restore to default if changed.
- DNS/WINS settings: Ensure these match your network requirements or set to automatic if unsure.
- Click OK to save any adjustments.
Paying attention to both physical connections and advanced diagnostic tools ensures you catch issues that can be missed by software fixes alone. Step-by-step checks like these help you pinpoint the exact source of persistent Ethernet connectivity errors.
Conclusion
Resolving the “Ethernet Doesn't Have a Valid IP Configuration” error often comes down to a combination of practical steps and preventive habits. Regularly updating your network drivers, performing occasional TCP/IP resets, and assigning static IP addresses when necessary help keep your connection stable and responsive.
Preventive maintenance like these actions reduces the risk of unexpected outages and ensures smoother day-to-day internet use.
Over the long term, deepening your familiarity with DHCP settings and network adapter functions pays off. Knowing how your router assigns IP addresses and how your adapter interacts with the system can make troubleshooting quicker and less stressful.
Reliable networking is not just about immediate fixes, but about forming a routine that supports ongoing stability.
If connection issues persist after trying these measures, or if hardware errors continue to appear in your diagnostics, do not hesitate to seek professional support. Sometimes physical faults or complex configuration problems require specialized tools or expertise.
Getting timely help ensures that your network remains secure, efficient, and dependable in any setting.


