How to Fix ‘WiFi Doesn’t Have a Valid IP Configuration’ on Windows

Encountering the ‘WiFi doesn’t have a valid IP configuration’ error message on a Windows computer can be both confusing and frustrating. This issue disrupts your ability to connect to the internet, essentially putting a halt to your online activities.
But what does this cryptic message mean? At its core, the issue stems from your computer’s inability to obtain a valid IP address, a crucial identifier that enables network communication. Whether you’re working from home or streaming your favorite show, a stable internet connection is a must.
Understanding IP Configuration in Windows
In any computer network, an IP address serves as a unique identifier for a device, enabling it to communicate with other devices on the same network. Windows operating systems rely on Dynamic Host Configuration Protocol (DHCP) to automatically assign these IP addresses.
However, when something goes awry in this process, you might encounter the ‘WiFi doesn’t have a valid IP configuration’ error.
What Is an IP Address?
An IP address is a series of numbers separated by periods that uniquely identifies each computer or device within a network. The IP address allows data packets to be routed to the correct destination.
Think of it as the mailing address for your computer on the network. It’s crucial for enabling seamless communication between your device and the network.
The Role of DHCP in Assigning IP Addresses
Dynamic Host Configuration Protocol, commonly known as DHCP, is a network protocol used in IP networks. Its job is to automatically assign IP addresses to devices, eliminating the need for manual configuration.
The DHCP server within the network grants an IP address lease to your computer for a specified period. Once this lease expires, the DHCP server either renews the existing IP address or assigns a new one.
Causes of ‘WiFi Doesn’t Have a Valid IP Configuration’ Error
Several factors can lead to this dreaded error message. Here are some of the most common culprits:
- Corrupted Network Drivers: Outdated or corrupted network drivers can interfere with the IP assignment process.
- Router or Modem Issues: Sometimes, the problem may originate from the router or modem itself, particularly if it fails to allocate IP addresses correctly.
- Incorrect Network Settings: If the network settings on your Windows computer are incorrectly configured, the DHCP server may not be able to assign a valid IP address.
- Software Conflicts: Third-party software like VPNs and network management tools can disrupt the normal functioning of network protocols, including DHCP.
Preliminary Checks Before Troubleshooting
Before diving into detailed solutions for the ‘WiFi doesn’t have a valid IP configuration’ error, it’s prudent to perform some basic checks. These preliminary steps can sometimes resolve the issue or provide valuable clues about the root cause.
Check the Network on Other Devices
The first step in identifying whether the issue is specific to your computer or broader involves testing the network on different devices. Attempt to connect other computers, smartphones, or tablets to the same WiFi network.
If they can connect without issues, it is likely that the problem is limited to your Windows computer.
Reboot Router and Computer
Often, a simple reboot can rectify various glitches and conflicts that may be affecting your network. Start by turning off the router and unplugging it from the power source. Wait for about 30 seconds before plugging it back in and restarting it.
Do the same with your computer to refresh the operating system and purge it of any temporary bugs affecting the network.
Test with a Different Network
If you have access to another WiFi network, try connecting your computer to it. Successfully connecting to a different network can help rule out issues with your router and indicate that the problem is likely within your computer’s settings or hardware.
Verify Physical Connections
If you’re on a wired connection or have access to the router, ensure that all cables and hardware connections are secure. A loose Ethernet cable or a faulty port can cause network issues that may manifest as IP configuration errors.
Using Network Troubleshooter in Windows
Once you’ve performed the preliminary checks and determined that further action is required, one of the first tools you can employ is the built-in Network Troubleshooter on Windows. This utility automatically diagnoses and tries to fix network issues.
While it may not resolve more complicated problems, it’s a straightforward and effective way to tackle common networking challenges.
Accessing the Network Troubleshooter
To run the Network Troubleshooter, you need to go to Settings, which can be opened by clicking on the gear icon found in the Start menu. From there, select Update & Security, and then click on Troubleshoot from the options on the left-hand side.
Now, click on ‘Additional troubleshooters’ and look for the ‘Internet Connections’ option to start the troubleshooter.
How Network Troubleshooter Works
Once initiated, the Network Troubleshooter scans for issues that could be preventing your computer from connecting to the WiFi. It will then either automatically fix the problem or provide suggestions on what actions to take.
While it might not have the complexity to tackle all types of networking issues, it can often resolve simple connectivity problems by renewing your IP address or resetting the network adapter.
Limitations of the Tool
Despite its ease of use, the Network Troubleshooter does have limitations. For example, it’s less likely to resolve issues arising from outdated or corrupted drivers.
It’s also not equipped to deal with problems originating from third-party software conflicts or more intricate hardware issues.
When to Proceed to Other Solutions
If the Network Troubleshooter is unable to resolve your issue, or if the problem reoccurs frequently, this usually means that you’ll need to look at other, more advanced troubleshooting steps. The Network Troubleshooter is valuable for diagnosing and solving immediate, simple issues but it should not be seen as a comprehensive solution for all networking problems.
Resetting Network Settings Using Command Prompt

If basic troubleshooting and the Network Troubleshooter haven’t resolved your issue, the next step is to get a bit more technical by using Command Prompt to reset your network settings. This method is often effective for more stubborn network issues that may be related to IP address allocation or other network configurations.
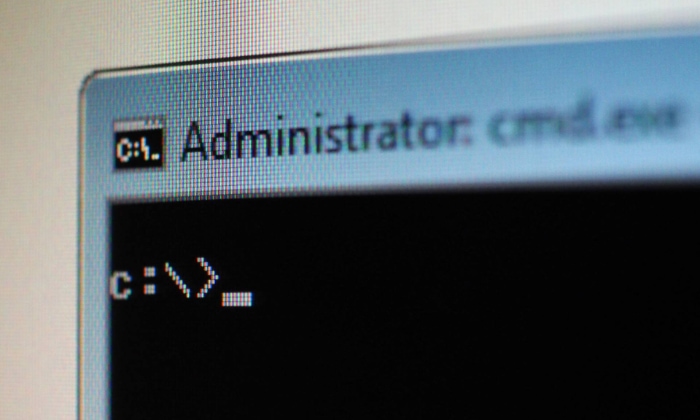
Opening Command Prompt as an Administrator
The first step is to open the Command Prompt with administrative privileges. To do this, search for ‘Command Prompt’ or ‘cmd’ in the Start menu, right-click on the result, and select ‘Run as administrator’.
This will provide the necessary permissions to execute advanced commands.
Commands to Release and Renew IP Address
One of the simplest fixes you can attempt through Command Prompt is to release and then renew your IP address. This will force your computer to request a new IP address from the DHCP server.
To do this, type the following commands, hitting Enter after each:
- ipconfig /release
- ipconfig /renew
Resetting the TCP/IP Stack
Another useful command is the one that resets the TCP/IP stack to its default configuration, which can resolve issues with internet connectivity. Enter the following command:
- netsh int ip reset
After running this command, you’ll need to restart your computer for the changes to take effect.
Flushing the DNS Cache
Sometimes, issues can be caused by a corrupted DNS cache. To clear it, you’ll need to run the following command:
- ipconfig /flushdns
Other Useful Commands
While the above commands resolve a majority of IP configuration issues, sometimes you may need to go further. Here are some additional commands that could prove helpful:
- netsh winsock reset (Resets Winsock Catalog back to default setting)
- netsh int ipv4 reset (Resets IPv4 settings)
- netsh int ipv6 reset (Resets IPv6 settings)
After executing these commands, it’s advisable to restart your computer to ensure all changes are properly implemented.
Manually Setting an IP Address
After exhausting other troubleshooting options, setting a static IP address manually could be the solution to your ‘WiFi doesn’t have a valid IP configuration’ problem. This strategy overrides the DHCP settings and sets a permanent IP address for your device, circumventing potential conflicts.
Determine a Suitable IP Address Range
Before setting an IP address manually, you should find out the IP address range your router uses for DHCP. This information is usually available on the router’s admin page or in its documentation.
Make sure to choose an IP address that is outside this range to avoid conflicts with other devices on the network.
Access Network Settings
To begin, right-click on the network icon in the system tray and select ‘Open Network & Internet settings’. From here, click on ‘Change adapter options’, which will show a list of all network interfaces on your computer.
Configuring the Properties
Right-click on your WiFi network adapter and select ‘Properties’. Scroll down to find ‘Internet Protocol Version 4 (TCP/IPv4)’ and double-click to open its properties. In the window that appears, select the ‘Use the following IP address’ option.
Entering the IP Details
Enter the IP address, subnet mask, and default gateway that you have determined to be appropriate for your network. It’s usually a good idea to set the DNS server addresses as well.
Most people use Google’s public DNS, which are 8.8.8.8 for the preferred DNS server and 8.8.4.4 for the alternate DNS server. Click ‘OK’ to save these settings.
Testing the Connection
After applying these settings, it’s crucial to test the connection to ensure everything is working as expected. Open Command Prompt and run the command ping 8.8.8.8 to check if you’re getting a response.
A successful response indicates that your manual IP configuration is correct.
Uninstalling and Reinstalling Network Adapter Drivers
When all else fails, the issue might be with the network adapter drivers themselves. Corrupted or outdated drivers can lead to various network issues, including the ‘WiFi doesn’t have a valid IP configuration’ error.
Access Device Manager
The Device Manager is the tool you’ll use to manage your drivers. You can easily access it by typing ‘Device Manager’ into the Windows search bar and pressing Enter. This will display a list of all hardware components installed on your computer.
Locate Network Adapters
Within the Device Manager window, you’ll find a category labeled ‘Network adapters.’ Expand this category by clicking on the arrow beside it to reveal the list of network adapters installed on your computer.
Uninstall the Network Adapter
Identify the network adapter that you are using for your WiFi connection. Right-click on it and choose ‘Uninstall device.’ A confirmation dialog will appear; proceed with the uninstallation but make sure not to delete the driver software for the device if given the option.
Reboot and Reinstall Drivers
After you’ve uninstalled the network adapter, restart your computer. Windows will automatically detect the missing driver and attempt to reinstall it upon boot.
This will usually result in the installation of the most recent and compatible driver for your network adapter.
Verify the Connection
Once your computer has restarted, reconnect to your WiFi network and test the connection. If the issue was with the drivers, this step should resolve it. If not, the problem may lie deeper within the system or hardware.
Uninstalling and reinstalling network adapter drivers can act as a last-resort troubleshooting step for persistent networking issues. While this method can be effective, it should be used cautiously, as it involves removing key software components that enable network connectivity.
If this doesn’t fix the problem, you may need to consider even more specialized troubleshooting methods or seek professional assistance.
Conclusion
Confronting the ‘WiFi doesn’t have a valid IP configuration’ error can be a frustrating experience, but various troubleshooting steps can address and resolve this issue effectively. From conducting preliminary checks to employing the Network Troubleshooter, Command Prompt, or even reinstalling network drivers, each method serves as a pathway to possibly fix this common but nettlesome problem.
Manually setting an IP address offers another layer of control for those well-versed in network configurations. By methodically working through these options, users increase their chances of restoring a stable, reliable internet connection.
While some methods may seem complex, they are all designed to address the multiple facets of what could be causing your network issues.


