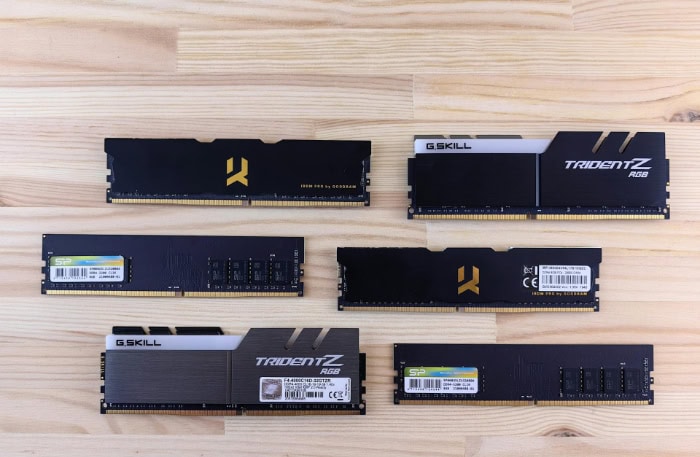
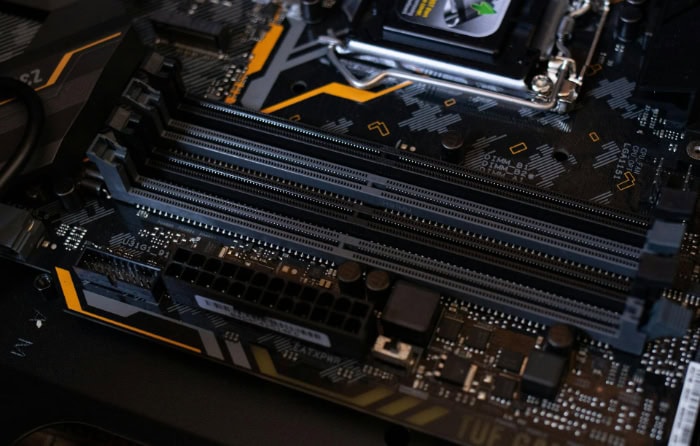
How to Free Up RAM on Windows: Step-by-Step

Is your Windows computer running slower than usual? The culprit might be insufficient RAM. Random Access Memory acts as your system's short-term memory, essential for smooth multitasking and quick application responses.
As we demand more from our computers, managing RAM efficiently becomes crucial. Fortunately, you can boost your system's performance without expensive hardware upgrades.
From simple tweaks to advanced techniques, numerous methods exist to free up RAM and breathe new life into your Windows machine. We'll guide you through diagnosing RAM issues, optimizing memory usage, and implementing strategies for long-term efficiency.
Understanding RAM Usage in Windows
Random Access Memory (RAM) plays a crucial role in your computer's performance. It acts as a temporary storage space for data that your computer needs to access quickly.
Windows manages RAM in specific ways to ensure smooth operation of your system.
How Windows Manages RAM
Windows employs several techniques to manage RAM efficiently. The operating system allocates memory to running programs and processes as needed.
When a program is closed, Windows frees up the RAM it was using. However, some of this freed memory may be kept in a standby list for quick access if the program is reopened.
Windows also uses a technique called memory compression. This process compresses infrequently used data in RAM, allowing more information to be stored without increasing physical memory.
Additionally, Windows utilizes virtual memory, which uses hard drive space as an extension of RAM when physical memory is low.
Signs of Low RAM and Performance Impact
Low RAM can significantly impact your computer's performance. Some common signs include:
- Slow system responsiveness
- Frequent freezing or crashing of applications
- Long load times for programs and files
- Difficulty running multiple applications simultaneously
- Constant hard drive activity (indicated by frequent disk light flashing)
These issues occur because when RAM is low, Windows must constantly swap data between RAM and the hard drive, a process much slower than accessing data directly from RAM.
Checking Current RAM Usage
To check your current RAM usage in Windows, follow these steps:
- Press Ctrl + Shift + Esc to open Task Manager
- Click on the “Performance” tab
- Select “Memory” in the left-hand panel
Here, you'll see a graph showing your RAM usage over time. The “In use” value shows how much RAM is currently being used, while “Available” shows free RAM. If your available RAM is consistently low, it might be time to consider freeing up some memory.
Determining Optimal Free RAM
The amount of free RAM you need depends on your system and usage patterns. Generally, having at least 20% of your total RAM free is a good rule of thumb.
For example, if you have 8 GB of RAM, aim to have at least 1.6 GB free.
However, this can vary based on your needs. If you frequently use memory-intensive applications like video editing software or run multiple programs simultaneously, you might benefit from having more free RAM.
Remember, some amount of used RAM is normal and even desirable. Windows caches frequently used data in RAM for faster access.
What's important is having enough free RAM to handle new tasks without excessive slowdowns.
Diagnosing RAM Issues

Identifying and resolving RAM-related problems is crucial for maintaining optimal system performance. Windows provides built-in tools to help diagnose these issues, and there are also third-party options available for more advanced diagnostics.
Using Windows Memory Diagnostic Tool
The Windows Memory Diagnostic Tool is a built-in utility that can help identify RAM-related problems. To use this tool:
- Press Windows + R to open the Run dialog.
- Type “mdsched.exe” and press Enter.
- Choose to restart now and check for problems or schedule the check for the next restart.
The tool will run a series of tests on your RAM, checking for errors or corruption. If issues are found, you'll see a report after your computer restarts.
This report can help you determine if your RAM is faulty and needs replacement.
Interpreting Windows Event Viewer Logs
The Event Viewer in Windows can provide valuable insights into RAM-related issues. To access and interpret these logs:
- Press Windows + X and select “Event Viewer.”
- Navigate to “Windows Logs” > “System.”
- Look for events with “Memory” in the source column.
Pay attention to error messages related to memory management, page faults, or low memory conditions. These can indicate problems with your RAM or how your system is managing memory.
While the Event Viewer can be complex, focusing on these specific events can help you identify patterns or recurring issues related to RAM.
Third-party Tools for Advanced RAM Diagnostics
For more comprehensive RAM diagnostics, consider using third-party tools. Some popular options include:
- MemTest86: A thorough, standalone memory testing tool that can be run from a bootable USB drive.
- RAMMap: A Sysinternals tool that provides detailed information about memory usage.
These tools offer more in-depth analysis and can be particularly useful for identifying intermittent or hard-to-detect RAM problems. However, they may require more technical knowledge to use effectively.
Common Causes of High RAM Usage
High RAM usage can stem from various sources. Some common causes include:
- Too many open applications or browser tabs
- Memory leaks in poorly coded software
- Malware or viruses consuming system resources
- Outdated or corrupted device drivers
- Windows background processes and services
To identify which processes are using the most RAM, use Task Manager (Ctrl + Shift + Esc) and sort the processes by memory usage. This can help you pinpoint specific applications or services that might be causing high RAM consumption.
Quick and Safe Methods to Free Up RAM

When your computer starts to slow down due to high RAM usage, there are several quick and safe methods you can employ to free up memory. These techniques can help improve your system's performance without the need for advanced technical knowledge or third-party software.
Restarting Your Computer
Restarting your computer is a simple yet effective way to free up RAM. It's particularly useful when you notice your system slowing down or after installing major operating system updates.
A restart clears the RAM, closing all running programs and processes, which can help resolve memory leaks and other issues that accumulate over time.
For most users who shut down their computers daily, regular restarts are already part of their routine. However, if you keep your computer running for extended periods, consider restarting it when you notice performance issues or after significant software changes.
This practice can help maintain optimal system performance and prevent RAM-related slowdowns.
Using Task Manager
Task Manager is a powerful built-in Windows tool that allows you to monitor and manage your system's resource usage, including RAM. To use Task Manager effectively:
- Press Ctrl + Shift + Esc to open Task Manager.
- Click on the “Processes” tab.
- Click on the “Memory” column to sort processes by RAM usage.
This view helps you identify which applications or processes are consuming the most memory. Look for any unfamiliar processes or applications you're not actively using that are taking up significant RAM.
You can right-click on these processes and select “End task” to close them and free up memory.
Be cautious when ending tasks, as closing essential system processes can cause instability. Focus on closing unnecessary applications or browser tabs that you're not actively using.
If you're unsure about a process, it's best to research it before closing to avoid potential system issues.
Optimizing Startup Programs
Many programs automatically start when you boot your computer, consuming RAM even when you're not actively using them. Optimizing these startup programs can significantly improve your system's boot time and overall RAM usage. Here's how to manage startup programs:
- Open Task Manager (Ctrl + Shift + Esc).
- Click on the “Startup” tab.
- Review the list of programs that start with Windows.
- Right-click on programs you don't need at startup and select “Disable.”
Focus on disabling non-essential programs like media players, chat applications, or update checkers for software you rarely use. Leave essential security software and hardware drivers enabled.
Advanced Techniques for RAM Optimization

For users looking to squeeze every bit of performance out of their systems, there are several advanced techniques to optimize RAM usage. These methods require a deeper understanding of Windows settings and may involve some risks, so proceed with caution.
Adjusting Virtual Memory Settings
Virtual memory is a feature that allows Windows to use hard drive space as an extension of RAM. Adjusting these settings can potentially improve system performance, especially on computers with limited physical RAM.
To modify virtual memory settings:
- Open System Properties by right-clicking on “This PC” and selecting “Properties.”
- Click on “Advanced system settings.”
- Under the “Advanced” tab, click “Settings” in the Performance section.
- Go to the “Advanced” tab and click “Change” under Virtual memory.
Here, you can customize the paging file size. While Windows manages this automatically by default, manual adjustment can sometimes yield better results.
A common recommendation is to set the initial size to 1.5 times your physical RAM and the maximum size to 3 times your RAM.
Be aware that setting the paging file too small can lead to system instability, while setting it too large can waste disk space and potentially slow down your system. Always restart your computer after making changes to see the effects.
Fine-tuning Windows Visual Effects
Windows offers various visual effects that enhance the user experience but can consume RAM. Adjusting these settings can free up memory for more critical tasks.
To modify visual effects:
- Open System Properties and navigate to “Advanced system settings.”
- Under the “Advanced” tab, click “Settings” in the Performance section.
- Choose “Adjust for best performance” to disable all visual effects, or select “Custom” to choose which effects to keep.
Consider disabling animations, transparent glass, and other resource-intensive effects. Keep in mind that this will make your Windows interface less visually appealing but can noticeably improve performance on systems with limited RAM.
Managing Browser Memory Usage
Web browsers are often major consumers of RAM, especially when multiple tabs are open. Different browsers handle memory differently, so it's worth exploring options:
For Chrome:
- Use the built-in Task Manager (Shift + Esc) to identify and close memory-hungry tabs.
- Consider using extensions like The Great Suspender to pause inactive tabs.
For Firefox:
- Type “about:memory” in the address bar to view detailed memory reports.
- Use the “Minimize memory usage” button to free up memory.
For Edge:
- Use the Task Manager (accessible through the “…” menu) to monitor and manage tab memory usage.
Regardless of the browser, regularly clearing cache can help manage memory usage over time.
Updating Drivers and Software
Outdated drivers and software can sometimes cause memory leaks, which gradually consume RAM over time. Keeping your system up-to-date is crucial for optimal performance.
To update drivers:
- Open Device Manager.
- Right-click on a device and select “Update driver.”
- Choose to search automatically for updated driver software.
For software updates, check for updates within individual applications or use their official websites. Many programs also offer automatic update features, which can be enabled for convenience.
Pay special attention to graphics drivers, as they can significantly impact system performance and memory usage. However, be cautious with driver updates and consider creating a system restore point before making changes.
Long-term Strategies for Efficient RAM Management
Maintaining optimal RAM performance isn't just about quick fixes; it requires ongoing attention and smart practices. By implementing long-term strategies, you can ensure your system runs smoothly and efficiently over time.
Regular System Maintenance
Establishing a routine for system maintenance is crucial for keeping your RAM usage in check. Set aside time each month to perform essential tasks that contribute to overall system health and efficient memory usage.
Start by running Windows' built-in Disk Cleanup tool to remove temporary files and system clutter. Next, use the Defragment and Optimize Drives tool to organize your hard drive data more efficiently, which can indirectly improve RAM usage by reducing the time needed to access files.
Consider using Windows' built-in antivirus, Windows Defender, to perform regular scans. Malware can significantly impact RAM usage, so keeping your system clean is essential.
Additionally, review your installed programs and remove any that you no longer need or use.
Lastly, make sure to restart your computer regularly, especially if you tend to leave it on for extended periods. This simple act can clear out RAM and resolve many memory-related issues.
Uninstalling Unused Applications
Over time, our computers accumulate applications we no longer use. These programs often run background processes or start automatically with Windows, consuming valuable RAM. Regularly reviewing and uninstalling unused applications can free up significant memory resources.
To uninstall programs:
- Open the Control Panel
- Go to “Programs and Features”
- Review the list of installed programs
- Right-click and uninstall any programs you no longer need
Pay special attention to large applications or those you haven't used in months. After uninstalling, use a registry cleaner (with caution) to remove any leftover entries that might still be consuming resources.
Assessing Hardware Upgrade Needs
Sometimes, no amount of optimization can overcome the limitations of insufficient physical RAM. If you consistently experience slowdowns despite following best practices, it might be time to consider a hardware upgrade.
To assess your RAM needs, open Task Manager and monitor your memory usage during typical use. If you're regularly using 70% or more of your available RAM, an upgrade could be beneficial.
Before upgrading, check your computer's specifications to determine the maximum RAM it supports and the type of RAM it uses. This information is crucial for ensuring compatibility and maximizing the benefit of your upgrade.
You can find these details in your computer's manual or by using system information tools built into Windows.
If you're not comfortable installing RAM yourself, consider seeking help from a professional to ensure proper installation. They can guide you through the process, recommend suitable RAM modules, and perform the installation safely.
Remember that upgrading RAM is just one aspect of improving system performance. Consider other factors like your processor speed and storage type (HDD vs. SSD) when evaluating overall system performance.
Best Practices for Daily Use
Adopting good habits in your daily computer use can significantly impact RAM efficiency. Start by being mindful of the programs you run simultaneously.
Each open application consumes RAM, so limit the number of active programs and browser tabs. Closing unused ones can free up valuable resources.
When working, consider using lightweight alternatives to resource-heavy applications. A simple text editor might suffice for quick notes instead of launching a full-featured word processor. This approach helps conserve RAM for more demanding tasks.
Regular maintenance is crucial for optimal performance. Clear your browser cache periodically to manage memory usage over time.
Most browsers offer built-in tools for this in their privacy or history settings. Similarly, keep your operating system and applications updated to benefit from performance improvements and bug fixes that can positively impact RAM usage and overall system stability.
Pay attention to background applications, especially those that start automatically with Windows. Review your startup programs periodically and disable any that aren't essential for your daily use.
This practice can significantly reduce unnecessary RAM consumption.
For systems with slower hard drives, consider using built-in Windows tools like ReadyBoost. This feature uses a USB flash drive to supplement your RAM, potentially improving performance on systems with limited physical memory.
Conclusion
Effective RAM management is essential for maintaining a smooth and responsive Windows experience. From simple techniques like restarting your computer and closing unnecessary programs to advanced methods such as adjusting virtual memory settings, numerous strategies can help optimize your system's memory usage.
Regular maintenance, including uninstalling unused applications and updating drivers, plays a crucial role in long-term performance.
Balancing RAM optimization with system functionality requires careful consideration. While freeing up memory is important, it's equally vital to ensure your computer retains the resources needed for daily tasks.
Monitoring your RAM usage regularly allows you to identify potential issues early and take appropriate action.
Remember, optimal RAM management is an ongoing process that adapts to your changing computing needs, ensuring a consistently smooth and productive experience.


