How to Improve PC Performance in Windows: Tune-Up Tips

A sluggish computer kills productivity and ruins gaming sessions faster than almost anything else. Even top-tier machines eventually succumb to “PC rot” as temporary files, leftover registry entries, and silent background processes accumulate over years of use.
This degradation often feels inevitable, yet most performance issues are solvable without spending a dime on a replacement. We will guide you through a logical progression of fixes, starting with immediate software tweaks to cut input lag before advancing to deeper system optimizations and physical maintenance.
Essential “Quick Wins” to Reduce Boot Time and Lag
Improving system responsiveness often begins with simple adjustments rather than complex overhauls. Windows arrives with default settings that prioritize energy efficiency or user convenience over raw speed, but these configurations can make a powerful machine feel sluggish.
Managing Startup Programs
When you install new software, many applications automatically set themselves to launch the moment you turn on your computer. This extends your boot time and eats up system resources before you even start working.
- Access Task Manager: Right-click the Start button or press Ctrl + Shift + Esc to open Task Manager.
- Locate the Startup Tab: Click on the “Startup apps” tab to view a list of all programs configured to run at boot.
- Identify High-Impact Apps: Look at the “Startup impact” column. Applications labeled “High” significantly slow down your boot process.
- Disable Unnecessary Software: select non-essential third-party apps like game launchers, chat clients, or cloud storage tools that you do not need immediately. Click Disable.
- Exercise Caution: Avoid disabling drivers or essential system processes (often listed under publishers like Intel, AMD, or Realtek) to prevent hardware issues.
Adjusting Power Settings
Windows defaults to a “Balanced” power plan to conserve energy, which allows the CPU to reduce its clock speed when idle. While efficient for battery life, this constant throttling and ramping up can cause micro-stutters in high-performance tasks.
- Open Power Options: Search for “Edit power plan” in the Start menu or locate “Power Options” within the Control Panel.
- Select High Performance: Switch the power plan from “Balanced” or “Power Saver” to High Performance.
- Maximize CPU Availability: This setting ensures your processor maintains higher clock speeds consistently, providing immediate power when an application requests it rather than waiting for the hardware to wake up from a low-power state.
Restarting and Resource Flush
Many users fall into the habit of leaving their PC in “Sleep” mode for days or weeks. While convenient, this prevents the system from fully clearing its Random Access Memory (RAM).
- Clear Memory Leaks: Some programs fail to release memory back to the system after they close, leading to a gradual decline in performance. A full restart flushes the RAM completely.
- Reset Background Processes: A fresh boot stops stuck background tasks that might be consuming CPU cycles unnoticed.
- Establish a Routine: Restart your computer completely at least once every few days to maintain system stability.
System Hygiene: Storage and Application Management

A cluttered drive affects more than just your available storage space. As drives fill up, file fragmentation and indexing overhead increase, which can lead to longer load times for applications and games.
Keeping a clean file system ensures that Windows does not waste resources managing junk data.
Decluttering Storage with Storage Sense
Windows 10 and 11 include built-in tools designed to automate the cleaning process, removing the need to manually hunt for temporary files.
- Enable Storage Sense: Go to Settings > System > Storage. Toggle “Storage Sense” to On.
- Configure Automation: Click into the settings to decide how often Windows should run this tool. You can set it to automatically delete temporary files, clear the Recycle Bin after a set number of days, and remove old downloads.
- Run Disk Cleanup: For a deeper clean, search for “Disk Cleanup” in the Start menu. Select Clean up system files to locate and remove massive outdated Windows Update files that Storage Sense might miss.
Removing Bloatware and Unused Apps
New computers often come pre-loaded with trial software, manufacturer utilities, and promotional games known as “bloatware.” These programs occupy disk space and frequently add clutter to the system registry.
- Audit Your Apps: Go to Settings > Apps > Installed apps. Scroll through the list and identify programs you do not recognize or have not used in the last six months.
- Uninstall Safely: Click the menu dots next to the unwanted application and select Uninstall.
- Target Manufacturer Utilities: Be critical of “Support Assistants” or “Update Centers” provided by the PC manufacturer. Unless you use them for specific driver updates, they often run redundant background services.
Malware and Security Audits
Sometimes a sudden drop in performance is not due to age or clutter but malicious software. Viruses and crypto-miners are designed to stay hidden while utilizing your processor and graphics card to perform tasks for an attacker.
- Run a Full Scan: Use Windows Security (Defender) or a reputable third-party antivirus to perform a full system scan.
- Check Resource Usage: If your fans are spinning loudly while the computer is idle, open Task Manager. If you see high CPU or GPU usage from an unknown process, it may indicate a crypto-miner infection.
- Quarantine Threats: Immediately remove or quarantine any flagged files to stop them from leeching system power.
Optimizing Windows Configuration for Performance

Windows is designed to look appealing with smooth animations, drop shadows, and transparency effects. While these visual flourishes make the interface feel modern, they consume processor cycles and video memory that could be better utilized by your active applications.
Disabling Visual Effects
The operating system includes a menu specifically for balancing appearance against performance. For older PCs or systems struggling with frame rates, stripping away these cosmetic layers can yield a noticeable improvement in snappiness.
- Access System Properties: Search for “View advanced system settings” in the Start menu to open the System Properties window.
- Open Performance Settings: Under the “Advanced” tab, locate the Performance section and click the Settings button.
- Prioritize Speed: Select the option labeled Adjust for best performance. This will disable all animations and visual extras.
- Customize the Balance: If the interface looks too stark, select “Custom” and re-enable only the essentials, such as “Smooth edges of screen fonts” or “Show thumbnails instead of icons.”
Managing Background App Permissions
Many applications installed via the Microsoft Store are permitted to run in the background by default. They continue to sync data, send notifications, and consume RAM even when you are not actively using them.
- Review App Activity: Go to Settings > Apps > Installed apps (or “Apps & features” in older versions).
- Restrict Permissions: Click the menu or advanced options next to an app you rarely use, such as Calculator, Maps, or the Xbox Game Bar.
- Select “Never”: Change the background apps permission to Never or Power optimized. This prevents the software from waking up unnecessarily and draining system resources.
Game Mode and Graphics Settings
Microsoft has integrated features directly into Windows to help the operating system recognize when a game is running and allocate resources accordingly.
- Enable Game Mode: Search for “Game Mode settings” and toggle the switch to On. This prevents Windows Update from performing driver installations or sending restart notifications during gameplay.
- Hardware-Accelerated GPU Scheduling: In the “Graphics settings” menu, look for Hardware-accelerated GPU scheduling. Turning this on allows the graphics card to manage its own video memory usage directly, which can reduce latency and improve average frame rates on supported hardware.
Advanced Tuning and Maintenance

Once basic settings are adjusted, you can address the underlying systems that govern hardware communication and memory management. These steps involve using deeper system tools to ensure the operating system interacts efficiently with your physical components.
While these adjustments are technical, they are essential for maintaining stability during heavy multitasking or gaming.
Virtual Memory (Pagefile) Optimization
When your physical RAM fills up, Windows moves data to a hidden file on your hard drive called the Pagefile. This acts as overflow memory.
If this file is too small or dynamically resizing constantly, it can cause stuttering or application crashes.
- Locate Virtual Memory Settings: Return to the “Performance Options” menu used in the previous section, click the Advanced tab, and select Change under Virtual memory.
- Manual Adjustment: Uncheck “Automatically manage paging file size for all drives.”
- Set Custom Size: Advanced users often set the “Initial size” and “Maximum size” to the same value (often 1.5 times the amount of installed RAM). This prevents Windows from wasting resources by constantly resizing the file on the fly.
Driver Management
Generic drivers provided by Windows Update are sufficient for basic video output, but they lack the optimization required for modern applications and games. Running outdated drivers is a common cause of poor performance and graphical glitches.
- GPU Drivers: Download graphics drivers directly from the manufacturer (NVIDIA, AMD, or Intel). These packages include game-specific optimizations and bug fixes that Windows Update often misses.
- Chipset Drivers: Check your motherboard manufacturer’s website for the latest chipset drivers. These control how the CPU communicates with other components and can fix micro-stuttering issues that GPU updates cannot resolve.
System File Repair
Over time, Windows system files can become corrupted due to failed updates or improper shutdowns. This corruption does not always stop the PC from booting, but it often leads to inexplicable errors and system instability.
- Run System File Checker: Open Command Prompt as an administrator and type sfc /scannow. Press Enter. This tool scans protected system files and replaces corrupted files with a cached copy.
- Use DISM: If the SFC command fails to fix the issue, run DISM /Online /Cleanup-Image /RestoreHealth. This command uses Windows Update to download fresh copies of core files to repair the system image.
Hardware Upgrades and Physical Care

Software optimization can only push a system so far. If the underlying components are outdated or physically compromised, the computer will remain sluggish regardless of how many background apps you disable.
Addressing hardware bottlenecks and maintaining physical cleanliness are the final steps to achieving peak performance.
The SSD Advantage
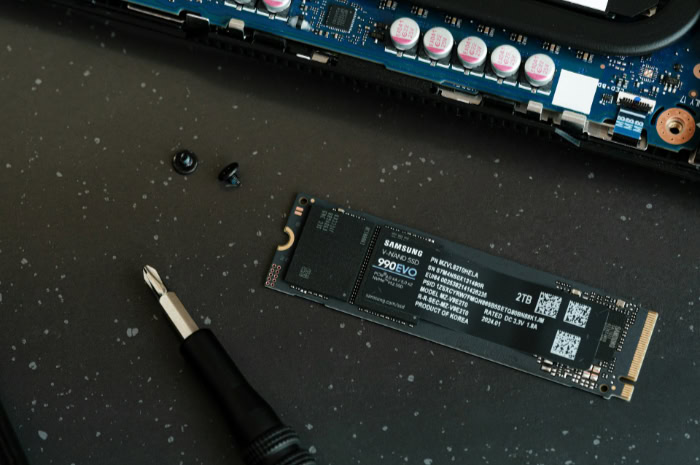
The single most impactful upgrade for an aging computer is replacing a mechanical Hard Disk Drive (HDD) with a Solid State Drive (SSD). Traditional HDDs rely on spinning platters and a physical read/write head to locate data, which introduces significant latency during boot times and application launches.
- Eliminate Physical Latency: SSDs use flash memory similar to a USB drive but much faster. They have no moving parts, allowing for near-instant data access.
- System Responsiveness: Moving your Windows installation to an SSD often reduces boot times from several minutes to under 20 seconds.
- Smoother Experience: Windows feels significantly “snappier” because background tasks, updates, and search indexing complete without choking the system's ability to respond to your mouse clicks.
RAM Expansion
Random Access Memory (RAM) serves as the temporary workspace for your processor. When you run out of RAM, Windows is forced to use your storage drive as temporary memory, which is much slower and causes severe stuttering.
- Diagnose the Bottleneck: Open Task Manager and navigate to the Performance tab. Check the Memory section while running your usual applications or games. If usage consistently sits above 80% or 90%, lack of RAM is slowing you down.
- The Sweet Spot: For modern Windows versions, 8GB is considered the functional minimum. Upgrading to 16GB provides enough headroom to keep a web browser, Discord, and a heavy game open simultaneously without the system slowing to a crawl.
- Dual-Channel Performance: Installing two sticks of RAM (e.g., two 8GB sticks) rather than one large stick often yields better performance by doubling the memory bandwidth available to the CPU.
Thermal Management and Dusting
Heat is the silent killer of performance. Modern processors and graphics cards are designed to protect themselves through a process called “thermal throttling.”
When a component gets too hot, it automatically slows down its clock speed to cool off, resulting in sudden frame rate drops or sluggish behavior.
- The Dust Factor: Over time, dust accumulates on intake fans, exhaust vents, and heatsink fins. This layer of dust acts as insulation, trapping heat inside the case and preventing cool air from reaching the components.
- Cleaning Routine: Power down the PC and use a can of compressed air to blow dust out of the fans and heatsinks. perform this every three to six months.
- Airflow Optimization: Ensure your computer is placed on a hard surface. Placing a tower PC on a carpet often blocks the bottom intake capabilities of the power supply unit, suffocating the system and raising internal temperatures.
Conclusion
Optimizing a personal computer is a logical process that begins with software hygiene and ends with physical maintenance. We started by eliminating unnecessary startup programs and adjusting power plans to gain immediate responsiveness.
From there, we moved to deep cleaning storage, refining Windows visual settings for speed, and ensuring drivers were up to date. Finally, we addressed the physical reality of the hardware by discussing the critical impact of SSDs, RAM upgrades, and thermal management.
It is important to view this guide not as a one-time checklist but as a routine maintenance schedule. Just like a vehicle requires oil changes, a computer requires regular digital and physical cleaning to perform at its best.
Dust will inevitably return to clog your fans, and temporary files will accumulate in the background. Dedicating a few minutes every month to check for updates, clear junk data, and monitor temperatures will extend the usable life of your machine significantly.
However, software tweaks have limits. If you have performed every step in this guide, specifically the upgrade to a Solid State Drive and 16GB of RAM, and the system still struggles with basic tasks, you have likely hit the hardware's hard limit.
At that point, further optimization yields diminishing returns. When the central processor simply cannot keep up with modern web standards or software requirements, the most cost-effective solution is retiring the hardware and investing in a new platform.
Frequently Asked Questions
Is 8GB of RAM enough for gaming in 2026?
While 8GB allows Windows to function, it is often insufficient for modern gaming or heavy multitasking. Most users should aim for 16GB as the standard to prevent stuttering. If you stream or edit video, 32GB provides the necessary headroom to keep applications running smoothly without relying on slow virtual memory.
Will an SSD improve my frame rates in games?
An SSD primarily reduces boot times and load screens rather than directly increasing your average frame rate. However, it eliminates the stuttering caused by assets loading too slowly from a mechanical drive. Upgrading to an SSD is the single most noticeable performance improvement you can make for general system responsiveness.
Is it safe to delete everything in Disk Cleanup?
Yes, the files listed in Disk Cleanup are generally safe to remove. This includes old Windows Update files, temporary internet files, and error reports that the system no longer needs. Always review the Recycle Bin selection before confirming, as this permanently deletes files you may have placed there by mistake.
Do I really need to update my drivers constantly?
Graphics card drivers are essential for gaming performance and compatibility with new releases. Manufacturers like NVIDIA and AMD frequently release updates that optimize code for specific titles. Other drivers, such as audio or network, usually only require updates if you notice specific glitches or connection drops.
How do I know if I need a new PC?
If you have already upgraded to an SSD and added at least 16GB of RAM but still experience lag, your processor or graphics card is likely the bottleneck. When simple web browsing feels sluggish or games fail to run at playable settings on the lowest configuration, it is time to invest in a newer system.


