How to Lube Mechanical Keyboard Switches

Mechanical keyboard enthusiasts often seek ways to elevate their typing experience, and one effective method to achieve this is through the meticulous process of lubing switches. This simple yet impactful modification not only enhances the acoustics of your keyboard, making each keystroke sound more pleasing, but also significantly improves the tactile feedback, resulting in smoother actuation and a more satisfying typing sensation.
Moreover, for those who find the tactile bump in certain switches too prominent, lubing can subtly reduce it to a more comfortable level.
Understanding the Need for Lubing
Lubing mechanical keyboard switches is a nuanced task that serves multiple purposes. At its core, this process is about refining the keyboard’s performance and feel.
By applying a specialized lubricant to the switches, users can achieve a smoother keystroke, reduce noise levels, and enhance the overall typing experience.
Why Manually Lube Switches?
Manually lubing switches offers a level of customization and control that factory-lubed switches often lack. When you apply lubricant yourself, you have the ability to adjust the amount and distribution of lube according to your preferences.
This personal touch can significantly improve the smoothness of each keypress, eliminating scratchiness and reducing unwanted sounds like spring ping or stabilizer rattle. Moreover, manual lubing allows you to address specific issues in your keyboard, such as a particular switch that may be underperforming compared to the rest.
When to Use Factory-Lubed Switches
Factory-lubed switches, while not offering the same degree of customization as manual lubing, can be a convenient option for those who prefer a ready-to-use solution. These switches are typically lubricated during the manufacturing process with a standard amount and type of lubricant, ensuring a consistent, albeit generic, typing feel across the keyboard.
They are ideal for users who are not looking to invest time in the lubing process or for those who are satisfied with the out-of-the-box performance of their switches. It’s important to note, however, that the quality of factory lubing can vary significantly depending on the manufacturer and the specific model of the switch.
Tools and Materials Required
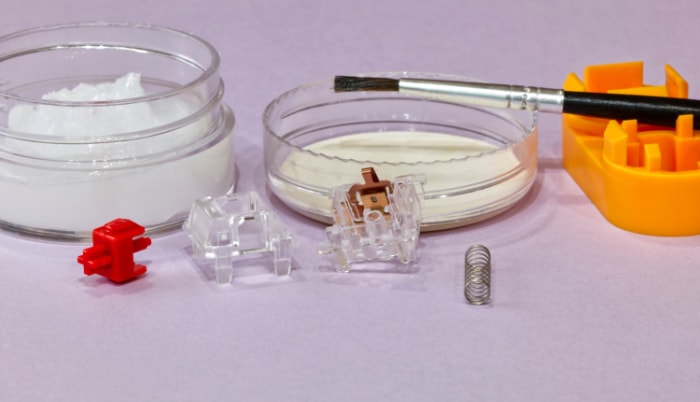
The process of lubing mechanical keyboard switches requires a specific set of tools and materials to ensure accuracy and efficiency. Each tool plays a vital role in disassembling, applying lubricant, and reassembling the switches.
Lubricant
Choosing the right lubricant is crucial for achieving the desired outcome. The type of switch you have – tactile, linear, or clicky – will determine the appropriate lubricant.
For tactile switches, a thinner lubricant like Krytox 105 is recommended, especially for beginners. It maintains tactility while providing smoothness. Linear switches, which benefit from a smoother glide, are best served with a thicker lubricant such as Krytox 205G.
It’s important to note that lubing clicky switches is generally not recommended, as it can alter their characteristic sound and feel.
Small Brush
A small brush is necessary for precise application of the lubricant. The size and softness of the brush ensure that the lube is evenly distributed across the small components of the switch, without leaving excess residue.
A #2 or 5mm sized paint brush is typically ideal for this purpose.
Switch Opener or Flathead Screwdriver
To access the internal components of the switches, you will need a switch opener or a small flathead screwdriver. A switch opener is specifically designed for this task, making it a more efficient and safer option for opening switches without damaging them.
Soldering Tools or Switch Puller
If your keyboard is not hot-swappable, you will need soldering tools to remove the switches from the PCB. For hot-swappable keyboards, a switch puller is sufficient to safely remove the switches without causing any damage.
Tweezers
Tweezers are helpful for handling small components such as springs and stems. They provide a precise grip and keep your fingers clean from lubricant.
Clean Workspace Area
Finally, a clean and organized workspace is essential for a smooth lubing process. It’s advisable to use a surface that’s easy to clean and to lay down newspaper or paper towels to prevent any mess.
An organized workspace ensures that small parts do not get lost and that the lubing process is efficient and enjoyable.
Step-by-Step Guide to Lubing Switches

Lubing mechanical keyboard switches is a detailed process that involves several steps, each requiring attention to detail and precision. From removing the switches from the keyboard to the final reassembly, this guide will walk you through each stage, ensuring that every component of the switch is adequately lubricated for optimal performance.
Removing the Switches from Your Keyboard
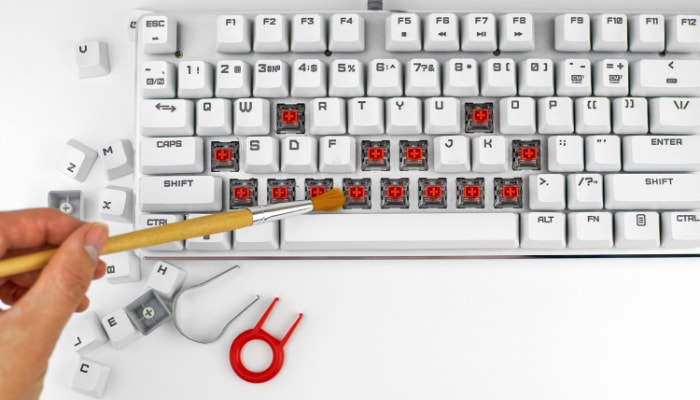
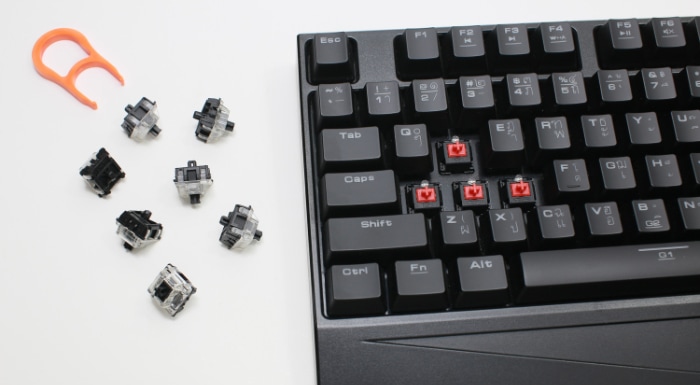
The first step in lubing your switches is to remove them from the keyboard. This process varies depending on whether you have a hot-swappable or a soldered keyboard.
For hot-swappable keyboards, simply remove the keycaps and use a switch puller to extract the switches. For soldered keyboards, you’ll need to dismantle the keyboard to access the PCB and desolder the switches.
This step requires patience and care to avoid damaging the keyboard or switches.
Opening the Switches
Once removed, the switches need to be opened to access the internal components. The easiest way to open your switches is with a switch opener, a tool specifically designed for this purpose.
Place the switch on the opener, aligning the tabs on the switch housing, and press down firmly. This action will loosen the top housing of the switch, allowing you to separate it into its four components: the bottom housing, top housing, spring, and stem.
A small flathead screwdriver or tweezers can also be used for this step, though it may be more time-consuming.
Lubing the Lower Housings
Begin by lubing the lower housings of your switches. Apply a small amount of lubricant to the side rails, center stem, and the floor of the switch housing.
Ensure that the lubricant is evenly spread without leaving any clumps or pools. For tactile switches, be cautious to avoid lubing the gold contact springs, as it can affect the switch’s tactility.
Lubing the Springs
There are two methods to lube the springs: individually or in bulk. For individual lubing, use tweezers to hold one end of the spring and apply a light coat of lubricant to both ends.
For bulk lubing, place all springs in a resealable plastic bag, add lubricant, and shake the bag to evenly distribute the lube. Both methods aim to achieve a light, even coating on the springs.
Lubing the Stems
Lubing the stems requires a careful application of lubricant to the side rails and the area of the stem that contacts the spring. If you are working with linear switches, you can also lube the legs of the stem.
However, for tactile switches, avoid lubing the legs to maintain the tactile bump.
Lubing the Upper Housing
Lubing the upper housing is an optional step, mainly focusing on the side rails where the stem slides. Similar to other components, ensure a light coating of lubricant without any visible clumps.
Reassembling and Testing
After the meticulous process of lubing each component of the mechanical keyboard switches, reassembling and testing them is crucial to ensure that the lubing process was successful. This final stage involves carefully putting the switches back together and verifying their functionality in the keyboard.
It is a critical step to confirm that the enhanced performance and feel of the switches are as expected.
Reassembling Your Switches
The reassembly process begins with placing the stem into the bottom housing, making sure that the orientation is correct, with the stem legs facing the gold contacts. Next, the top housing is aligned and gently pressed onto the bottom housing until a click is heard, indicating that the switch is securely assembled.
It’s essential to handle the components with care, especially the metal leaf, to avoid any misalignment or damage.
Once the switch is reassembled, a quick press can help confirm that it actuates correctly. If there’s any irregularity in the feel or sound, it might be necessary to disassemble and reassemble the switch, paying close attention to the correct placement of each part.
Installing Your Switches and Testing Them
With the switches reassembled, the next step is to install them back into the keyboard. For hot-swappable keyboards, this involves aligning the switches and pressing them into place by hand, ensuring the metal pins correctly match up with the hot-swap holes in the PCB.
For keyboards that require soldering, the switches need to be carefully soldered back onto the PCB.
After installation, it’s crucial to test each switch to ensure they are functioning correctly. This can be done using online keyboard testers, which help identify any non-responsive or incorrectly installed switches.
If a switch does not work as expected, reseating or reassembling it may be necessary to rectify the issue.
The final test involves typing and experiencing the improved feel and sound of the lubed switches. This step not only confirms the success of your efforts but also provides the satisfying realization of a job well done, enhancing your typing experience significantly.
Special Considerations

The art of lubing mechanical keyboard switches is not without its nuances. There are special considerations to keep in mind, especially when dealing with different types of switches and scenarios that require a tailored approach.
By paying attention to these details, one can ensure that the modifications to each switch are conducive to the desired outcome, be it in sound, feel, or performance.
Lubing Tactile Switches
Tactile switches present a unique challenge when it comes to lubing. The goal is to enhance their performance without compromising the tactile feedback that typists rely on.
It is generally advised to avoid applying lube to the legs of the stem and the leaf where the stem makes contact. This preserves the characteristic tactile bump. However, if the aim is to slightly soften the tactility, a minimal application on the legs can be beneficial.
The process requires a delicate balance to achieve the right feel, so proceed with caution and a light hand.
Handling Broken-In Switches
For switches that have already been broken in, whether through extensive use or a break-in machine, the lubing process is similar to that of new switches. The critical aspect to note here is the need to maintain the pairing of the worn-in stem and housing since they have conformed to each other’s shapes over time.
Mixing up the components can negate the benefits of the break-in period. It is recommended to lube these switches individually, ensuring the same components are reassembled together.
Cleaning Off Factory Lube
In some cases, you may decide to clean off the factory-applied lube before adding your own. This is typically done when the pre-applied lubricant is uneven or excessive.
The cleaning process can involve using isopropyl alcohol and a cotton swab or a simple wipe with a clean cloth. If the factory lube is minimal and evenly applied, it may be more practical to lube over it, adding a thin layer of your chosen lubricant to even out the coverage.
Adjusting for Sound and Feel
Switch lubing is often aimed at achieving a particular sound or feel. This subjective element means that the amount and type of lube applied can vary greatly from one individual to another.
Some may prefer a deeper sound, which can be achieved by using a thicker lubricant, while others may seek the lightest touch for speed and a soft sound. Testing and personal preference play significant roles in determining the right approach.
Conclusion
Lubing mechanical keyboard switches is a delicate process that blends art and science, offering a path to elevate the typing experience significantly. From selecting the appropriate tools and materials to the meticulous application of lubricant on various switch components, each step contributes to a more refined outcome.
The guide provided outlines the key stages of removing, opening, lubing, reassembling, and testing switches, ensuring even beginners can achieve professional results. Special considerations for tactile switches, broken-in switches, and factory lube removal highlight the customizable nature of this task, allowing individuals to tailor the feel and sound of their keyboards to their preferences.
Engaging in this process not only enhances the performance of your mechanical keyboard but also deepens the connection between the user and their typing instrument. With patience, precision, and the right approach, the transformation of a standard keyboard into a smoothly operating, acoustically pleasing device is not just achievable but also incredibly rewarding.


