How to Make Your Microphone Sound Better: Fix Echo and Noise

Crisp audio retains an audience faster than 4K video ever will. While viewers might forgive a grainy webcam, static or heavy echoes force them to leave immediately.
This reality often drives creators to panic buy expensive equipment because they assume professional sound requires a massive budget. That belief is false.
A modest microphone properly configured often outperforms high-end gear used incorrectly.
The secret lies in optimizing the “Signal Chain.” This systematic approach prioritizes your speaking technique and room acoustics before touching any software sliders.
By mastering these fundamentals, you can achieve broadcast quality and command attention without spending another dollar on hardware.
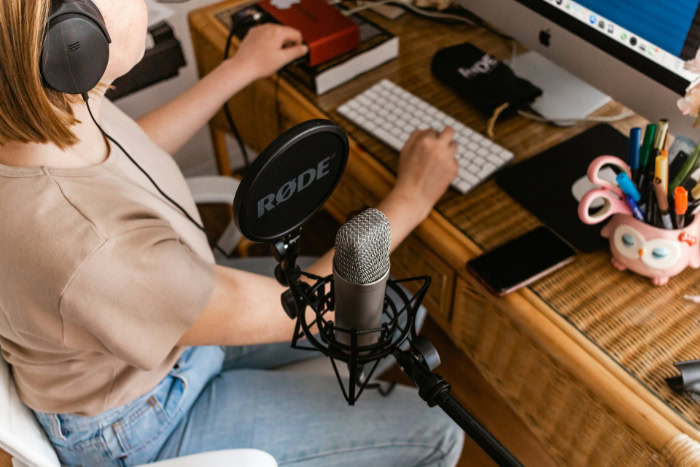
Mastering Microphone Technique and Positioning
Great audio begins with physical placement. Even a studio-grade microphone will sound thin or distant if it is too far away or pointing in the wrong direction.
Before adjusting any software settings, you must establish a consistent physical relationship with your hardware.
Utilizing the Proximity Effect
Distance significantly alters the tone of your voice. This phenomenon is known as the proximity effect.
When you move closer to a directional microphone, the low frequencies increase, creating a deeper and warmer “radio broadcast” sound. Moving further away strips this bass response, resulting in a thin and often echoey tone as the room sound takes over.
Finding the optimal distance requires balance. Getting too close can cause distortion or muddiness, while staying too far removes presence.
For most desktop setups, the ideal range sits between two to six inches from the mouth. This distance captures the fullness of the voice while maintaining clarity.
Orientation and Polar Patterns
Many beginners make the mistake of speaking into the wrong part of the microphone. You must identify if your device is a “front-address” mic, like most handheld dynamic mics, or a “side-address” mic, common with studio condensers like the Blue Yeti.
Speaking into the top of a side-address microphone will result in muffled, distant audio.
Check the polar pattern settings as well. For streaming, podcasting, or solo recording, the “Cardioid” pattern is essential.
This setting creates a heart-shaped pickup zone that captures sound directly in front of the mic while rejecting noise from the rear and sides. Selecting the wrong pattern, such as Omnidirectional, captures sound from the entire room and significantly lowers audio quality.
The Off-Axis Technique
Plosives are the harsh popping sounds caused by bursts of air hitting the microphone capsule, usually from words containing “P” or “B.” While pop filters help, positioning is the primary defense.
Instead of placing the microphone directly in front of your lips, try the off-axis trick.
Position the microphone slightly to the side of your mouth and angle it back toward you. This setup ensures that the bursts of air travel past the microphone rather than slamming directly into the diaphragm.
You still capture the direct sound of your voice, but the distracting pops and breathing noises are naturally reduced.
Controlling the Recording Environment

Your room acts as a second instrument in every recording. If the environment is noisy or reflective, the microphone will faithfully capture those flaws.
Treating the space around you is often more effective than upgrading your gear. You do not need a professional booth to achieve professional results; simple adjustments to your surroundings can drastically tidy up the signal.
Dampening Room Reverb
Sound waves bounce off hard surfaces like bare walls, glass windows, and tile floors. These reflections return to the microphone milliseconds later, creating a hollow, echoey sound that makes speech hard to understand.
To fix this, you need to break up these flat surfaces with soft materials.
Household items work surprisingly well for acoustic treatment. Placing pillows in the corners of the room, hanging heavy curtains over windows, or laying down a thick rug can absorb stray sound waves.
If you are recording in a closet or a small room, hanging clothes on a rack behind you prevents sound from bouncing off the rear wall and back into the mic.
Minimizing the Noise Floor
The noise floor refers to the constant low-level hum present in a recording when you are not speaking. Common culprits include computer fans, air conditioning units, and traffic from open windows.
While software can remove some of this later, it is always better to eliminate it at the source.
Turn off unnecessary appliances and close windows before hitting record. If your computer fans are loud, try to move the tower as far away from the microphone as possible.
Additionally, separate the microphone from mechanical noise sources. If you type while recording, move the keyboard behind the microphone's pickup pattern to ensure the clicking sounds are not the dominant audio feature.
Isolating Vibrations
Low-frequency rumbles often ruin recordings without the user realizing it until playback. These sounds travel through solid objects rather than the air.
Typing on a keyboard, tapping a foot, or bumping the desk sends vibrations up the mic stand and directly into the capsule.
A specialized shock mount is the best tool for this, but you can create a makeshift solution. Placing a folded towel, a thick mouse pad, or a piece of foam under the microphone stand acts as a decoupler.
This soft layer absorbs the energy from the desk before it reaches the microphone, resulting in a cleaner low end.
Optimizing System Input and Gain Levels
Once the physical setup is complete, you must calibrate how the computer receives the audio signal. Improper gain staging is the most common reason for distorted or quiet audio.
If the input level is too hot, the audio distorts; if it is too quiet, boosting it later introduces static hiss. Finding the middle ground protects the integrity of your recording.
Gain Versus Volume
It is vital to distinguish between gain and volume. Gain controls the sensitivity of the microphone and the strength of the signal entering the system.
Volume controls how loud that signal sounds coming out of your speakers or headphones. Turning up your headphone volume does not change the recording level.
The most dangerous error in this stage is “clipping.” This occurs when the gain is set so high that the audio waveform hits the maximum limit, often represented by a red zone on audio meters.
Clipping chops off the top of the sound wave, creating harsh, crackling distortion that cannot be fixed in post-production. It is always safer to record slightly quieter than to risk clipping.
Setting the OS Baseline
Before opening any streaming or recording software, set the raw input levels in your operating system. On Windows, navigate to the Sound Control Panel; on a Mac, go to Sound Preferences.
These sliders control the actual signal strength allowed into the computer.
Aim for a “healthy” signal level. When speaking at a normal volume, the input meter should bounce between -12dB and -6dB.
This range provides enough volume to be heard clearly but leaves “headroom” for unexpected loud noises. If you laugh or shout, the extra space prevents the signal from hitting 0dB and distorting.
Disabling System Enhancements
Operating systems often apply default processing intended for business conference calls, not high-quality content creation. Features like “Automatic Gain Control” (AGC), “Noise Suppression,” or “Echo Cancellation” can aggressively alter your voice.
AGC is particularly problematic because it constantly adjusts your volume. If you stop speaking for a moment, the system cranks up the gain, raising the background static.
When you speak again, the first syllable is deafeningly loud before the system drastically lowers the volume. For consistent, natural audio, navigate to your sound device properties and disable all these enhancements. You want the computer to capture the raw sound exactly as the microphone hears it.
Polishing Audio with Software Filters
Raw audio often sounds flat or captures unwanted frequencies that detract from the speaker's voice. Software filters act as the final polish to sculpt the sound, removing imperfections and enhancing clarity.
Most streaming software like OBS, as well as dedicated audio workstations, include these tools by default. Applying them in the correct order transforms a dull recording into a professional broadcast.
Equalization for Clarity
Equalization, or EQ, allows you to adjust the volume of specific frequencies within a sound. For voice work, the first step is cleaning up the low end.
A “High-Pass Filter” removes low-frequency rumble below 80Hz or 100Hz. This energy usually consists of air conditioning hum or desk vibrations that muddy the sound without adding anything useful to the vocal tone.
Once the low end is clean, you can focus on clarity. Human speech intelligibility lives in the “high-mid” frequencies.
Applying a gentle boost between 3kHz and 6kHz adds presence to the voice. This adjustment helps the vocal cut through background music or game audio, making the speaker sound closer and more articulate.
Compression for Consistency
A compressor acts as an automatic volume knob. Without it, your listeners might struggle to hear you when you whisper but scramble to lower the volume when you shout.
Compression narrows this dynamic range by automatically lowering loud sounds and boosting quiet ones. This process creates the rich, consistent “broadcast” sound associated with radio DJs.
Setting up a compressor involves two main controls: Threshold and Ratio. The Threshold dictates how loud the audio must be before the compressor turns on.
The Ratio determines how much the volume is reduced once that limit is crossed. A standard ratio of 3:1 or 4:1 effectively prevents audio spikes without making the voice sound unnatural or robotic.
Noise Suppression and Gates
Background noise is inevitable in a home studio, but software can hide it. A Noise Gate is the simplest tool for this. It mutes the microphone completely when the signal drops below a certain volume.
This eliminates the idle hiss of the room or distant traffic during pauses in speech. The gate opens instantly when you speak and closes again when you stop.
For more complex environments, AI Noise Suppression offers a superior solution. Tools like NVIDIA Broadcast or generic VST plugins use machine learning to identify and remove specific non-vocal sounds.
These algorithms can surgically remove keyboard clicks, dog barks, or computer fans while leaving the voice intact. This method is often cleaner than a standard gate, as it works even while you are speaking.
Essential Hardware Accessories

A microphone is only as good as the system supporting it. While the mic captures the audio, accessories ensure it stays in the right position and remains isolated from external disruptions.
Investing in these mechanical supports often yields a better return on investment than buying a more expensive microphone, as they solve physical acoustic problems that software cannot fix.
Boom Arms and Stands
Desktop stands often force users to hunch over to get close to the microphone, resulting in poor posture and restricted breathing. A boom arm solves this by suspending the microphone in the air.
This allows you to position the mic right in front of your mouth while sitting back comfortably in your chair.
Beyond comfort, a boom arm ensures consistent placement. Once clamped to your desk and adjusted, the microphone creates a fixed target.
You can swing it into position when you are ready to record and push it away when finished, ensuring you are always recording at the same distance and angle.
Pop Filters and Windshields
Plosives are fast bursts of air that occur when we pronounce words with hard consonants. Without protection, these blasts hit the microphone diaphragm and cause an unpleasant booming sound.
A pop filter is a mesh screen placed a few inches in front of the mic. It disperses the air so it loses momentum before reaching the capsule, allowing the sound to pass through cleanly.
Foam windscreens serve a similar purpose but fit directly over the microphone head. While slightly less effective at stopping heavy plosives, they are excellent for reducing wind noise from fans or air conditioners.
They also provide a layer of protection for the internal components, stopping saliva and moisture from corroding the delicate electronics over time.
Shock Mounts
Solid objects conduct sound very efficiently. If your microphone is screwed directly onto a rigid stand, any contact with your desk travels up the metal arm and into the recording.
Typing, setting down a drink, or nudging the table creates a loud, low-frequency thud.
A shock mount isolates the microphone from these vibrations. It suspends the mic in a cradle of elastic bands, physically disconnecting it from the stand.
When the desk or stand vibrates, the elastic absorbs the energy, leaving the microphone floating steadily in place. This accessory is critical for anyone who keeps their microphone attached to the same surface as their keyboard.
Conclusion
Great audio is rarely about the price tag on the box. It is about how you use what you have.
If you master mic placement, treat your room, and dial in your levels, you solve 80 percent of audio problems without spending a dime. The goal is not studio perfection but listener comfort.
Clear, consistent sound keeps people engaged, while expensive gear in a bad room just sounds like expensive noise. Before you upgrade your setup, upgrade your habits.
Try these adjustments first, and you will likely find your current microphone is more capable than you thought.
Frequently Asked Questions
Which microphone type is better for untreated rooms?
Dynamic microphones are generally better for untreated rooms. They are less sensitive than condenser mics and capture sound from a shorter distance, which helps reject background noise and room echo. If you have noisy neighbors or a loud fan, a dynamic mic is the safer choice.
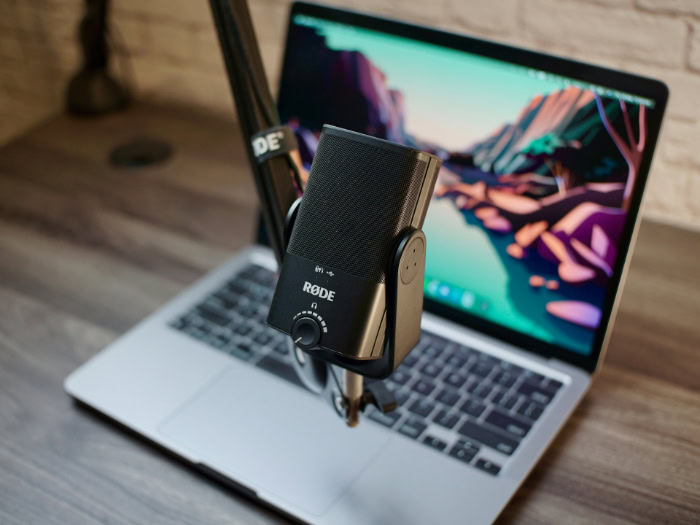
Do I need an XLR interface or is USB enough?
Modern USB microphones are perfectly capable for streaming and content creation. While XLR setups offer more flexibility and upgrade paths, a high-quality USB mic is plug-and-play and sounds excellent. Unless you need to record multiple microphones at once, a USB connection is sufficient for most users.
How do I remove keyboard clicking from my audio?
The best method is physical separation. Use a boom arm to lift the mic off the desk and position it closer to your mouth than the keyboard. You can also use a noise gate in your software to silence the mic when you are not speaking, or use AI suppression tools.
Is a pop filter actually necessary?
Yes, a pop filter is essential for clear speech. Without one, words starting with “P” or “B” send bursts of air that distort the microphone capsule. This creates unpleasant thumping sounds that ruin the recording. It is a cheap accessory that makes a massive difference in quality.
What is the best free software for audio improvement?
OBS Studio is the standard for live streaming and offers built-in filters like noise suppression and compression. For recording and editing, Audacity is a powerful, free tool that lets you apply equalization and normalization. Both programs have extensive community support and tutorials available online.


