How to Remove a Graphics Card: No-Fuss Technique

Removing a graphics card from your computer might seem daunting, but with the right guidance, it can be a straightforward and rewarding process. Whether you're upgrading to a more powerful model, addressing a repair, or simply performing routine maintenance, understanding how to safely and effectively extract this crucial component is a valuable skill for any tech enthusiast.
With attention to detail and a focus on best practices, you'll gain the confidence to handle this task like a pro, ensuring your computer's performance is maintained.
Preparatory Steps
Before diving into the physical task of removing a graphics card, it's crucial to prepare adequately. This preparation ensures not only the safety of the individual but also the protection of the computer and its components.
The following steps form the foundation of a successful removal process, setting the stage for a smooth and hassle-free experience.
Safety Measures
Ensuring your personal safety and the integrity of your PC's components is paramount. The first step is to ground yourself to prevent static electricity from damaging the delicate electronics.
Using an anti-static wristband or regularly touching a grounded metal object can serve this purpose effectively. Additionally, work in a clean, well-lit area to avoid accidental spills or misplacement of components.
Tools Required
Equipping yourself with the right tools is essential. A standard Phillips-head screwdriver is usually sufficient for most graphics card removals.
However, some cases or cards may require different types or sizes of screwdrivers. Keeping a small container or a magnetic tray can be helpful to keep screws and small parts organized and prevent loss.
System Shutdown
Properly shutting down your computer is the first step in the physical process. Turn off your computer and disconnect it from its power source.
It's also advisable to disconnect all peripherals (like keyboards, mice, and monitors) to avoid any obstruction during the removal process. Once everything is disconnected, open the computer case.
This may involve removing screws or releasing latches, depending on your PC case design.
Taking these preparatory steps seriously lays a strong foundation for the smooth removal of your graphics card. With safety measures in place, the right tools at hand, and the system properly prepared, you're now ready to proceed to the next phase of accessing and eventually removing the graphics card.
Accessing the Graphics Card
The next critical step in removing a graphics card involves accessing it within the computer's case. This phase demands careful handling and a keen eye for detail to ensure the safety of all computer components.
Let's break down the steps to successfully reach the graphics card.
Opening the Case
To begin, locate the screws or latches that hold the side panel of the computer case in place. These are typically found at the back of the case.
After removing the screws or releasing the latches, gently slide or lift off the side panel. It's important to handle the panel with care to avoid damaging any internal components or the panel itself.
Identifying the Graphics Card
Once the case is open, you'll see various components like the motherboard, power supply, and cooling fans. The graphics card is usually a large, rectangular component inserted into a PCIe slot on the motherboard.
It's often located near the back of the case and has monitor connections on its external bracket.
Handling Internal Components
Exercise caution when moving your hands inside the case. Ensure that you avoid touching other components unnecessarily, as this can cause damage due to static electricity or physical force.
Keep your movements gentle and deliberate to prevent disturbing the arrangement of cables or other delicate parts.
Properly accessing the graphics card is a crucial step in its removal. With the case open and the graphics card identified, you're well on your way to successfully removing the card from your system.
Detaching the Graphics Card

After successfully accessing the graphics card, the focus shifts to carefully detaching it from the motherboard. This stage requires precision and an awareness of the specific locking mechanisms and connections that secure the card in place.
Disconnecting Power Connectors
First, locate any power cables connected to the graphics card. These cables supply the additional power needed for the card to operate and are typically found at the top or side of the card.
Gently disconnect these cables by firmly gripping the connector (not the wires) and pulling straight out. Avoid using excessive force which can damage the connectors.
Unlocking the PCIe Slot
The graphics card is secured in a PCIe slot on the motherboard. This slot has a small lever or clip at one end that locks the card in place.
Carefully press down or slide this lever to release the card. Some slots may require a bit of maneuvering to unlock, so be patient and gentle to avoid breaking the locking mechanism.
Removing Screws and Brackets
Most graphics cards are also secured to the case with screws or a bracket at the back panel. Using your screwdriver, remove these screws and keep them safely as they will be needed when installing a new card or replacing the existing one.
After unscrewing, carefully detach any brackets holding the card in place.
Detaching the graphics card is a delicate process that involves managing small, but vital components. With the power connectors detached, PCIe slot unlocked, and screws removed, the card is now ready to be physically lifted out of the system.
Physical Removal of the Card
With the graphics card now detached from its power connections, PCIe slot, and the case, the final step is the physical removal of the card from the motherboard. This step must be approached with care and precision to avoid damaging the card or the motherboard.
Gently Lifting the Card
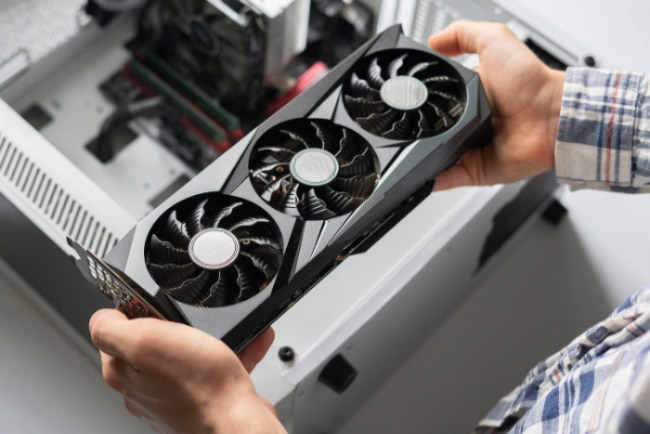
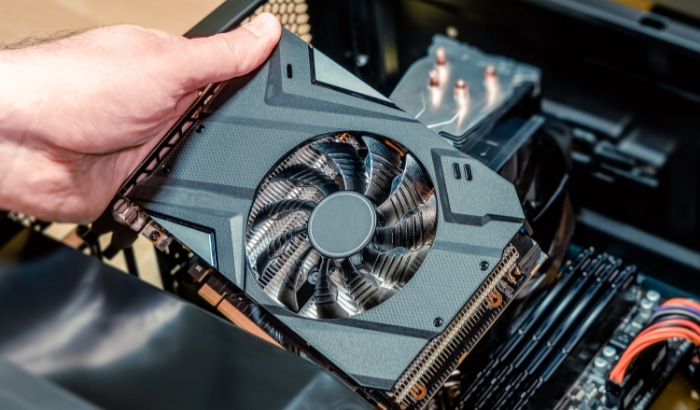
To begin removing the card, gently grasp it by its edges, avoiding any contact with the circuitry or components on the board. Apply even pressure as you lift the card straight up and out of the slot.
It's important to avoid angling or twisting the card during removal, as this can damage the PCIe slot or the card itself.
Avoiding Common Mistakes
There are a few common errors to be aware of during this stage. Ensure that all screws are removed and the PCIe slot lever is fully disengaged before attempting to lift the card.
Rushing this process or using excessive force can lead to bent pins or damaged slots. Another critical point is to handle the card by its edges and not by the cooler or other components attached to it.
The physical removal of the graphics card is a culmination of careful preparation and attention to detail in the previous steps. Successfully lifting the card out signifies the completion of the removal process, setting the stage for whatever next steps you have planned, be it an upgrade, a cleaning, or a repair.
Post-Removal Steps
Once the graphics card has been successfully removed, several important steps follow to ensure both the safety of the removed hardware and the readiness of your computer system for future use or upgrades.
Handling the Removed Card
Proper handling and storage of the removed graphics card are crucial. If the card will be reused or stored, place it in an anti-static bag to protect it from static damage.
Avoid placing the card on conductive surfaces and ensure it is stored in a safe, dry location, away from direct sunlight and extreme temperatures.
Case Management
After the card's removal, it's time to reassemble the computer case. Before doing so, this is an opportune moment to clean any dust that may have accumulated inside the case, especially in areas that are hard to reach when all components are in place.
After cleaning, carefully replace the side panel of the case, securing it with screws or latches.
Future Preparation
If you plan to install a new graphics card, now is a good time to ensure your system is prepared for the installation. This includes checking that your power supply is adequate for the new card, ensuring there is enough space for installation, and familiarizing yourself with the installation process.
If you're not installing a new card immediately, make sure to cover the open PCIe slot with a protective cover to prevent dust accumulation and potential damage.
The post-removal steps are as vital as the removal process itself. Proper handling and storage of the removed graphics card, efficient case management, and preparation for future upgrades are key to maintaining your computer’s performance and longevity.
With these steps completed, your system is now ready for its next phase, be it a hardware upgrade or routine maintenance.
Conclusion
Successfully removing a graphics card is a task that, while complex, can be accomplished with careful adherence to detailed instructions. From the initial safety protocols to the precise detachment and handling of the card, each step plays a critical role in ensuring the process is completed without harm to you or your equipment.
Post-removal, the attention to proper storage and case management maintains the integrity of both the removed component and the computer system. Whether the aim is to upgrade, clean, or perform repairs, the skills and understanding gained from this experience are valuable assets in the repertoire of any tech enthusiast.
It is through these meticulous processes that one can confidently manage and execute such tasks, leading to successful outcomes in personal computing hardware management.


