How to Safely Overclock Your GPU: Boost Without the Burn
Gamers and tech enthusiasts often seek ways to push their hardware to its limits, and GPU overclocking stands out as a popular method to boost performance. This process involves increasing the clock speed of a graphics card beyond its factory settings, potentially unlocking hidden power within your system.
However, overclocking isn't without risks, and safety should be the top priority for anyone considering this performance-enhancing technique. By carefully adjusting core clocks, memory speeds, and power limits, users can achieve significant gains in frame rates and overall graphical prowess.
Understanding GPU Overclocking
GPU overclocking is the process of increasing the clock speed and memory frequency of a graphics card beyond its default settings. By pushing the GPU to operate at higher frequencies, users can potentially achieve improved performance in graphics-intensive applications, such as gaming or video rendering.
Overclocking allows the GPU to complete more calculations per second, resulting in smoother gameplay, higher frame rates, and faster rendering times.
Benefits of Overclocking
The primary benefit of GPU overclocking is enhanced performance. In gaming, this translates to higher frame rates, smoother gameplay, and the ability to run games at higher settings without compromising on visual quality.
For content creators and professionals, overclocking can significantly reduce rendering times, allowing for faster project completion and improved productivity. Overclocking can also provide a cost-effective way to extend the lifespan of an older GPU, allowing it to keep pace with newer, more demanding applications.
Potential Risks and Challenges
While GPU overclocking offers tangible benefits, it also comes with potential risks and challenges. One of the primary concerns is increased heat generation.
As the GPU operates at higher frequencies, it consumes more power and produces more heat. Without adequate cooling, this can lead to thermal throttling, reduced performance, and even permanent damage to the GPU.
Overclocking also puts additional strain on the graphics card's components, potentially shortening its lifespan if done improperly.
Stability is another challenge associated with overclocking. Pushing the GPU beyond its factory settings can result in artifacts, crashes, or system freezes if the overclock is not stable.
Finding the right balance between performance gains and stability requires careful testing and incremental adjustments.
Moreover, overclocking may void the manufacturer's warranty, as it involves operating the GPU outside its specified parameters. It is crucial to understand the risks involved and proceed with caution when overclocking a GPU.
Preparing for a Safe Overclock
Before diving into the overclocking process, it is essential to lay the groundwork for a safe and successful experience. This involves assessing your GPU's overclocking potential, gathering the necessary software tools, and establishing a baseline performance to measure your progress against.
Assessing Your GPU's Potential
Not all GPUs are created equal when it comes to overclocking potential. Factors such as the GPU's architecture, cooling solution, and power delivery can impact its ability to handle increased clock speeds.
Some GPU models, particularly those designed for overclocking enthusiasts, may have more headroom for performance gains. It is important to research your specific GPU model and read reviews or forums to gauge its overclocking capabilities.
Additionally, consider the age and condition of your GPU, as older or heavily used cards may have less overclocking potential due to degradation over time.
Necessary Software Tools
To safely and effectively overclock your GPU, you will need a few essential software tools. First and foremost, a reliable overclocking utility is required.
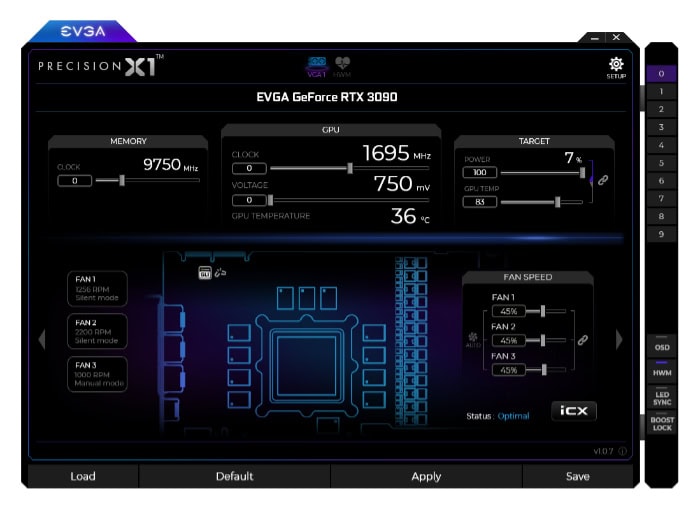
Popular options include MSI Afterburner, EVGA Precision X1, and AMD Radeon Software for AMD GPUs. These tools allow you to adjust clock speeds, memory frequencies, and power limits while monitoring temperatures and performance metrics.
In addition to an overclocking utility, it is crucial to have a robust stress testing and benchmarking tool. Programs like 3DMark, Unigine Heaven, or Furmark can help you assess the stability and performance of your overclocked GPU under heavy load.
These tools will be instrumental in identifying any instability or artifacts caused by aggressive overclocks.
Finally, monitoring software is essential for keeping an eye on your GPU's temperatures, clock speeds, and power consumption during the overclocking process. Tools like GPU-Z or HWiNFO provide detailed information about your GPU's performance and can help you ensure that your overclock remains within safe operating parameters.
Establishing a Baseline Performance
Before making any overclocking adjustments, it is important to establish a baseline performance for your GPU. This involves running benchmarks and recording the results at stock settings.
By doing so, you create a reference point to compare against once you start overclocking. This baseline will help you quantify the performance gains achieved through overclocking and ensure that your efforts are yielding tangible results.
To establish a baseline, run a series of benchmarks that are representative of your typical GPU workload. For gamers, this may involve running a few demanding games at your preferred settings and recording the average frame rates.
Content creators or professionals may focus on rendering benchmarks or application-specific tests. Be sure to record your GPU's clock speeds, temperatures, and power consumption during these baseline tests for future reference.
Step-by-Step Overclocking Process
The GPU overclocking process requires patience, attention to detail, and a methodical approach. By following a step-by-step procedure, you can safely push your graphics card to its limits while maintaining stability and avoiding potential damage.
Adjusting Core Clock
The core clock speed is the primary factor in determining your GPU's performance. Begin by opening your chosen overclocking software and locating the core clock adjustment slider.
Start with a modest increase of 25-50 MHz above the base clock. Apply this change and run a short benchmark or stress test to check for stability.
If the system remains stable, gradually increase the core clock in small increments of 10-15 MHz, testing after each adjustment.
Continue this process until you encounter artifacts, crashes, or system instability. When this occurs, reduce the core clock by 10-15 MHz to find the highest stable frequency.
It's important to note that different GPUs, even of the same model, may have varying overclocking headroom due to silicon lottery variations.
Tweaking Memory Clock
Once you've found a stable core clock, move on to adjusting the memory clock. The process is similar to core clock overclocking, but memory overclocking can sometimes yield more significant performance gains, especially in memory-intensive applications.
Start by increasing the memory clock by 50-100 MHz and run a benchmark. If stable, continue increasing in 25-50 MHz increments, testing after each change.
Memory instability often manifests as visual artifacts or performance degradation rather than outright crashes. If you notice these issues, dial back the memory clock until you achieve stability.
It's worth noting that some GPUs may experience reduced performance at higher memory clock speeds due to error correction. Always verify that increased clock speeds result in actual performance improvements through benchmarking.
Modifying Power Limits
Most modern GPUs have power limits that restrict their maximum performance to stay within thermal and power design constraints. By increasing the power limit, you can allow your GPU to draw more power and potentially maintain higher clock speeds for longer periods.
In your overclocking software, look for a power limit or TDP (Thermal Design Power) slider. Gradually increase this limit, typically in 5-10% increments.
Higher power limits can lead to increased temperatures, so monitor your GPU's thermals closely during this process. The goal is to find a balance between performance gains and acceptable temperatures.
Stress Testing and Stability Verification
After making adjustments to core clock, memory clock, and power limits, it's crucial to thoroughly test your overclock for stability. Short benchmarks are useful for quick checks, but extended stress tests are necessary to ensure long-term stability.
Run a combination of synthetic benchmarks (like 3DMark or Unigine Heaven) and real-world applications or games that you frequently use. Aim for stress test durations of at least 30 minutes to an hour.
During these tests, monitor your GPU's temperature, clock speeds, and watch for any signs of instability such as graphical glitches, crashes, or system freezes.
If you encounter any instability during extended testing, reduce your overclock settings slightly and retest. It's better to have a slightly lower, stable overclock than a higher, unstable one that could lead to crashes or potential data loss during actual use.
Remember that stability in one application doesn't guarantee stability in all scenarios. Test your overclock across a variety of workloads to ensure consistent performance and stability.
Additionally, consider running an overnight stress test to verify long-term stability if you plan to use your overclocked settings continuously.
Optimizing Performance and Safety
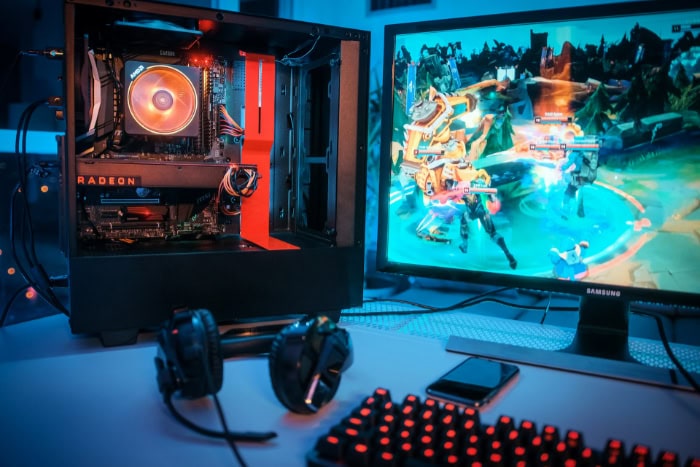
While overclocking your GPU can lead to significant performance gains, it's essential to prioritize safety and stability throughout the process.
Monitoring temperatures, finding the optimal balance between performance and stability, and exploring undervolting as a complementary technique can help you achieve the best results without compromising the longevity of your graphics card.
Monitoring Temperatures
Temperature management is crucial when overclocking your GPU. Higher clock speeds and increased power limits can generate more heat, which can potentially degrade performance and shorten the lifespan of your graphics card if not properly managed.
During the overclocking process, keep a close eye on your GPU's temperature using monitoring software like MSI Afterburner, GPU-Z, or HWiNFO. These tools provide real-time temperature readings, allowing you to ensure that your GPU stays within safe operating limits.
Ideal temperature ranges can vary depending on the specific GPU model, but as a general rule, aim to keep your GPU below 85°C under load. If you notice temperatures consistently exceeding this threshold, consider improving your case airflow, adjusting fan curves, or even upgrading your GPU's cooling solution.
Finding the Sweet Spot Between Performance and Stability
Achieving the highest possible overclock may be tempting, but it's important to strike a balance between performance gains and long-term stability. An overly aggressive overclock that pushes your GPU to its limits may result in instability, crashes, or even permanent damage.
When fine-tuning your overclock, aim for a combination of clock speeds and voltage settings that provide a noticeable performance boost while maintaining rock-solid stability. This sweet spot may require some trial and error, as each GPU has its own unique characteristics and limitations.
Consider running a variety of benchmarks and stress tests to assess performance and stability across different workloads. Don't rely solely on synthetic benchmarks; test your overclock with the games and applications you use most frequently to ensure a consistent and reliable experience.
Remember that a slightly lower, stable overclock is preferable to a higher, unstable one. Prioritize stability and longevity over squeezing out every last frame per second.
Undervolting as a Complementary Technique
Undervolting is a technique that involves reducing the voltage supplied to your GPU while maintaining or even increasing clock speeds. By optimizing the voltage-frequency curve, you can potentially achieve better performance, lower temperatures, and improved power efficiency.
Many modern overclocking tools, such as MSI Afterburner, offer undervolting capabilities alongside traditional overclocking features. To undervolt your GPU, you'll need to carefully adjust the voltage-frequency curve, finding the lowest stable voltage for each desired frequency point.
The process of undervolting requires patience and extensive testing to ensure stability across various workloads. Start by making small voltage adjustments and thoroughly test each change with benchmarks and real-world applications.
If you encounter instability, incrementally increase the voltage until you find the lowest stable point.
Undervolting can be particularly beneficial for laptop GPUs or systems with limited cooling capabilities, as it can help reduce heat output and improve overall efficiency. However, it's important to note that not all GPUs respond well to undervolting, and the potential gains may vary depending on the specific GPU model and silicon quality.
Troubleshooting and Fine-Tuning
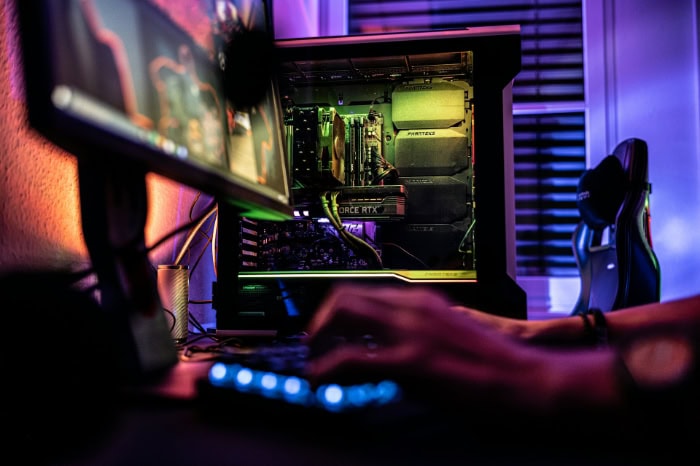
Even with careful preparation and a methodical approach, overclocking your GPU may present challenges along the way. Identifying and resolving common issues, benchmarking to measure performance gains, and making adjustments for long-term stability are essential aspects of the overclocking process.
Identifying and Resolving Common Issues
During the overclocking process, you may encounter various issues that can hinder stability or performance. Some common problems include:
- Artifacting: Visual glitches, such as flickering, unusual colors, or distorted images, can indicate an unstable overclock. If you notice artifacting, reduce your GPU's clock speeds or increase the voltage until the issue is resolved.
- Crashes and Freezes: Sudden crashes, freezes, or system reboots during stress testing or regular use can signify an unstable overclock. If you experience these issues, dial back your clock speeds or adjust voltage settings until stability is restored.
- Thermal Throttling: If your GPU reaches its maximum temperature threshold, it may automatically reduce clock speeds to prevent overheating. Ensure your cooling solution is adequate and consider adjusting fan curves or improving case airflow to maintain optimal temperatures.
- Driver Crashes: Overclocking can sometimes cause driver crashes, particularly if you're using outdated or incompatible drivers. Make sure you have the latest GPU drivers installed and consider rolling back to a previous version if issues persist.
If you encounter any of these issues, take a systematic approach to troubleshooting. Adjust one variable at a time, such as reducing clock speeds or increasing voltage, and retest stability after each change.
Keep detailed notes of your adjustments to help identify patterns and optimize your overclock.
Benchmarking and Measuring Performance Gains
Benchmarking is crucial for quantifying the performance gains achieved through overclocking. By running benchmarks before and after overclocking, you can objectively measure the impact of your adjustments and ensure that your efforts are yielding tangible results.
Use a combination of synthetic benchmarks and real-world applications to assess performance. Synthetic benchmarks, such as 3DMark or Unigine Heaven, provide standardized tests that stress your GPU and measure its performance under controlled conditions.
These benchmarks allow for easy comparison between different overclocking configurations and can help you track progress.
However, it's equally important to test your overclock with the games and applications you use regularly. Measure frame rates, frame times, and overall smoothness to gauge the practical impact of your overclock.
Keep in mind that performance gains may vary depending on the specific workload and the bottlenecks present in your system.
When comparing benchmark results, look for consistent improvements across multiple runs. Be cautious of results that seem too good to be true, as they may indicate instability or measurement errors.
Aim for a balance between noticeable performance gains and long-term stability.
Adjusting for Long-Term Stability
While your GPU may appear stable during initial stress testing, it's essential to monitor its performance and stability over an extended period. Some instabilities may only manifest after prolonged use or under specific workloads.
To ensure long-term stability, consider running extended stress tests overnight or while you're away from your computer. Use a variety of benchmarks and real-world applications to simulate different workloads and identify any potential issues.
If you encounter instability or performance degradation over time, make incremental adjustments to your overclock. Reduce clock speeds, increase voltage, or adjust power limits until you find a configuration that maintains stability across all workloads.
Remember that overclocking is an iterative process that requires patience and persistence. Don't be discouraged if you need to make multiple adjustments to find the optimal balance between performance and stability.
Regularly monitor your GPU's performance and temperatures, and be prepared to make further tweaks as needed.
Conclusion
GPU overclocking offers enthusiasts a powerful way to enhance their system's performance, but it requires careful consideration and execution. By following the steps outlined in this guide, you can safely push your graphics card to its limits while maintaining stability and longevity.
Remember to start with modest adjustments, monitor temperatures closely, and thoroughly test each change. Balancing performance gains with long-term reliability is crucial for a successful overclock.
While the process may seem daunting at first, patience and methodical fine-tuning will lead to rewarding results. Armed with the knowledge from this guide, you're now prepared to embark on your GPU overclocking journey, unlocking hidden potential and enjoying improved performance in your favorite games and applications.

