PopSocket Removal: Steps, Tips, and Tricks

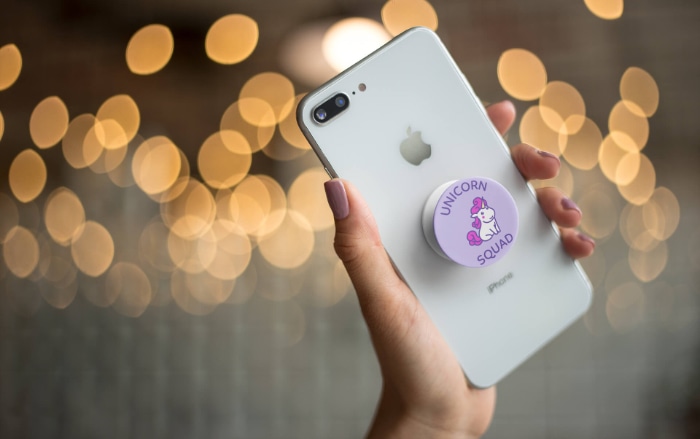
PopSockets, those versatile grips and stands that have become almost ubiquitous on the backs of smartphones, serve both aesthetic and functional purposes. With a myriad of designs, they not only allow users to express their personal style but also enhance the ease of handling our often-slippery devices.
Yet, there comes a time when you might want to replace an old design, fix a wobbly PopSocket, or simply enjoy a sleek phone surface once more. Understanding how to remove a PopSocket without causing damage is essential, and this guide aims to provide you with a detailed, step-by-step process to do just that.
Tools You Might Need
Choosing the right tools for removing your PopSocket can make the process smoother and prevent potential damage to your device. Here's a closer look at some tools and materials that will come in handy during the removal process.
Dental Floss or a Thin, Strong String
Dental floss, especially the un-waxed variety, offers an ideal combination of strength and thinness. This allows you to slide it beneath the PopSocket with ease, helping to separate the adhesive bond.
If dental floss isn't available, any thin yet strong string can serve as a substitute.
Hairdryer (Optional)
Sometimes, the adhesive holding the PopSocket can be quite stubborn. A hairdryer can help in such situations. The gentle heat emitted softens the adhesive, making the removal process simpler.
When using a hairdryer, remember to keep it at a safe distance to avoid overheating the phone.
Soft Cloth or Towel
After removing the PopSocket, you might find adhesive residue on your phone. A soft cloth or towel can help wipe away this residue. For tougher spots, dampen the cloth slightly with rubbing alcohol, ensuring you don't allow moisture to seep into the phone.
Steps to Remove a PopSocket
Journeying through the removal of a PopSocket can be straightforward when you follow a systematic approach. Here are the steps to guide you through this process, ensuring minimal risk of damage to your device.
Ensure Your Phone is Secure
Before starting, placing your phone on a flat and soft surface is essential. This precautionary step ensures that your phone remains stable and is protected from potential scratches or damages during the PopSocket removal process.
Loosen the PopSocket Using Heat (Optional)
If you've been using your PopSocket for a while, the adhesive might have strengthened its bond with the phone's surface. In such cases, using a bit of gentle heat can be beneficial.
With a hairdryer set to low or medium heat, direct the airflow towards the edge of the PopSocket for about 15 seconds. This should make the adhesive more pliable and easier to work with.
Using Dental Floss or String
Once you've prepared the phone and optionally applied heat, take a piece of dental floss or a thin, strong string. Slide it carefully underneath one edge of the PopSocket. Gently move the floss or string in a sawing motion, working your way around the PopSocket.
This action will help to detach it from the phone's surface. Ensure that you apply steady pressure and move slowly to avoid any sudden jerks that might harm your device.
Clean the Phone Surface
After the PopSocket is off, there's a possibility of some adhesive residue remaining on the phone. Using a soft cloth or towel, gently rub the area to clean it.
If you find the residue stubborn, you can dampen the cloth with a bit of rubbing alcohol. However, be cautious not to let any moisture enter the phone's openings.
Tips and Tricks
While the steps to remove a PopSocket are straightforward, there are some nuances that can make the process even smoother. Here are a few insider tips and tricks that can come in handy, ensuring a seamless removal experience.
Prioritize Patience and Gentle Movements
Rushing the process or using excessive force can lead to unwanted outcomes. By being patient and applying gentle, steady pressure, you reduce the risk of damaging your device or the PopSocket.
Consider Reusability
If you're planning to reuse the PopSocket on another device or location, it's crucial to retain its adhesive properties. When removing, be cautious not to touch the sticky side too much, as oils from your fingers can degrade its stickiness.
Heat Sparingly
While using a hairdryer can be beneficial, it's vital not to overdo it. Excessive heat can not only weaken the adhesive too much but might also harm the phone. Always keep the hairdryer at a safe distance and move it around to avoid focusing on one spot for too long.
Test with Alcohol Swabs
If you don't have rubbing alcohol on hand, alcohol swabs can be an excellent alternative for cleaning adhesive residue. They are less messy and provide a controlled way to tackle stubborn spots.
Storage Matters for Reuse
If you wish to reuse your PopSocket later, consider storing it with the adhesive side protected. Placing it on a clean plastic wrap or inside a zip-lock bag can help retain its tackiness for future use.
Alternative Removal Methods
While the previously mentioned steps are the most commonly used techniques to remove a PopSocket, there are alternative methods that individuals have found effective. Exploring these alternative approaches can offer a solution that might be more suitable for specific circumstances or preferences.
Commercially Available Adhesive Removers
There are several products on the market specifically designed to tackle stubborn adhesives. If you're struggling with residue, consider using one of these removers.
Always ensure you read the label for compatibility with your phone's material and follow the instructions carefully.
Using a Plastic Card
If you have an old credit card or any thin plastic card at hand, it can serve as a useful tool. Start by sliding the edge of the card under one side of the PopSocket, gently prying it off.
This method can be especially helpful if you find the string or floss method challenging.
Twist and Pull
Some users have found success by gently twisting the PopSocket in a clockwise or counter-clockwise direction before attempting to pull it off. This slight rotation can help in breaking the adhesive bond, making the removal process more effortless.
Warm Water Soak
For those who prefer not to use a hairdryer, submerging the PopSocket (while it's still attached to the phone case) in warm water for a few minutes can help soften the adhesive. After soaking, try peeling off the PopSocket.
However, this method is best suited for waterproof phone cases to avoid any potential water damage.
Natural Oils
Certain natural oils, such as eucalyptus or tea tree oil, can weaken adhesive bonds. By applying a few drops to the edges of the PopSocket and allowing it to sit for a few minutes, the removal process might become more straightforward.
Remember to clean your phone thoroughly afterward to remove any oil residues.
Conclusion
Removing a PopSocket doesn't have to be a daunting task. With the right tools, techniques, and a dash of patience, you can seamlessly detach it while preserving the integrity of both the device and the PopSocket.
Whether you choose the primary steps or experiment with alternative methods, the key is to approach the process with care. By understanding the nuances of each method and being attuned to the needs of your device, you ensure a successful and damage-free removal.
Always remember, the goal is not just to take off the PopSocket, but to also maintain the pristine condition of your cherished device.


