
Can I Upgrade My CPU Without Changing Motherboard?
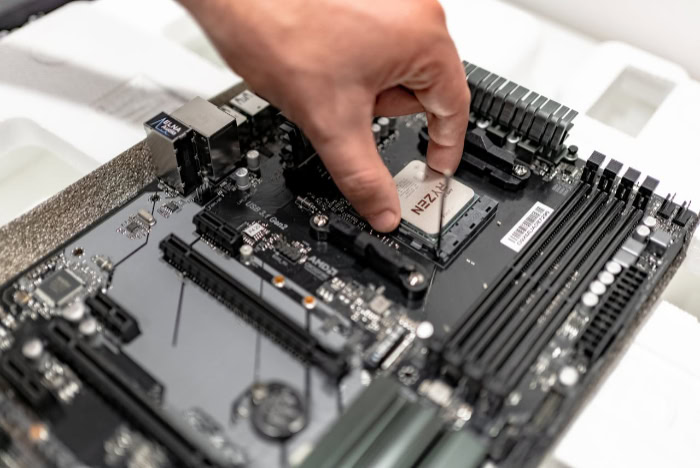
Upgrading a computer often feels like an expensive task, but swapping just the processor can breathe new life into your system for a fraction of the cost. This targeted approach saves money and avoids the tedious hassle of rebuilding your entire PC from scratch.
While a direct swap is highly appealing, the process requires careful planning. Success depends on specific physical connections, system power limits, and motherboard firmware updates that allow different generations of hardware to communicate.
Key Takeaways
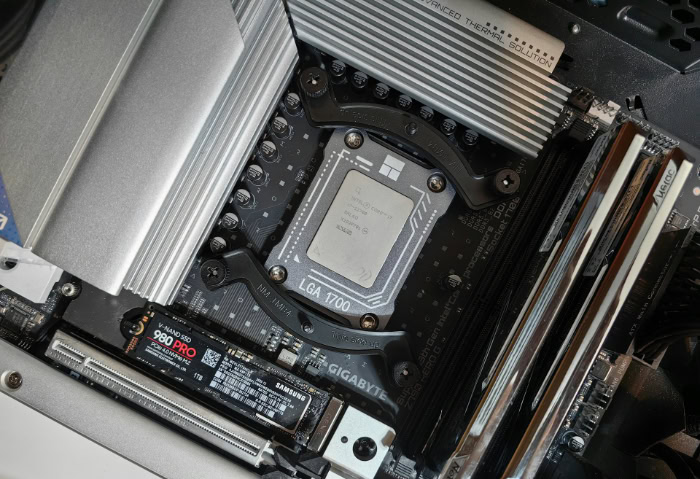
- Physical socket compatibility is the absolute first requirement, meaning a CPU must match the motherboard’s exact socket type, such as Intel’s LGA 1700 or AMD’s AM5.
- Even with a matching socket, the motherboard’s chipset must support the processor generation, which can be verified using the manufacturer’s official CPU Support List.
- Outdated motherboard firmware will prevent a system from booting with a newer CPU, requiring a BIOS update using the older processor before installing the upgrade.
- Upgrading to a higher-wattage CPU requires verifying that your current motherboard’s Voltage Regulator Modules (VRMs) and power supply unit (PSU) can safely handle the extra electrical load.
- Motherboard limitations can bottleneck performance, forcing newer processors to run on slower memory or older PCI Express standards like PCIe 3.0 instead of PCIe 4.0 or 5.0.
The Foundations of CPU and Motherboard Compatibility
Upgrading a processor starts with assessing how well it coordinates with your existing motherboard. Since hardware components must be physically and logically compatible to function, you cannot simply purchase any processor on the market and expect it to work.
You need to verify that your current motherboard can accommodate, power, and speak to the new hardware before making a purchase.
CPU Socket Architecture
The CPU socket is the dedicated physical interface on the motherboard designed to hold and connect the processor. This socket houses hundreds or thousands of tiny pins or contact points that transmit electrical signals between the processor and the rest of the computer.
Intel and AMD use different physical configurations. Intel commonly relies on Land Grid Array (LGA) sockets, where the delicate pins are located directly inside the motherboard socket, and the processor itself has flat contact pads.
In contrast, AMD historically favored Pin Grid Array (PGA) sockets for platforms like AM4, where the pins are on the underside of the processor, though newer AMD platforms like AM5 have transitioned to LGA configurations.
Because these physical layouts differ dramatically in shape, pin count, and pin arrangement, a processor must physically fit the exact socket on your motherboard. A processor designed for an LGA 1700 socket cannot physically fit or connect to an AM4 or LGA 1200 socket, making physical alignment the absolute first rule of processor selection.
Motherboard Chipset Generations
The chipset acts as the communications hub of the motherboard. It manages the flow of data between the processor, system memory, graphics cards, storage drives, and other peripherals.
Even if a new processor physically fits into your motherboard socket, it may not work if the chipset does not support it. Chipset generations dictate which specific processors are compatible.
For example, AMD’s AM4 socket spans multiple generations of processors, but an older B350 chipset might not support a newer Ryzen 5000 series chip without a specific firmware update, or it may not support it at all, even though they share the exact same physical socket.
Manufacturer CPU Support Lists
To avoid guesswork, you should consult the motherboard manufacturer’s official CPU Support List, sometimes called the Qualified Vendor List. This document lists every single processor model that the manufacturer has tested and verified to work on that specific motherboard.
You can find this document by searching for your motherboard’s exact model number on the manufacturer’s website. Once you access the support or download page for your specific motherboard, look for a tab labeled “CPU Support,” “Support,” or “Compatibility.” This table will tell you not only which processors are compatible but also the minimum firmware version required for each processor to boot successfully.
The Role of BIOS and Firmware Revisions
Physical compatibility is only half of the equation; your motherboard must also be programmed to recognize the new processor. Motherboards rely on basic software to communicate with components right at startup.
If this system software is outdated, the board will not understand how to interact with a newer chip, even if it fits perfectly in the socket.
The Purpose of BIOS in Hardware Recognition
The basic input/output system (BIOS), or its modern successor UEFI, acts as the bridge between the motherboard hardware and the processor during startup. It initializes hardware components, runs self-tests, and prepares the system to load your operating system.
If you install a newer processor on an older motherboard, the existing BIOS may lack the necessary microcode to identify and run the new chip. When this happens, the system will fail to complete its power-on self-test.
You will likely see blank screens, error lights, or hear warning beeps, as the motherboard cannot communicate with the unrecognized processor.
Pre-Upgrade Firmware Preparation
To resolve this, you must perform a BIOS update before removing your older, functioning processor. Since you need a working computer to access and update the BIOS, the old CPU must remain installed to complete the flashing process.
The update process involves visiting the motherboard manufacturer’s official support page, finding your motherboard model, and downloading the correct BIOS file. You then copy this file to a formatted USB drive, restart your computer to enter the BIOS menu, and locate the built-in utility (such as EZ Flash or M-Flash) to install the update.
System Recovery Protocols
Some motherboards feature a safety tool often called BIOS Flashback. This feature allows you to update the firmware using a USB drive and a dedicated button on the rear panel, without needing a compatible processor, memory, or graphics card installed.
This is highly useful if you purchase a motherboard that does not support your new CPU out of the box.
During any firmware update, preventing power loss or system interruption is vital. A sudden power failure, unplugged cord, or manual shutdown while the BIOS is flashing can corrupt the firmware, potentially rendering the motherboard completely unusable.
Power Delivery and Thermal Management Limits

Beyond physical fit and firmware support, a successful processor swap requires matching the physical limits of your motherboard and power supply. A more powerful processor draws more electricity and generates more heat than its predecessor.
Ensuring that your system can safely handle these increased demands is critical for long-term stability.
Voltage Regulator Module Capacity
The Voltage Regulator Module (VRM) sits on the motherboard, usually near the processor socket, and is responsible for converting high-voltage power from the power supply into the precise, lower voltage that the processor requires.
Budget motherboards often feature smaller, uncooled VRMs designed for low-power processors. If you pair a high-end, power-hungry processor with a budget motherboard, the VRMs will work under heavy stress, causing them to overheat.
This overheating triggers thermal throttling, which slows down your processor to prevent damage, or causes sudden system crashes and instability.
Cooler Compatibility and Thermal Design Power
Every processor has a Thermal Design Power (TDP) rating, measured in watts, which indicates the maximum amount of heat the processor is expected to generate under normal workloads. You must compare the TDP of your new processor with that of your old one.
If the new processor has a higher TDP, your existing CPU cooler may not be capable of dissipating the extra heat. Running a high-TDP processor with an inadequate cooler will cause temperatures to rise rapidly, leading to loud fan noise, reduced performance, and automatic shutdowns to protect the silicon.
Power Supply Unit Requirements
Upgrading your processor can significantly increase the total power consumption of your entire system. You must calculate if your existing power supply unit (PSU) has enough remaining capacity to handle the increased load, especially when both the processor and graphics card are running at full capacity.
Review your PSU’s wattage rating and verify that it has the appropriate power connectors. High-end processors often require additional 8-pin or 4-pin CPU power cables connected directly to the motherboard, which budget or older power supplies might not offer.
Performance Factors and System Bottlenecks

Upgrading your processor can deliver a massive boost in processing power, but other system components may restrict its ultimate speed. An older motherboard can create hardware limitations that prevent a new CPU from performing at its absolute best.
Identifying where these bottlenecks might occur allows you to manage performance expectations and choose components that work together harmoniously.
PCI Express Generation Constraints
Modern processors are designed to support newer PCI Express (PCIe) standards like PCIe 4.0 or PCIe 5.0, which offer massive data transfer speeds. However, if you install a new CPU into an older motherboard that only supports PCIe 3.0, the system will drop down to the older standard.
The new processor is forced to communicate at the slower speed of the motherboard.
This bandwidth limitation can impact modern high-performance graphics cards and NVMe solid-state drives. While modern graphics cards might only see a minor performance drop on PCIe 3.0, high-speed Gen 4 or Gen 5 SSDs will have their read and write speeds cut in half, preventing you from utilizing the storage speeds you paid for.
Memory Speed and System Stability
A processor relies heavily on system memory (RAM) to temporarily store and access data. Although a new processor might support exceptionally fast RAM speeds, your motherboard’s physical traces and motherboard BIOS limits can restrict how fast your RAM can actually run.
Attempting to force higher memory speeds on a motherboard that does not support them often results in boot failures, random crashes, and general system instability.
Memory generation compatibility is another rigid physical boundary. Motherboards are built with memory slots dedicated to either DDR4 or DDR5 RAM; these slots are not interchangeable due to different physical notch placements and electrical requirements.
When upgrading your CPU, you must ensure your processor supports the memory generation built into your motherboard, as some newer CPUs only support DDR5, while older boards are strictly DDR4.
Graphics Card and Processor Balance
To get the most value out of your upgrade, the processing power of your CPU should match the performance potential of your graphics card (GPU). If you pair an incredibly fast new processor with an ancient, low-end graphics card, the GPU will struggle to keep up, creating a bottleneck where your processor sits idle waiting for the graphics card to finish its work.
Balancing these components ensures that neither part limits the other, providing a smooth experience during gaming or rendering tasks.
The CPU Replacement Procedure and System Verification

Once you have verified compatibility, updated your BIOS, and checked your power limits, you are ready to perform the physical swap. Replacing a processor is a straightforward process, but it requires precision and a careful hand to avoid damaging delicate computer parts.
Following a structured, step-by-step approach ensures a smooth and risk-free upgrade.
Pre-Install Preparation Steps
- Gather all required tools and materials, including high-quality thermal paste, high-percentage isopropyl alcohol, a coffee filter or microfiber cloth, and the correct screwdriver for your CPU cooler.
- Set up anti-static precautions by wearing an anti-static wrist strap or regularly touching a grounded metal object, such as your computer’s power supply casing while it is plugged in but switched off.
- Back up all critical files and system data to an external drive or cloud storage as a safety precaution before making any physical hardware changes.
Physical Hardware Swap
- Shut down the computer completely, unplug the power cable from the wall, press the power button to drain any remaining electricity, and lay the PC case flat on its side.
- Disconnect the CPU fan or pump cable from the motherboard, unscrew the CPU cooler, and gently twist it back and forth to break the seal of the old thermal paste before lifting it away.
- Use a microfiber cloth or coffee filter lightly dampened with isopropyl alcohol to thoroughly clean the old thermal compound off the underside of the cooler block and the old processor.
- Release the metal tension arm on the CPU socket, carefully lift the old processor straight out by its edges, and store it in an anti-static bag.
- Align the gold triangle or notches on the corner of the new processor with the corresponding markings on the motherboard socket, gently lower the CPU straight down into place, and secure the metal tension arm.
- Apply a small, pea-sized drop of new thermal paste to the center of the installed processor’s integrated heat spreader.
- Place the CPU cooler back over the processor, tighten the screws in a cross pattern to ensure even pressure, and reconnect the CPU fan or pump power cable to the motherboard.
Post-Upgrade Stability Tests
- Plug in the power cable, turn on the computer, and press the designated key to enter the BIOS immediately.
- Verify that the BIOS correctly displays the new processor model, core count, and operating speeds, and check that your RAM profile is enabled.
- Boot into your operating system and open hardware monitoring software, such as HWMonitor or HWiNFO, to observe idle processor temperatures.
- Run a system stress test using software like Cinebench or Prime95 for at least ten minutes while monitoring temperatures to ensure the cooler is performing properly and the system remains stable under load.
Conclusion
Upgrading your CPU without replacing the motherboard relies on verifying physical socket compatibility, chipset support, a compatible BIOS version, and adequate power delivery. Checking the manufacturer’s support list and upgrading the BIOS beforehand are vital steps to ensure the new hardware boots safely.
If your current motherboard meets these criteria and supports your desired processor, a CPU-only upgrade is an excellent, cost-effective way to boost performance. However, if your motherboard restricts you to older PCI Express speeds, requires slower memory, or lacks the power delivery needed for high-end chips, investing in a new motherboard alongside a new processor is the more sensible path for future growth.
Frequently Asked Questions
Can I put any CPU into my motherboard as long as it physically fits?
No, physical fit does not guarantee compatibility because the motherboard’s chipset and BIOS must also support the specific processor. Even if a CPU matches the physical socket, an incompatible chipset cannot route the data correctly. Always check your motherboard manufacturer’s official support list before buying a new processor.
What happens if I install a new CPU without updating my BIOS first?
Your computer will likely fail to boot and display a black screen because the older motherboard software cannot recognize the new chip. The motherboard needs the updated microcode from a BIOS update to communicate with newer processors. You must reinstall your old CPU to perform this update.
How do I know if my power supply is strong enough for a new CPU?
You can determine if your power supply is adequate by adding up the wattage requirements of your new processor, graphics card, and other hardware components. Compare this total to your power supply’s maximum capacity. Ensure your power supply also has the necessary 8-pin power connectors required by newer motherboards.
Will a new processor work with my old CPU cooler?
Your old cooler will work only if it physically fits the motherboard socket and has a high enough thermal design power rating to handle the new CPU’s heat. If your new processor generates more heat than your old one, your old cooler may struggle. This can cause overheating and performance slowdowns.
Can I use DDR5 RAM on my older DDR4 motherboard after upgrading my CPU?
No, you cannot use DDR5 RAM on a DDR4 motherboard because the physical slots and electrical connections are completely different. Memory slots are built strictly for one generation of RAM. If you want to use DDR5 memory, you must purchase a newer motherboard that natively supports it.
About the Author: Julio Caesar


