Common PC Building Mistakes and How to Avoid Them
Building a custom PC is one of the most exciting projects for tech enthusiasts, offering the chance to tailor a machine to your exact needs. However, while the process can be deeply rewarding, it also comes with its fair share of potential pitfalls.
A single error during assembly can lead to frustrating delays, suboptimal performance, or even damaged components.
To avoid these setbacks, it's important to be aware of common mistakes that many builders, both novice and experienced, tend to make. From selecting incompatible parts to overlooking proper cooling, each step requires careful attention.
Component Compatibility
Choosing the right components for a custom PC is more than just selecting the latest and greatest hardware. One of the most common mistakes among builders, especially first-timers, is overlooking compatibility between parts, which can lead to major frustration.
Ensuring that all parts work together is critical to avoid performance issues or, worse, causing damage to your new hardware.
CPU and Motherboard Compatibility
The relationship between the CPU and motherboard is arguably the most important in any PC build. These two components must be compatible with each other to function properly.
Every CPU is designed to fit into a specific socket type on the motherboard. For example, Intel CPUs use different socket types than AMD processors. Even within the same brand, socket types may vary depending on the generation.
Intel’s 12th and 13th-generation CPUs, for instance, use the LGA 1700 socket, while AMD’s Ryzen 7000 series requires an AM5 socket.
Installing a CPU into a motherboard with an incompatible socket will result in serious issues—at best, the build won't function, and at worst, you might damage both components.
Aside from the socket type, you also need to check motherboard chipset compatibility. A chipset is essentially the motherboard’s control hub, and it determines the CPU features and capabilities that the system can use.
Higher-end chipsets offer support for advanced features like overclocking, PCIe 5.0, or faster RAM speeds, so it's important to match the CPU’s potential with a compatible chipset for optimal performance.
Checking the motherboard’s official documentation or manufacturer’s website will help confirm which CPUs are supported by a specific board.
RAM Compatibility
RAM plays a vital role in overall system performance, but not all RAM is compatible with every motherboard. The first step in choosing the right RAM is ensuring that it matches the correct type.
For example, modern motherboards are designed to support either DDR4 or DDR5 RAM, but not both. Trying to install DDR4 RAM into a motherboard that only supports DDR5 (or vice versa) will result in a failed build.
In addition to the type, you also need to consider the RAM’s speed and capacity. While most motherboards can support a range of memory speeds, it’s important to check the maximum supported speed.
If you install RAM that exceeds the motherboard’s speed limits, the system might default to a lower speed, thereby wasting the potential of your faster RAM modules. On the other hand, installing slower RAM may bottleneck the system, reducing overall performance.
Motherboard documentation will also specify the maximum amount of RAM it can support. Exceeding this capacity will prevent the system from recognizing all the installed memory.
For optimal results, always check the motherboard’s memory compatibility list, which shows tested and supported RAM models and speeds.
GPU and Case Fit
The GPU (graphics card) is one of the most physically imposing components in a PC build, and its size can often be underestimated. Modern GPUs, especially higher-end models, can be large and bulky, requiring ample space within the case.
One common mistake many builders make is purchasing a case that’s too small to fit their GPU.
Before purchasing a GPU, always check its dimensions—length, width, and height—and compare them to the internal space available in your chosen case.
Most case manufacturers provide specifications that include the maximum supported GPU length, which makes it easier to avoid compatibility issues.
Another aspect to consider is the GPU’s cooling setup, especially if you're going with a high-performance model.
Some GPUs are designed with large cooling solutions that take up multiple expansion slots, so it's important to ensure that your case has enough clearance and that airflow won’t be restricted by other components.
Additionally, if you're planning on installing multiple GPUs, make sure your motherboard has enough PCIe slots and that there's adequate space between them to prevent overheating.
Lastly, always check that your power supply can provide sufficient power for the GPU, as high-end cards can have significant wattage requirements.
Power Supply Selection
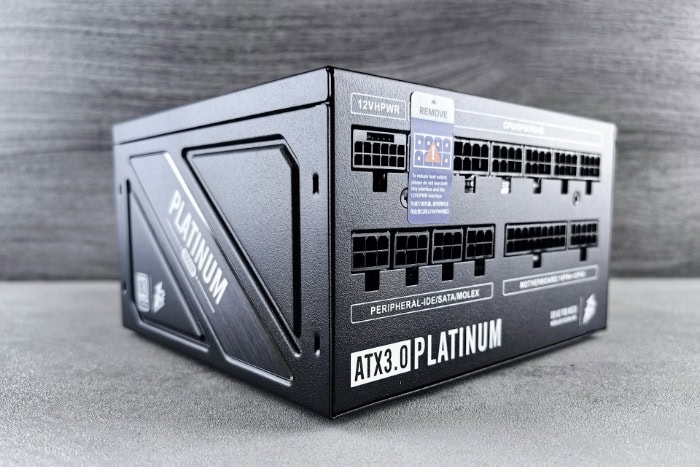
The power supply unit (PSU) is one of the most vital components of any PC build, yet it often doesn’t receive the attention it deserves. A poor PSU choice can lead to system instability, hardware damage, and even complete failure.
Ensuring that you select the right PSU is not just about providing enough power to your components, but also about choosing a reliable unit that can operate efficiently and support future upgrades.
Underestimating Power Requirements
One of the most frequent mistakes builders make is underestimating the total power requirements of their system. Every component in your build—CPU, GPU, motherboard, RAM, fans, storage devices—draws a certain amount of power.
If the PSU doesn’t have enough wattage to handle all of these components, your system may experience random shutdowns, crashes, or an inability to boot.
To avoid this, it’s crucial to calculate the total power consumption of your system. Many online power supply calculators can help estimate the wattage your build will require.
Simply input the details of each component, and the calculator will provide a recommended wattage. However, it’s important to leave some overhead when selecting your PSU.
For example, if your system needs 450 watts, choosing a PSU with 550 or 600 watts allows for additional headroom, making your build more stable and allowing room for future upgrades.
Another factor to consider is the GPU’s power demand. High-end GPUs can draw a significant amount of power, especially under load.
Some models may require dedicated power connectors, so make sure the PSU you choose has the necessary cables to supply power directly to the GPU.
Choosing Low-Quality PSUs
Not all power supplies are created equal, and opting for a cheap, no-name PSU can be one of the most damaging mistakes you make in a PC build. While it may be tempting to save money by selecting a low-cost unit, doing so can compromise the entire stability of the system.
Cheap PSUs often lack important safety features like overvoltage protection, which can prevent damage to your components in case of a power surge or failure.
Low-quality PSUs also tend to use subpar components, which can degrade over time and lead to issues like poor voltage regulation, excess heat generation, or failure to deliver consistent power.
In the worst cases, a failing PSU can damage other parts of your system, such as the motherboard, GPU, or storage drives.
When selecting a PSU, it’s best to stick with well-known, reputable brands that have been proven to produce reliable and high-quality power supplies.
Brands like Seasonic, Corsair, and EVGA are known for their reliable units and often come with long warranties, ensuring you’re covered in case of defects.
Investing in a quality PSU may cost more upfront, but it will save you from costly repairs or replacements down the road.
Ignoring Efficiency Ratings
PSU efficiency is another critical factor that impacts the overall performance and longevity of your build. The efficiency of a power supply refers to how effectively it converts AC power from the wall into DC power that your PC components can use.
A more efficient PSU generates less heat and uses less electricity, which can lead to lower energy bills and a quieter system, as fans won’t have to work as hard to cool the unit.
The 80 Plus certification is a common standard for PSU efficiency, indicating that the unit operates at 80% or higher efficiency under typical loads. PSUs with higher 80 Plus certifications, such as Bronze, Silver, Gold, Platinum, or Titanium, offer progressively better efficiency.
For most builds, an 80 Plus Bronze or Gold-rated PSU strikes a good balance between price and performance. Opting for a higher-rated PSU is especially beneficial for enthusiasts who are building powerful systems with high-end components that will be under heavy load for extended periods.
Ignoring efficiency ratings can result in higher energy consumption and excess heat, which in turn can reduce the lifespan of your components.
Cooling and Airflow Management
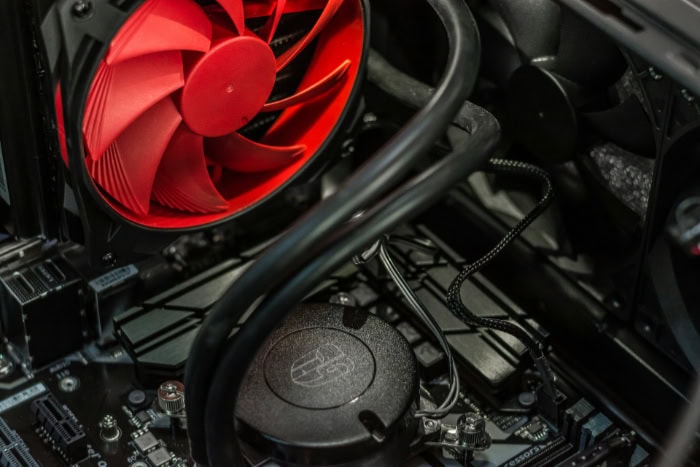
Effective cooling is essential for any PC build, as overheating components can lead to performance drops, instability, or even permanent damage. Proper airflow management and adequate cooling solutions are crucial to ensure that components like the CPU, GPU, and power supply operate within safe temperature ranges.
However, cooling issues are often overlooked or misunderstood, leading to common errors that can have serious consequences.
Incorrect Fan Placement
One of the simplest yet most common mistakes in PC building is improper fan placement. Fans are essential for maintaining airflow within the case, but they must be installed in the correct orientation to be effective.
Fans are typically designed to either intake cool air from outside the case or exhaust hot air from inside the case. Installing fans in the wrong direction can disrupt airflow, trapping hot air inside the case and causing temperatures to rise.
A common setup for airflow is to have intake fans at the front and bottom of the case and exhaust fans at the rear and top. This creates a natural flow where cool air is pulled in and hot air is expelled.
However, if fans are reversed—such as having exhaust fans trying to pull air in—this can lead to poor circulation and increased heat buildup. Builders should always check the directional arrows printed on the side of the fans, which indicate the direction of airflow, to ensure proper placement.
Additionally, it's important to balance the number of intake and exhaust fans. Too many intake fans without enough exhaust can result in positive air pressure, where air is trapped inside the case.
Conversely, too many exhaust fans can create negative pressure, which may pull in dust through unfiltered openings. A balanced setup ensures steady airflow and helps keep temperatures down while reducing dust buildup inside the case.
Neglecting Thermal Paste Application
The application of thermal paste is vital for efficient heat transfer between the CPU and its cooler. Thermal paste fills the microscopic gaps between the CPU's heat spreader and the cooler's base, allowing heat to transfer more effectively.
Neglecting this step or applying thermal paste incorrectly can lead to poor thermal conductivity, causing the CPU to overheat under load.
One common mistake is applying too much or too little thermal paste. Applying too much paste can create an insulating effect, preventing the cooler from making proper contact with the CPU.
On the other hand, applying too little can leave gaps between the cooler and CPU, leading to uneven heat dissipation. A small, pea-sized amount in the center of the CPU is typically sufficient, as pressure from the cooler will spread the paste evenly.
Another issue arises from reusing old thermal paste. When re-seating a cooler, it's important to clean off the old paste and apply a fresh layer.
Reusing dried or degraded paste can significantly reduce its effectiveness. Builders should use a lint-free cloth or isopropyl alcohol to remove the old paste before applying a new layer, ensuring optimal heat transfer.
Overlooking Case Airflow Design
The design of the PC case itself plays a major role in effective airflow management. Many builders, especially first-time ones, may choose a case based on aesthetics without considering how its layout affects cooling.
Some cases feature sleek designs but lack adequate ventilation, while others have restrictive front panels that hinder airflow. Choosing a case with good airflow design is essential to keep internal temperatures in check.
A well-designed case should have enough space for airflow around all components, especially the GPU and CPU, which tend to generate the most heat. Cases with mesh front panels, top vents, and bottom dust filters are ideal for promoting airflow.
Additionally, make sure the case has enough mounting points for fans and radiators if you're using liquid cooling solutions.
Another important factor is cable management. Poor cable management can obstruct airflow, as tangled cables can block the path of cool air entering the case and prevent hot air from being exhausted properly.
Most modern cases come with built-in cable management features, such as cutouts and velcro straps, allowing builders to route cables behind the motherboard tray and out of the way of airflow. Taking the time to manage cables neatly will not only improve cooling performance but also make your build look more professional.
Lastly, it's important to ensure that there's enough clearance between the internal components and the case walls. For example, large GPUs or aftermarket CPU coolers may take up significant space, leaving little room for air to circulate.
Always check the case’s specifications to ensure it can accommodate all your components without crowding.
Installation Errors
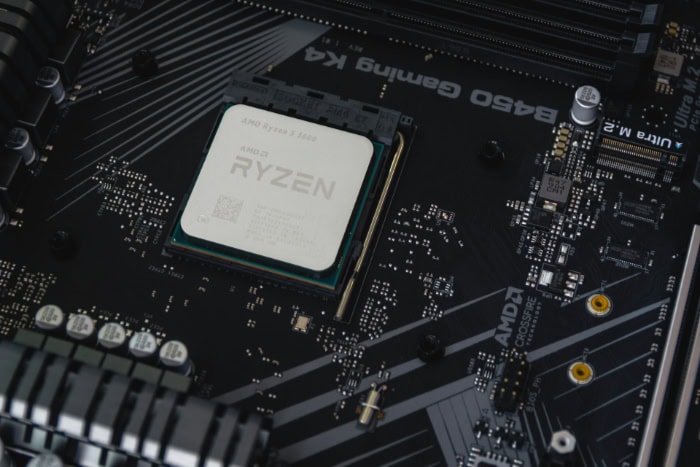
Building a PC involves assembling various delicate components, and even a minor installation mistake can lead to malfunctioning hardware or, in some cases, cause permanent damage. Ensuring that each part is installed correctly is crucial for the system’s overall stability and performance.
Forgetting Motherboard Standoffs
Motherboard standoffs are small, often overlooked components that play a critical role in protecting your motherboard. These small screws elevate the motherboard slightly above the case, preventing it from coming into contact with the metal surface.
Without standoffs, the motherboard can touch the case directly, leading to short circuits that can permanently damage the board and other components.
A common mistake, especially among first-time builders, is either forgetting to install the standoffs or installing them incorrectly.
Every case comes with pre-drilled holes aligned with standard motherboard sizes (ATX, mATX, ITX), and standoffs must be installed in these holes before mounting the motherboard.
It’s important to double-check that each standoff is in place and properly aligned with the motherboard’s mounting holes. Using too few standoffs or placing them in the wrong spots can cause the board to bend or flex, leading to potential damage.
When securing the motherboard to the standoffs, avoid overtightening the screws as this can damage both the standoffs and the board. A firm but gentle hand is all that’s needed to ensure the board is securely mounted.
Improper CPU Installation
The CPU is one of the most important components of any build, and installing it incorrectly can cause serious issues, including permanent damage. One common error is mishandling the CPU or forcing it into the socket.
CPUs are incredibly delicate, with pins or contacts that can easily bend or break if not handled carefully.
Most modern CPUs, whether from Intel or AMD, are designed to fit into the socket in only one orientation.
For Intel CPUs, the contact pads are on the underside of the processor, while the socket on the motherboard contains the delicate pins.
AMD CPUs, on the other hand, have pins on the processor itself, which must be carefully aligned with the holes in the motherboard socket. In both cases, forcing the CPU into the socket can bend or break the pins, rendering the CPU or motherboard unusable.
To avoid this, always look for the alignment markers on both the CPU and the socket. These markers, usually small triangles, indicate the correct orientation for installation.
Gently placing the CPU into the socket and lowering the retention arm will ensure a proper fit without exerting unnecessary pressure. Additionally, avoid touching the pins or contact pads, as oils from your fingers can interfere with the electrical connections.
Cable Management Issues
Cable management may seem like a minor concern in the grand scheme of a PC build, but poor organization of cables can lead to several problems. One of the most significant issues is the obstruction of airflow.
When cables are left tangled or strewn across the interior of the case, they can block fans and restrict the flow of cool air to critical components like the CPU and GPU. This can lead to higher temperatures, reduced performance, and, in extreme cases, overheating.
Messy cables can also make future upgrades or troubleshooting more difficult, as it becomes harder to identify and access specific connections. It’s much easier to tidy up cables during the initial build rather than trying to reorganize them later.
Most modern cases offer built-in cable management systems, such as routing channels, tie-down points, and cutouts for threading cables behind the motherboard tray.
Using zip ties or velcro straps can help bundle cables neatly and keep them out of the way. Additionally, modular power supplies, which allow you to connect only the cables you need, can significantly reduce cable clutter and improve airflow within the case.
Skipping Testing and Troubleshooting
After assembling all the components of a custom PC, it’s tempting to power it on right away and jump into using your new system. However, skipping proper testing and troubleshooting can lead to frustrating issues later on.
Taking the time to ensure that everything works as expected before finalizing the build can save a significant amount of time and prevent the need to disassemble the system later.
Not Testing Components Before Full Assembly
One of the most overlooked steps in building a PC is testing major components before fully assembling them inside the case. This is especially important for first-time builders or those working with new hardware.
Testing critical parts like the CPU, RAM, and GPU outside of the case—often called a “bench test”—allows you to verify that the system powers up and that there are no compatibility or hardware issues.
Performing a bench test before installing the motherboard into the case can save time and effort. Set up the motherboard on a non-conductive surface (such as the box it came in), install the CPU and cooler, insert the RAM, and connect the power supply.
Power on the system to check if it boots and displays the BIOS on a monitor. If the system doesn't POST (Power-On Self-Test), it's much easier to troubleshoot when the components are out of the case.
A successful bench test gives you confidence that the key parts are functional, reducing the chances of needing to disassemble the system if something goes wrong later.
Skipping this step can lead to a situation where you’ve fully assembled the PC, only to find that it won’t boot, forcing you to partially or completely disassemble the build to troubleshoot.
Failing to Check All Connections
Another common mistake, especially during the excitement of finishing a build, is not thoroughly checking all the cable connections before powering on the system. Modern PCs require multiple connections between components, and even one loose or forgotten cable can prevent the system from starting or functioning correctly.
Power cables are the most critical, as missing or loose connections can lead to a system that won’t boot or behaves inconsistently. For example, forgetting to connect the 8-pin CPU power cable to the motherboard is a frequent error, leading to a system that powers on but doesn’t post.
Additionally, GPUs often require dedicated power cables from the PSU, and failing to connect these can result in the graphics card not working properly.
It’s also important to double-check data connections, such as SATA cables for storage drives, and ensure that front-panel connectors (power button, reset button, etc.) are correctly plugged into the motherboard.
Front-panel connectors are small and easy to misplace, but most motherboards include a labeled diagram to help ensure proper placement. Checking all connections before hitting the power button for the first time can prevent unnecessary troubleshooting and frustration.
Ignoring BIOS Updates and Settings
Once the PC is assembled and booting, many builders make the mistake of ignoring the motherboard’s BIOS, assuming it’s already configured for optimal performance.
However, out-of-the-box BIOS settings are often outdated or set to default values that may not take full advantage of your hardware.
Updating the BIOS is crucial, especially if you’re using newer components like the latest generation of CPUs or RAM. Motherboard manufacturers frequently release BIOS updates that improve compatibility, fix bugs, or enable new features.
Ignoring these updates can result in instability or performance issues that could easily be resolved with a quick update.
In addition to updating the BIOS, it’s important to check key settings such as RAM speed. Many motherboards default to lower memory speeds, and without adjusting these settings, you won’t get the full performance you paid for.
Enabling XMP (Extreme Memory Profile) or DOCP (Direct Overclock Profile) in the BIOS allows your RAM to run at its advertised speed, ensuring that your system gets the most out of its components.
Taking the time to update the BIOS and configure settings like RAM speed can make a noticeable difference in the stability and performance of your build.
Conclusion
Building a custom PC can be a highly rewarding experience, but avoiding common mistakes is crucial to ensure a smooth process and a system that performs optimally.
Paying attention to component compatibility, choosing a reliable power supply, managing cooling effectively, installing hardware carefully, and thoroughly testing the build before finalizing it are all essential steps.
With proper planning and attention to detail, you can dodge many of the pitfalls that often trip up builders and enjoy a PC that runs efficiently and reliably for years to come. Patience and precision are your best allies in achieving a successful build.

