How to Check if Your VPN Is Working: A Complete Checklist

You've activated your VPN, but how can you be certain it’s truly protecting you? A simple “connected” status offers a false sense of security and doesn't guarantee your privacy or unlock region-specific content. A properly functioning VPN does more than just switch on; it creates an encrypted tunnel that completely hides your IP address, prevents dangerous data leaks through DNS or WebRTC, and delivers stable performance.
Verifying that your VPN is working correctly is a critical step for maintaining anonymity and ensuring your access to global services is uninterrupted.
Confirm the VPN Tunnel
The most fundamental test is to ensure your device's internet traffic is actually passing through the VPN's encrypted tunnel. Before checking for subtle data leaks or testing advanced features, you must first confirm that the connection is active and correctly rerouting your data.
These initial checks validate that the VPN is performing its primary function of masking your digital footprint.
Verify Client Status and Server
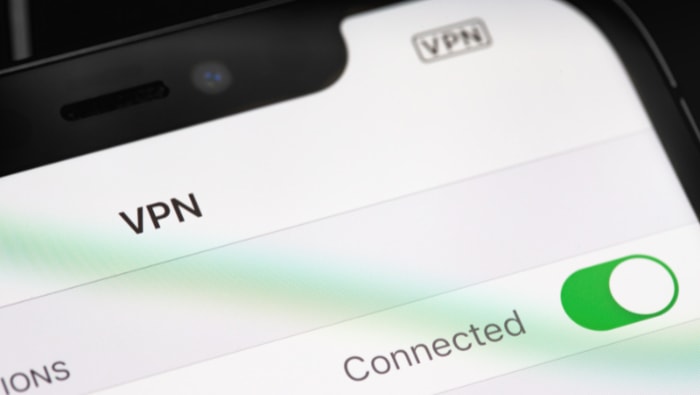
- Open your VPN application and look for a clear “Connected” status or a similar visual indicator that the service is active.
- Check that the displayed server location and country match the one you selected.
- If your VPN client shows the active security protocol, confirm it is set to your preference, such as WireGuard or OpenVPN.
Check Your IP Address and Location
- Before connecting the VPN, use an online IP lookup tool to see your real public IP address and its corresponding geographic location.
- Connect your VPN to a server in your chosen region.
- Refresh the IP lookup tool's webpage or open it in a new tab.
- Confirm that the IP address and location now shown match those of the VPN server, not your own.
Perform a Routing Sanity Check
- Disconnect your VPN and run a traceroute command from your computer to any website. On Windows, open Command Prompt and type tracert example.com. On macOS or Linux, open Terminal and type traceroute example.com.
- Note the initial network “hops” in the result, which will belong to your internet service provider (ISP).
- Connect to your VPN and run the same traceroute command again.
- The new results should show that the first hops belong to the VPN provider's network, confirming that your traffic is being successfully rerouted.
Detect Data Leaks

Even with an active VPN tunnel, your personal data can still be exposed through various leaks that bypass the encrypted connection. These vulnerabilities can reveal your true IP address or online activities to your internet service provider, websites, or other third parties.
Performing specific tests for DNS, WebRTC, and IPv6 leaks is essential to confirm that your privacy is fully protected and that no identifying information is accidentally escaping the tunnel.
Check for DNS Leaks
A Domain Name System (DNS) leak occurs when your device sends DNS queries outside the VPN tunnel, allowing your ISP to see which websites you are visiting. To check for this, you can use a dedicated testing tool.
- Connect to your VPN.
- Using your browser, visit a testing website like dnsleaktest.com.
- Run the standard or extended test offered by the site.
- Review the results. The test will show the IP addresses and owners of the DNS servers your device is using. If you see your ISP's name or location in the list, you have a DNS leak. A secure connection will only show servers belonging to your VPN provider.
Test for WebRTC Leaks
WebRTC is a browser-based technology for voice and video communication that can inadvertently reveal your real IP address, even with a VPN running.
- With your VPN connected, navigate to a comprehensive testing tool like ipleak.net.
- The test will automatically run when you load the page.
- Examine the results for any IP addresses listed under the WebRTC section. If the test reveals your true public or local IP address, you have a WebRTC leak. The IP addresses shown should only belong to your VPN. If a leak is detected, you can often fix it by enabling a leak protection setting in your VPN app or by using a browser extension to disable WebRTC.
Validate IPv6 and Torrent IP Protection
Some VPNs may not properly handle IPv6 traffic, and torrent applications can also be a source of IP leaks if not configured correctly.
- IPv6 Leak Test: Many networks now use the newer IPv6 protocol, but not all VPNs support it, causing IPv6 traffic to travel outside the encrypted tunnel. Visit a site such as test-ipv6.com. If it shows your real IPv6 address is visible, enable “IPv6 Leak Protection” in your VPN's settings or disable IPv6 on your device's network adapter.
- Torrent IP Check: When using torrents, it is critical that your client only communicates through the VPN. You can verify this by using the torrent IP checker tool on a site like ipleak.net. Add the special magnet link provided to your torrent client, which will track the IP address seen by other peers. The reported IP must match the one assigned by your VPN.
Validate Privacy Features
Beyond establishing a secure tunnel and checking for basic leaks, many VPN services offer advanced privacy tools that require separate verification. Features like a kill switch and split tunneling provide critical layers of protection, but they only work if they are configured and functioning correctly.
Test the Kill Switch
A kill switch is a failsafe mechanism designed to block all internet traffic if your VPN connection unexpectedly drops. This feature prevents your real IP address from being exposed during the brief moments it takes for the VPN to reconnect.
To test it, first ensure the kill switch is enabled in your VPN's settings. Then, while connected to the VPN and actively using the internet, such as streaming a video or downloading a file, force a connection drop by briefly disabling your device's Wi-Fi or unplugging its network cable.
If the kill switch is working, your internet access should be cut off completely. Your browser will be unable to load any websites, and the download will pause until the VPN connection is restored.
Verify Split Tunneling Behavior
Split tunneling allows you to direct some of your application traffic through the VPN while allowing other apps to access the internet directly through your regular connection. To verify this feature, configure it within your VPN client by selecting specific applications to include or exclude from the VPN tunnel.
For instance, you could route your web browser through the VPN but exclude a gaming client. After setting it up, check your public IP address in the browser to confirm it matches the VPN server's IP.
At the same time, use a tool within the excluded application, or a separate network monitoring tool, to confirm it is using your true IP address provided by your ISP.
Confirm Leak Protection Settings
Modern VPN applications include dedicated settings to prevent common data leaks, but these protections must be enabled to be effective. Navigate to your VPN client's settings or preferences menu and look for options related to DNS, IPv6, and WebRTC.
You should find and activate settings labeled “Use VPN DNS servers,” “IPv6 Leak Protection,” or “Block WebRTC.” It is good practice to periodically review these settings, especially after a software update, as configurations can sometimes revert to their default states.
Ensuring these toggles are persistently enabled hardens your connection against a variety of potential privacy vulnerabilities.
Test Real-World Functionality

A VPN that passes technical checks but fails in practice offers little value. The ultimate measure of a VPN's effectiveness is its ability to perform reliably in everyday situations, from accessing geo-restricted content to protecting you on unsecured public networks.
Verify Access to Region-Locked Content
One of the most common reasons for using a VPN is to bypass geographic restrictions on websites and streaming platforms. To test this, connect to a VPN server in a specific country, such as the United Kingdom.
Once connected, navigate to a streaming service or news website that is exclusively available in that region. If you can access and use the service as if you were physically there, your VPN is successfully spoofing your location.
If you are blocked, it may indicate the service has identified and blacklisted the VPN server's IP address.
Test on Public Wi-Fi and Captive Portals
Public Wi-Fi networks, like those in cafes or airports, often use captive portals, which require you to agree to terms or log in through a special webpage before granting internet access. A reliable VPN should handle this process smoothly.
Connect to the public Wi-Fi and attempt to activate your VPN. Your VPN should either wait for you to complete the portal login or allow you to connect after you have gained access.
Test the reconnection behavior by briefly disconnecting from the Wi-Fi and then rejoining it; a good VPN will re-establish its secure tunnel automatically and cleanly without requiring manual intervention.
Confirm System-Wide Protection
It is important to determine if your VPN is protecting your entire device or just a single application. A full VPN client installed at the operating system level should route all traffic from every application through the encrypted tunnel.
In contrast, a browser extension only protects the traffic originating from that specific browser. To confirm you have system-wide protection, connect your VPN and verify your IP address in your browser.
Then, open a separate application, like a desktop email client or a software update tool, and check its network activity to ensure it is also using the VPN's connection, not your home internet.
Troubleshooting and Optimization
Even a properly configured VPN can encounter issues, from a failed connection to frustratingly slow speeds. When your VPN does not perform as expected, a systematic approach to troubleshooting can often resolve the problem quickly.
IP or Location Unchanged
If your IP address and location do not change after connecting, the VPN tunnel has failed to establish correctly. The first step is to disconnect and try connecting to a different server, or even a server in another country, as the one you selected may be offline or experiencing issues.
If the problem continues, try changing the security protocol within your VPN app; switching from the default setting to IKEv2 or WireGuard can often force a successful connection. Clearing your browser's cache and your operating system's DNS cache can also resolve conflicts that prevent the new IP from being recognized.
On mobile devices, disable system-level location services, as they can sometimes report your physical GPS location to websites, overriding the VPN's spoofed location.
Persistent Leaks
When leak tests continue to reveal your real IP address despite an active connection, you must take targeted steps to secure your data. Go into your VPN client’s settings and enable any available leak protections, specifically for DNS and IPv6.
You may also find an option to force the use of the VPN’s DNS servers, which can prevent your device from defaulting to your ISP. For persistent WebRTC leaks, you can disable the protocol directly in your browser’s advanced settings or use a dedicated browser extension designed to block it.
If IPv6 leaks are the problem, ensure your VPN’s IPv6 handling is enabled or, alternatively, disable the IPv6 protocol on your device's network adapter as a final measure.
Connection Blocks or Poor Performance
Slow speeds or being blocked by websites can make a VPN unusable. A simple solution is to select a server that is geographically closer to you to reduce latency, or choose one with a lower user load if your provider displays that information.
If you are still experiencing issues, experimenting with different protocols can help; WireGuard often provides the best speeds, while OpenVPN may be more effective at bypassing network restrictions. For aggressive firewalls that block VPN traffic, look for an obfuscation or “stealth” mode in your VPN's settings, which disguises your traffic to look like regular web browsing.
Advanced users can also try adjusting the Maximum Transmission Unit (MTU) value in the VPN settings to better match their network, potentially improving stability and throughput.
Conclusion
Verifying your VPN's integrity goes far beyond simply seeing a “connected” icon. The process involves a layered approach, starting with confirming the encrypted tunnel is active and has successfully changed your IP address.
It continues with actively testing for data leaks through DNS, WebRTC, and IPv6 to ensure no identifying information is exposed. Next, validating advanced privacy features like the kill switch guarantees your protection during connection drops.
Finally, proving its real-world effectiveness by accessing regional content and tuning its performance ensures it works reliably for your specific needs. Making these checks a regular habit is what ultimately maintains your privacy, ensures dependable performance, and guarantees consistent access across all your devices and networks.


