
What Is BIOS? Motherboard Firmware Explained

When you press your computer’s power button, internal fans spin up and a manufacturer logo briefly flashes across the screen before the familiar desktop appears. During those quiet opening moments, your computer is performing critical diagnostic routines.
Operating behind the scenes is the Basic Input/Output System, universally recognized as BIOS. Installed directly onto a dedicated chip on the motherboard, this low-level firmware functions as an essential bridge connecting raw physical components with your operating software.
Key Takeaways
- Motherboard firmware operates as permanent, low-level code soldered directly onto the system board, executing before any connected storage drive or operating system can load.
- During startup, the Power-On Self-Test (POST) inspects the processor, memory, graphics adapter, and power rails, communicating hardware errors through coded beeps or numeric motherboard LEDs.
- Modern UEFI replaces legacy BIOS by expanding partition capacities beyond the historical 2.2TB limit to 9.4 zettabytes, adding mouse support, and enforcing pre-boot protection with Secure Boot.
- Custom user configurations and system clock time are preserved in volatile CMOS memory powered by a 3V CR2032 battery, which can be cleared to recover from unbootable settings.
- Firmware updates should only be performed to patch known vulnerabilities or add support for newer processors, because any power interruption during the flashing process can permanently brick the board.
Definition and Primary Function of BIOS
Every computer relies on an initial set of instructions to transition from inert silicon components into an active, responsive computing environment. Before the display turns on or the desktop appears, specialized code embedded on the system board oversees the earliest stages of hardware activation.
The Nature of Motherboard Firmware
Firmware is a specialized category of permanent, low-level software programmed directly into hardware circuits during manufacturing. Standard applications and operating systems reside on storage drives such as solid-state drives (SSDs) or mechanical hard drives, where users can freely install, modify, or erase them.
Firmware, by contrast, lives on a dedicated chip soldered directly onto the motherboard. This distinction matters because the computer must have access to functional programming before it can detect or read any connected storage drive.
Without firmware permanently fused to the circuit board, the central processor would have no instructions to follow when electricity first surges through the system.
The Physical Chip and CMOS Memory Connection
The firmware code resides on a small integrated circuit mounted directly to the surface of the motherboard. Alongside this read-only memory module sits a tiny pool of volatile memory known as Complementary Metal-Oxide Semiconductor (CMOS) memory.
While the main firmware instructions remain fixed under standard conditions, the CMOS memory stores variable settings configured by the user, including clock speeds, fan curves, and custom hardware preferences. Because volatile memory requires continuous power to hold data, motherboards incorporate a small coin-cell battery, typically a 3V CR2032 lithium cell.
This battery supplies power continuously, maintaining customized preferences and running the real-time clock even after the user unplugs the computer from the electrical wall outlet.
The Bridge Between Computer Hardware and System Software
At its foundational level, firmware acts as an essential interpreter between physical circuitry and operating software. Modern computer hardware consists of complex microchips, memory controllers, and peripheral buses that do not communicate with high-level software automatically.
Firmware provides the standardized interface that bridges this gap, giving the operating system a reliable method to communicate with physical devices. This low-level communication framework operates with complete independence from specific software platforms.
The firmware functions identically whether the user intends to boot Windows 11, a distribution of Linux, or specialized recovery software, providing a universal foundation that underlies consumer operating environments.
The Startup Sequence and Hardware Verification
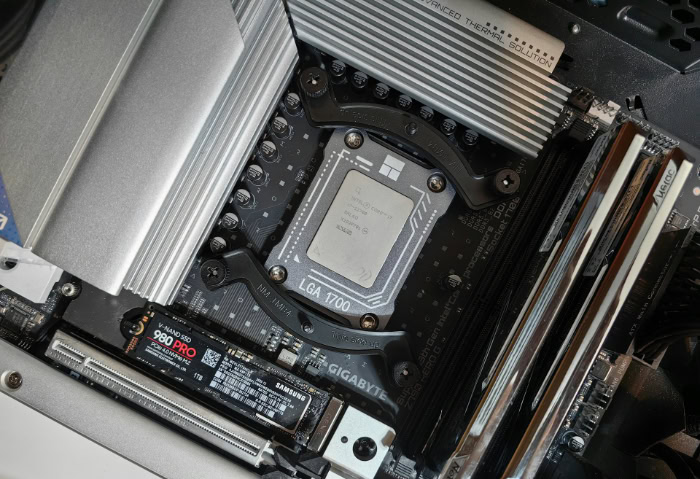
Starting a computer involves a precise series of operational checks designed to confirm that critical parts can safely run together. The startup sequence acts as an automated inspection process that systematically validates each part before passing authority to the main software.
The Power-On Self-Test (POST) Routine
Immediately after the power button delivers current to the motherboard, the firmware initiates an automated diagnostic sequence known as the Power-On Self-Test (POST). This preliminary evaluation tests the electrical integrity and operational responsiveness of essential hardware.
If a failure occurs during this diagnostic stage, the motherboard alerts the user before video output is established. Traditional motherboards use a tiny internal speaker to generate coded audio beeps, where specific sequences of short and long tones identify exact failures, such as unseated memory modules or missing display adapters.
Many modern motherboards replace or supplement these tones with visual indicators, such as a row of colored diagnostic LEDs or a two-digit display that shows alphanumeric error codes corresponding to specific hardware faults.
Hardware Detection and System Component Checks
During the diagnostic sequence, the firmware conducts an inventory of the physical components attached to the system. It interrogates the central processing unit (CPU), identifies the capacity and timing parameters of the random-access memory (RAM), verifies the presence of the graphics adapter, and registers all connected storage drives.
Beyond cataloging hardware, the firmware checks essential environmental conditions. It monitors supply voltages from the power supply unit and checks onboard thermal sensors to ensure that temperatures remain within safe operating thresholds before allowing the computer to proceed with normal operation.
The Transfer of Control to the Bootloader
Once all hardware passes initial validation, the firmware prepares to hand over responsibility to the operating system. It consults a saved list of storage locations, known as the boot order, to determine where to search for startup instructions.
The firmware inspects internal drives, external USB flash media, and network connections according to these assigned priorities until it locates a valid bootable partition. Once it finds the designated drive, the firmware loads a small program called the bootloader into system memory and transfers execution authority to it.
At that moment, the firmware steps back, allowing the bootloader to begin loading the main operating system files.
Access Procedures and Common System Parameters

Users frequently need to view hardware statistics, adjust device behavior, or change startup routines. Motherboard firmware includes an interactive configuration utility that allows users to adjust fundamental operational parameters directly on the motherboard.
Keyboard Shortcuts and System Restart Techniques
Accessing the firmware menu requires entering a command during the brief window between system power activation and the appearance of the operating system logo. Manufacturers designate specific buttons for this function, most commonly the Delete button or the F2 button, though some systems use F10 or F12.
Tapping the designated button repeatedly immediately after powering on the computer interrupts the automated sequence and displays the configuration menu. For modern machines that start too rapidly to catch these button presses, operating systems offer a convenient software alternative.
In Windows 11, users can hold the Shift button while selecting Restart, select Advanced Startup options, and choose UEFI Firmware Settings to reboot directly into the configuration utility.
Boot Device Priority Selection
One of the most frequent reasons users enter the firmware setup menu is to configure boot device priority. This setting controls the sequence in which the system queries storage devices when looking for an operating system.
When installing a clean operating system from a USB flash drive, a user can position the USB drive at the top of the priority list so the machine reads the installation media rather than the internal storage drive. Firmware utilities also provide a temporary boot override menu, which allows the user to select an alternate boot drive for a single session without permanently altering the saved default sequence.
Hardware Controls: Virtualization Support and Thermal Profiles
The firmware environment houses critical controls that adjust low-level hardware features. Users running virtual machines, mobile application emulators, or container software must often enable hardware-assisted virtualization, labeled as Intel VT-x on Intel platforms or AMD-V on AMD systems.
The utility also grants control over cooling and memory performance. Users can configure fan curves to balance cooling efficiency against acoustic noise, dictating how fast cooling fans spin at specific thermal levels.
Additionally, users can activate memory performance profiles, such as Intel Extreme Memory Profile (XMP) or AMD Extended Profiles for Overclocking (EXPO), allowing system RAM to run at its rated maximum speed with a single configuration change.
The Distinction Between Legacy BIOS and Modern UEFI

Computing technology advanced dramatically over several decades, eventually exposing the architectural limits of early system firmware. The industry transition from traditional legacy firmware to modern interfaces reshaped how personal computers boot, handle vast storage capacities, and defend against malicious code.
Storage Capacity and Partition Support Limitations
Legacy firmware relies on the Master Boot Record (MBR) partitioning scheme, an architecture designed in the early 1980s. MBR uses 32-bit values to track storage sectors, which restricts drive capacity to a maximum of 2.2TB (terabytes) and limits drives to four primary partitions.
Modern Unified Extensible Firmware Interface (UEFI) overcomes this limitation by implementing the GUID Partition Table (GPT) format. GPT uses 64-bit identifiers, enabling support for storage drives up to 9.4 zettabytes (9.4 billion terabytes) and supporting up to 128 primary partitions under Windows.
This architectural leap ensures that modern computers can partition and boot from high-capacity modern storage drives without artificial size barriers.
Interface Evolution: Text Displays Versus Graphical Environments
The appearance and usability of firmware utilities changed radically with the arrival of UEFI. Legacy firmware presented a simple, text-only interface featuring blue-and-grey menus, simple line borders, and navigation controlled solely through directional arrow buttons.
Modern UEFI environments feature rich graphical user interfaces with full mouse support, high-resolution color graphics, and multiple operational modes. Motherboard manufacturers typically provide a simplified dashboard mode for casual users, displaying temperature gauges, basic fan controls, and single-click profile toggles.
For experienced enthusiasts, a detailed advanced mode provides granular access to deep overclocking parameters, complex power states, and peripheral configurations.
Security Protections and The Secure Boot Standard
Modern firmware incorporates robust defensive mechanisms designed to protect computers during vulnerable pre-boot stages. A prominent feature is Secure Boot, a protocol that verifies the cryptographic signatures of bootloaders, kernel files, and system drivers before executing them.
If malicious software like a rootkit or bootkit attempts to intercept the startup process with unsigned code, Secure Boot halts execution and prevents the unauthorized program from loading. UEFI also integrates seamlessly with security hardware, including discrete Trusted Platform Modules (TPM 2.0) and firmware-based equivalents like Intel Platform Trust Technology (PTT) or AMD Platform Security Processor (PSP), creating a secure foundation required by modern platforms such as Windows 11.
Firmware Maintenance, Failure Risks, and Recovery Solutions

While motherboard firmware operates quietly in the background throughout the life of a computer, specific circumstances require direct maintenance. Updating or resetting this low-level programming requires careful handling because errors during the process carry real operational risks.
Motherboard Firmware Updates and Upgrade Purposes
Manufacturers release firmware updates to address specific technical needs rather than routine software upkeep. A primary reason to update firmware is to add compatibility for newer central processors released on an existing motherboard socket.
Updates also resolve hardware bugs, improve memory stability when running high-speed modules, and apply patches for firmware security vulnerabilities. However, firmware maintenance follows a conservative philosophy: if a computer is operating smoothly and does not require support for newly installed components, performing a firmware update is generally unnecessary.
Unlike standard applications, updating firmware carries inherent risks that outweigh the benefits of updating solely for the sake of having the newest build.
The Hazards of Interrupted Firmware Installations
The process of flashing firmware involves erasing the existing programming on the chip and writing new binary code in its place. If an interruption occurs during this delicate procedure, such as a sudden power outage, an accidental system reset, or corrupted installation data, the chip may be left partially written or blank.
This outcome is commonly referred to as “bricking” the motherboard, turning the hardware into an unresponsive slab incapable of starting or displaying error messages. To mitigate this hazard, users should ensure stable electrical power during updates, avoid flashing firmware during electrical storms, and consider using an uninterruptible power supply (UPS) to guard against unexpected outages.
Restoration Methods: CMOS Clear and Dual-Firmware Safeguards
When misconfigured settings or failed overclocks prevent a system from booting, resetting the CMOS memory restores all parameters to factory defaults. Users can achieve this by disconnecting electrical power and removing the CR2032 coin-cell battery for 5 minutes, allowing all stored voltage in the volatile memory circuit to dissipate.
Motherboards also feature dedicated reset jumpers or buttons that clear configuration data in seconds when shorted with a screwdriver or pressed. To defend against severe corruption, many motherboards include dual firmware chips, where a secondary backup chip automatically restores the primary chip if corruption is detected.
Modern boards also frequently feature dedicated USB flashback buttons on the rear input panel, enabling users to flash fresh firmware directly from a USB drive even if the computer lacks a functional processor or memory.
Conclusion
Motherboard firmware acts as the critical first responder for your computer, orchestrating hardware diagnostics, validating components, and coordinating the initial handoff to the operating system every time you press the power button. Even though modern machines have shifted to the faster, more flexible UEFI standard with graphical menus and advanced security protocols like Secure Boot, the term “BIOS” remains firmly embedded in everyday computing vocabulary.
Whether referred to as BIOS or UEFI, this essential layer of low-level software ensures that raw physical circuitry can seamlessly initialize, communicate, and power your everyday computing experience.
Frequently Asked Questions
What is the difference between BIOS and UEFI?
UEFI is the modern replacement for legacy BIOS, offering faster startup times, a graphical mouse-driven interface, and support for drives larger than 2.2TB. While traditional BIOS relied on a text-only menu and older 32-bit architecture, UEFI supports advanced security features like Secure Boot and handles modern hardware far more efficiently.
Do I need to update my BIOS regularly?
You only need to update your BIOS if you are installing a newer processor, fixing a specific stability problem, or patching a known security vulnerability. Unlike regular software applications, unnecessary firmware updates carry risks. If a power outage or error occurs while writing new code to the chip, it can permanently disable your motherboard.
How do I open the BIOS menu on my computer?
You can open the BIOS menu by pressing a designated shortcut button like Delete or F2 repeatedly right after pressing the power button. If your computer boots too quickly to catch the prompt, you can access it through Windows 11. Hold the Shift button while clicking Restart, then select Advanced Startup and choose UEFI Firmware Settings.
What happens if a BIOS update gets interrupted?
An interrupted BIOS update can corrupt the motherboard firmware and leave your computer completely unable to boot, a condition known as bricking. You can often recover by using a motherboard with dual BIOS chips, activating a dedicated USB flashback button on the rear panel, or clearing the CMOS memory to restore default settings.
How do I reset my BIOS settings to default?
You can reset your BIOS settings to default by choosing the reset option inside the firmware menu or by clearing the physical CMOS memory. To clear the CMOS manually, unplug the computer from electrical power and remove the CR2032 coin-cell battery from the motherboard for 5 minutes. You can also short the designated reset pins with a metal tool.
About the Author: Elizabeth Baker


