Easy Steps to Use a Second Monitor with Your Laptop

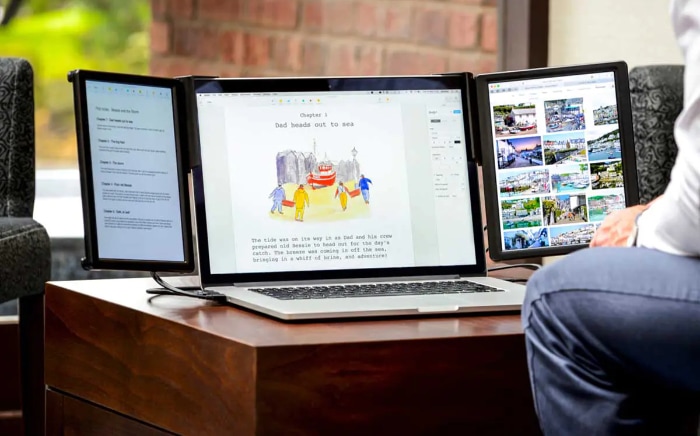
Maximizing productivity and enhancing multitasking capabilities has never been more accessible than through the addition of a second monitor to your laptop setup. With the rapid evolution of technology, integrating a second screen into your workspace is not just a luxury for professionals but a game-changer for students, creative individuals, and casual users alike.
This expansion of digital real estate allows for a seamless flow of work across multiple applications, fostering an environment where efficiency and comfort go hand in hand.
Checking If Your Laptop and Monitor Can Work Together
Before diving into the world of dual screens, it’s essential to ensure that your laptop and the second monitor can communicate effectively. This compatibility is the foundation of a successful setup, allowing you to extend your digital workspace smoothly.
Port Types on Your Laptop
Laptops come equipped with various ports, each serving as a potential bridge to your second monitor. Common types include HDMI, DisplayPort, and USB-C.
HDMI, familiar to most, is widely used for transmitting both high-definition video and audio. DisplayPort, another favorite, often supports higher refresh rates and resolutions, making it a go-to for gamers and professionals.
USB-C, the versatile newcomer, can carry data, video signals, and power over a single cable, offering a clean, all-in-one connection solution.
Matching Your Monitor’s Input Options
Monitors, like laptops, come with their own set of input ports. The trick to a smooth setup lies in matching these inputs with the outputs on your laptop.
If your laptop sports an HDMI port and your monitor does too, you’re in luck; a simple HDMI cable will do the trick. However, if the ports differ, you might need an adapter or a special cable, such as HDMI to DisplayPort or USB-C to HDMI.
Analyzing Specifications for a Successful Connection
Knowing the ports is one thing, but understanding the specifications required for a successful connection is another. This involves checking the supported resolutions and refresh rates on both your laptop and monitor.
For example, if your monitor supports 4K resolution but your laptop does not, you’ll be limited to the laptop’s maximum output. Always consult your devices’ manuals or online specifications to ensure compatibility.
This foresight prevents potential disappointments and ensures your setup meets your expectations, leading to a productive and visually satisfying experience.
The World of Monitor Connections
When setting up a second monitor, the variety of cables and adapters at your disposal can be overwhelming. Each type of connection has its advantages and is designed to cater to different setups.
HDMI Connections
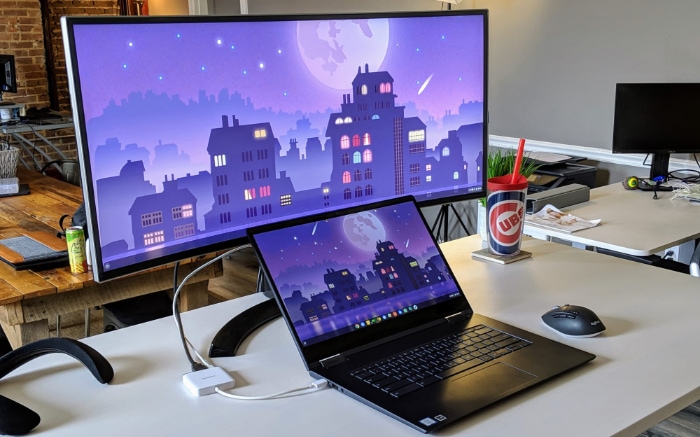
HDMI, or High-Definition Multimedia Interface, is a favorite for its ability to transmit high-quality audio and video signals over a single cable. If both your laptop and monitor have HDMI ports, connecting them is as straightforward as using an HDMI cable.
This setup is ideal for a wide range of activities, from streaming videos to browsing the web, and is supported by most modern devices.
DisplayPort Connections
DisplayPort connections are often found on higher-end laptops and monitors, prized for their support of higher resolutions and refresh rates. If you're a gamer or a professional who relies on precise visuals, using a DisplayPort to DisplayPort cable ensures you get the most out of your equipment.
This connection type is especially beneficial for setups requiring 4K resolution and beyond.
USB-C to HDMI or DisplayPort
USB-C is a relatively new player in the connectivity game, celebrated for its versatility. It can carry data, video signals, and power, all through a single slim port.
If your laptop has a USB-C port but your monitor does not, fear not. You can use a USB-C to HDMI or DisplayPort cable or adapter to bridge the gap.
This option is particularly useful for those with newer laptops looking to connect to older monitors, providing a modern solution to a common problem.
Connecting Your Second Monitor
Setting up a second monitor might seem like a task reserved for tech enthusiasts, but it's actually quite straightforward. By following a few simple steps, you can extend your digital workspace, making multitasking easier and more efficient.
Connecting the Cables
- Identify the Ports: Start by locating the video output port on your laptop and the input port on your monitor. These could be HDMI, DisplayPort, USB-C, or another type depending on your devices.
- Select the Right Cable or Adapter: Based on the ports you've identified, choose an appropriate cable or adapter. If both devices have HDMI ports, for example, you'll need an HDMI cable.
- Plug In the Cable: Connect one end of the cable to your laptop and the other end to your monitor. Ensure the connections are secure to avoid any signal issues.
Powering On and Selecting the Input Source
- Power On Your Monitor: With the cable connected, turn on your monitor. You might need to press the power button located on the monitor's side or bottom.
- Choose the Correct Input Source: Monitors can have multiple input sources. Use the monitor’s menu buttons to navigate to the input selection screen. Choose the input that matches the port you've used to connect to the laptop. For instance, if you've connected via HDMI, select HDMI as your input source.
- Check for Automatic Detection: Many laptops and monitors will automatically detect the connection and adjust the display settings accordingly. If your screen doesn't appear on the monitor, don't worry. The next section will guide you through configuring the display settings manually.
Fine-Tuning Your Dual-Monitor Setup

After successfully connecting your second monitor, the next step is to adjust the display settings on your laptop. This ensures that your new expanded workspace functions exactly how you need it to, whether that's by extending your desktop for more space or mirroring it for presentations.
Accessing Display Settings Across Operating Systems
- Windows: Right-click on your desktop and select “Display settings.” Here, you'll see graphical representations of your monitors. Click on a monitor to adjust its specific settings, or scroll down to customize the overall setup.
- macOS: Go to the Apple menu, select “System Preferences,” then click “Displays.” Use the “Arrangement” tab to manage your monitor setup. macOS automatically detects the second monitor and offers options for arrangement and mirroring.
- Linux: The process varies slightly by distribution, but generally, you can find display settings in the “System Settings” or “Settings” menu. Look for “Displays” or a similarly named section where you can manage your screens.
Extending vs. Mirroring Your Display
- Extending Your Display allows you to use the second monitor as an additional workspace. This is ideal for multitasking, as you can have different applications open on each screen.
- Mirroring Your Display shows the same content on both your laptop screen and the second monitor. This setup is useful for presentations or sharing content with others in the room.
Choose the option that best suits your needs by selecting the corresponding setting in your operating system’s display settings.
Optimizing Resolution, Orientation, and Display Order
- Adjusting Resolution ensures that text and images appear clear and undistorted on your monitors. You might need to experiment with different resolutions to find the best fit for each screen.
- Changing Orientation is particularly useful if you're using a monitor vertically for coding or reading. Both Windows and macOS allow you to rotate the display orientation from landscape to portrait.
- Setting the Display Order helps you organize how your mouse cursor moves between screens. Arrange the graphical representations of your monitors to match their physical placement on your desk.
Solving Common Dual-Monitor Setup Issues
Even with the best preparations, setting up a second monitor can sometimes hit a snag. From resolution woes to connectivity puzzles, various challenges might arise. But fear not—many of these issues have straightforward solutions.
Tackling Resolution and Display Scaling Issues
Sometimes, the text, icons, or images on your new monitor might look blurry or not fit the screen properly. This often boils down to resolution and display scaling settings not being optimally configured.
- Adjusting the Resolution: Navigate to your display settings. If the resolution is set too low, bump it up to match the monitor's recommended setting. Each monitor has a native resolution that offers the clearest image, usually listed in the manual or online specifications.
- Fixing Display Scaling: If elements look too small or too large, adjust the display scaling options in your display settings. You may have to experiment a bit to find the perfect balance for your eyes and workflow.
Resolving Connectivity and Recognition Problems
Occasionally, your laptop might not recognize the second monitor, leaving you staring at a blank screen.
- Check the Cable Connections: Ensure the cable is securely connected to both your laptop and the monitor. A loose connection is a common culprit behind recognition issues.
- Switch Input Sources: Make sure your monitor is set to the correct input source. If it's set to HDMI and you're using a DisplayPort cable, it won't display anything.
- Restart Your Computer: Sometimes, a simple restart can encourage your laptop to recognize the second monitor. This refreshes your system settings and might solve the problem.
Overcoming Software and Driver Conflicts
Driver issues or software conflicts can also prevent your second monitor from working as expected.
- Update Your Drivers: Check for updates for your graphics card drivers. An outdated or corrupt driver can lead to various display issues. You can usually find the latest drivers on the manufacturer's website.
- Inspect for Conflicts: If you recently installed new software or an update and then started facing issues, consider rolling back the update or uninstalling the software to see if it resolves the problem.
- Consult Online Forums: If you're stuck, someone else has likely faced the same issue. Online forums and communities can be goldmines for specific troubleshooting advice.
Conclusion
From ensuring your devices can communicate through compatible connections to fine-tuning display settings for optimal workflow, the process, while it might seem intricate at first, can significantly enhance your computing experience. We’ve covered the essential steps to get you started, including choosing the right cables or adapters, setting up the hardware, and configuring your system’s display settings.
Moreover, tackling common troubleshooting issues ensures that you’re prepared to handle any hiccups along the way.
Embracing this setup invites a world where multitasking becomes more manageable, and the scope of what you can display and work on simultaneously expands. Whether for professional tasks, academic pursuits, or personal projects, the effort to extend your laptop's display to a second monitor is an investment in your productivity and overall digital experience.
Remember, patience and a willingness to tweak settings are your best tools in achieving a seamless dual-monitor setup that meets your needs.


